HP Designjet T1500 HP Designjet T920 and T1500 ePrinter series - User's Guide - Page 139
Insert the printhead
 |
View all HP Designjet T1500 manuals
Add to My Manuals
Save this manual to your list of manuals |
Page 139 highlights
6. Leave the black piece approximately vertical. 7. Grasp the printhead by the blue pieces on each side. 8. Lift the printhead out of the carriage. Insert the printhead NOTE: You cannot insert a new printhead successfully if a connected ink cartridge has not enough ink to complete the printhead replacement process. In this case, you should replace the ink cartridge before inserting the new printhead. You can use the old cartridge later if it still contains some ink. 1. Insert the new printhead. CAUTION: Insert the printhead slowly and vertically, straight down. It may be damaged if you insert it too fast, or at an angle, or if you rotate it as you insert it. ENWW Insert the printhead 131
-
 1
1 -
2
-
3
-
4
-
5
-
6
-
7
-
8
-
9
-
10
-
11
-
12
-
13
-
14
-
15
-
16
-
17
-
18
-
19
-
20
-
21
-
22
-
23
-
24
-
25
-
26
-
27
-
28
-
29
-
30
-
31
-
32
-
33
-
34
-
35
-
36
-
37
-
38
-
39
-
40
-
41
-
42
-
43
-
44
-
45
-
46
-
47
-
48
-
49
-
50
-
51
-
52
-
53
-
54
-
55
-
56
-
57
-
58
-
59
-
60
-
61
-
62
-
63
-
64
-
65
-
66
-
67
-
68
-
69
-
70
-
71
-
72
-
73
-
74
-
75
-
76
-
77
-
78
-
79
-
80
-
81
-
82
-
83
-
84
-
85
-
86
-
87
-
88
-
89
-
90
-
91
-
92
-
93
-
94
-
95
-
96
-
97
-
98
-
99
-
100
-
101
-
102
-
103
-
104
-
105
-
106
-
107
-
108
-
109
-
110
-
111
-
112
-
113
-
114
-
115
-
116
-
117
-
118
-
119
-
120
-
121
-
122
-
123
-
124
-
125
-
126
-
127
-
128
-
129
-
130
-
131
-
132
-
133
-
 134
134 -
 135
135 -
 136
136 -
 137
137 -
 138
138 -
 139
139 -
 140
140 -
 141
141 -
 142
142 -
 143
143 -
 144
144 -
145
-
146
-
147
-
148
-
149
-
150
-
151
-
152
-
153
-
154
-
155
-
156
-
157
-
158
-
159
-
160
-
161
-
162
-
163
-
164
-
165
-
166
-
167
-
168
-
169
-
170
-
171
-
172
-
173
-
174
-
175
-
176
-
177
-
178
-
179
-
180
-
181
-
182
-
183
-
184
-
185
-
186
-
187
-
188
-
189
-
190
-
191
-
192
-
193
-
194
-
195
-
196
-
197
-
198
-
199
-
200
-
201
-
202
-
203
-
204
-
205
-
206
-
207
-
208
-
209
-
210
 |
 |
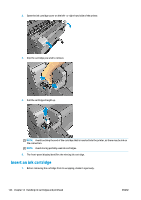
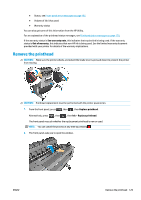
6.
Leave the black piece approximately vertical.
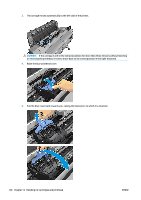
7.
Grasp the printhead by the blue pieces on each side.
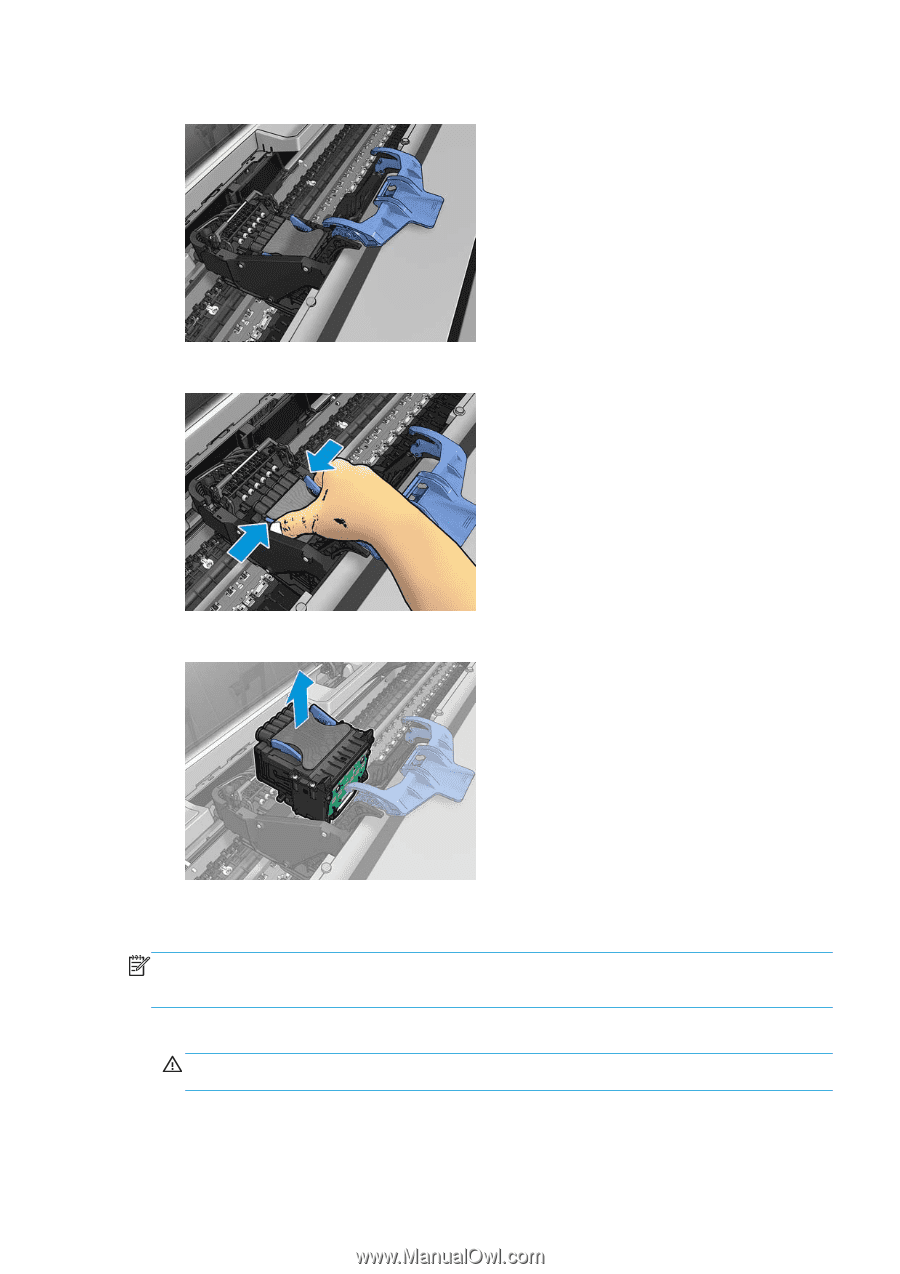
8.
Lift the printhead out of the carriage.
Insert the printhead
NOTE:
You cannot insert a new printhead successfully if a connected ink cartridge has not enough ink to
complete the printhead replacement process. In this case, you should replace the ink cartridge before
inserting the new printhead. You can use the old cartridge later if it still contains some ink.
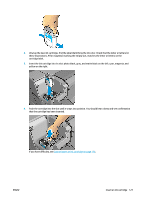
1.
Insert the new printhead.
CAUTION:
Insert the printhead slowly and vertically, straight down. It may be damaged if you insert it
too fast, or at an angle, or if you rotate it as you insert it.
ENWW
Insert the printhead
131