HP Designjet T1500 HP Designjet T920 and T1500 ePrinter series - User's Guide - Page 72
Print from a computer using the Embedded Web Server or HP Utility (T1500 series), order, Rotation
 |
View all HP Designjet T1500 manuals
Add to My Manuals
Save this manual to your list of manuals |
Page 72 highlights
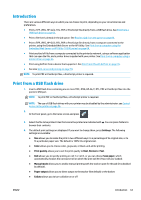
● Page order: allows you to choose first page on top, or last page on top ● Rotation allows you to rotate the print by any multiple of 90°, or you can choose Automatic, which rotates the print automatically if that will save paper. ● Printer margins allows you to change the default printer margins. NOTE: If you change the settings in this way, the changed settings apply to the current job but are not saved permanently. You can change the default settings, except for the Output setting, by pressing , then , then Print from USB preferences. 5. To display a preview of the printed job on the front panel, press . When the preview is displayed, you can press it to zoom in on it. Press it again to zoom out. 6. When you are satisfied with the print settings, press Start. 7. After printing, you can choose to print another file or go to the job queue. If you print another file immediately without returning to the home screen, the temporary settings used for the previous file are used again. Print from a computer using the Embedded Web Server or HP Utility (T1500 series) You can print files in this way from any computer that can access the printer's Embedded Web Server. See Access the Embedded Web Server on page 39. From the Embedded Web Server, select the Main tab and then Submit job. From the HP Utility, select Job Center > Submit Job. You will see the window below. Press the Add files button to choose the files from your computer that you want to print. The files must be in one of the following formats: ● HP-GL/2 ● RTL 64 Chapter 8 Printing ENWW
-
 1
1 -
2
-
3
-
4
-
5
-
6
-
7
-
8
-
9
-
10
-
11
-
12
-
13
-
14
-
15
-
16
-
17
-
18
-
19
-
20
-
21
-
22
-
23
-
24
-
25
-
26
-
27
-
28
-
29
-
30
-
31
-
32
-
33
-
34
-
35
-
36
-
37
-
38
-
39
-
40
-
41
-
42
-
43
-
44
-
45
-
46
-
47
-
48
-
49
-
50
-
51
-
52
-
53
-
54
-
55
-
56
-
57
-
58
-
59
-
60
-
61
-
62
-
63
-
64
-
65
-
66
-
 67
67 -
 68
68 -
 69
69 -
 70
70 -
 71
71 -
 72
72 -
 73
73 -
 74
74 -
 75
75 -
 76
76 -
 77
77 -
78
-
79
-
80
-
81
-
82
-
83
-
84
-
85
-
86
-
87
-
88
-
89
-
90
-
91
-
92
-
93
-
94
-
95
-
96
-
97
-
98
-
99
-
100
-
101
-
102
-
103
-
104
-
105
-
106
-
107
-
108
-
109
-
110
-
111
-
112
-
113
-
114
-
115
-
116
-
117
-
118
-
119
-
120
-
121
-
122
-
123
-
124
-
125
-
126
-
127
-
128
-
129
-
130
-
131
-
132
-
133
-
134
-
135
-
136
-
137
-
138
-
139
-
140
-
141
-
142
-
143
-
144
-
145
-
146
-
147
-
148
-
149
-
150
-
151
-
152
-
153
-
154
-
155
-
156
-
157
-
158
-
159
-
160
-
161
-
162
-
163
-
164
-
165
-
166
-
167
-
168
-
169
-
170
-
171
-
172
-
173
-
174
-
175
-
176
-
177
-
178
-
179
-
180
-
181
-
182
-
183
-
184
-
185
-
186
-
187
-
188
-
189
-
190
-
191
-
192
-
193
-
194
-
195
-
196
-
197
-
198
-
199
-
200
-
201
-
202
-
203
-
204
-
205
-
206
-
207
-
208
-
209
-
210
 |
 |
