HP Designjet T1500 HP Designjet T920 and T1500 ePrinter series - User's Guide - Page 61
The stacker
 |
View all HP Designjet T1500 manuals
Add to My Manuals
Save this manual to your list of manuals |
Page 61 highlights
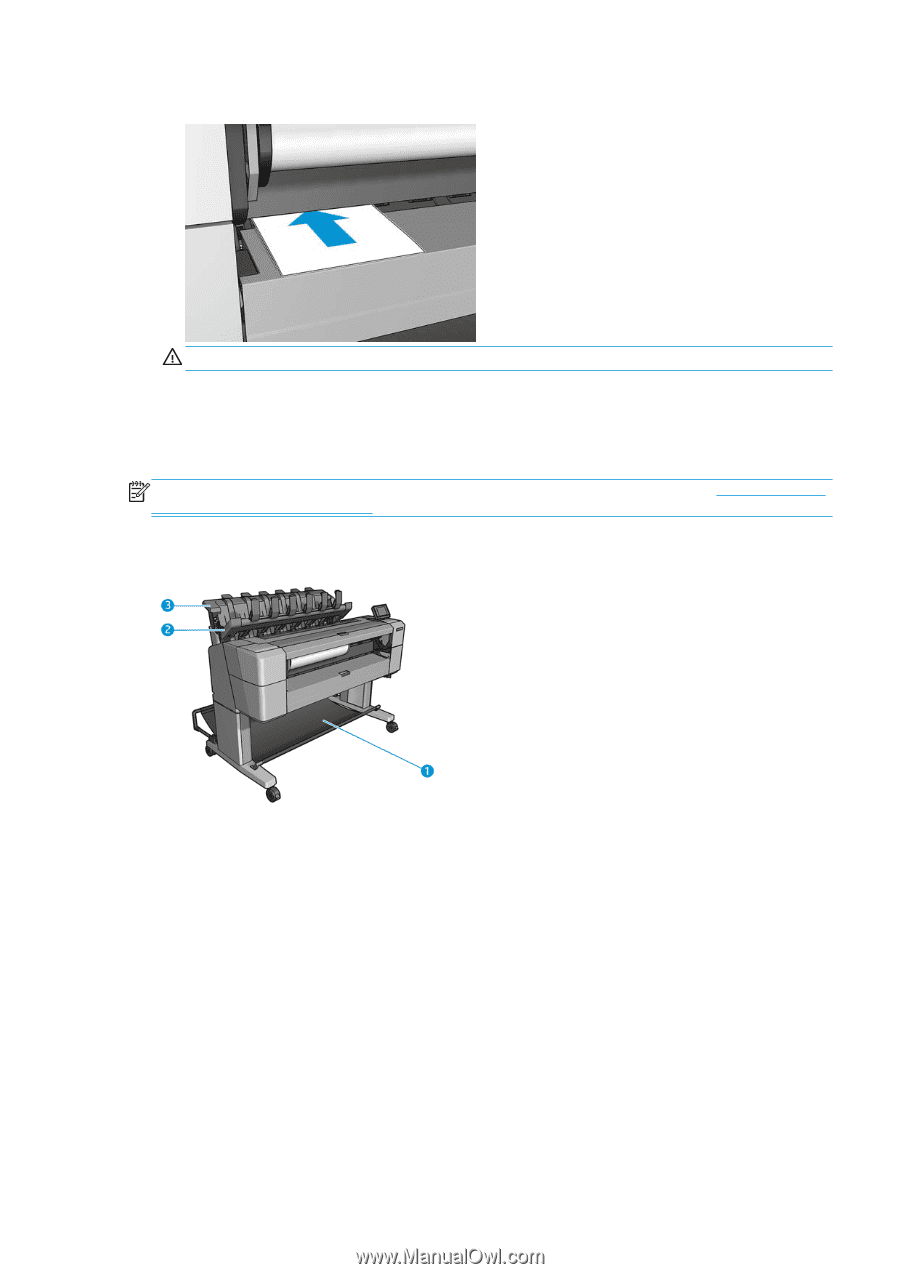
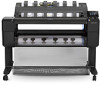
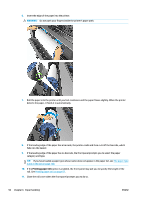
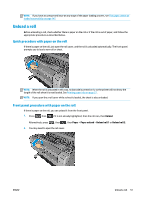
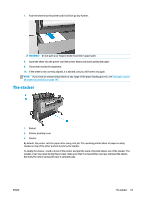
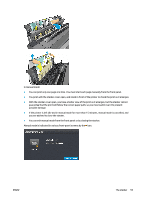
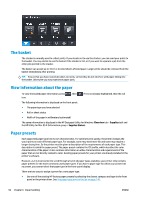
7. Push the sheet into the printer until it will not go any further. WARNING! Do not push your fingers inside the printer's paper path. 8. Guide the sheet into the printer until the printer beeps and starts pulling the paper. 9. The printer checks the alignment. 10. If the sheet is not correctly aligned, it is ejected, and you will have to try again. NOTE: If you have an unexpected problem at any stage of the paper loading process, see The paper cannot be loaded successfully on page 147. The stacker 1. Basket 2. Stacker pivoting cover 3. Stacker By default, the printer cuts the paper after every print job. The resulting printed sheet of paper is neatly stacked on top of the other printed sheets by the stacker. To empty the stacker, stand in front of the printer and pull the stack of printed sheets out of the stacker. The stacker cover may open during this process; make sure that it is closed after you have removed the sheets. Normally the return spring will close it automatically. ENWW The stacker 53
-
 1
1 -
2
-
3
-
4
-
5
-
6
-
7
-
8
-
9
-
10
-
11
-
12
-
13
-
14
-
15
-
16
-
17
-
18
-
19
-
20
-
21
-
22
-
23
-
24
-
25
-
26
-
27
-
28
-
29
-
30
-
31
-
32
-
33
-
34
-
35
-
36
-
37
-
38
-
39
-
40
-
41
-
42
-
43
-
44
-
45
-
46
-
47
-
48
-
49
-
50
-
51
-
52
-
53
-
54
-
55
-
 56
56 -
 57
57 -
 58
58 -
 59
59 -
 60
60 -
 61
61 -
 62
62 -
 63
63 -
 64
64 -
 65
65 -
 66
66 -
67
-
68
-
69
-
70
-
71
-
72
-
73
-
74
-
75
-
76
-
77
-
78
-
79
-
80
-
81
-
82
-
83
-
84
-
85
-
86
-
87
-
88
-
89
-
90
-
91
-
92
-
93
-
94
-
95
-
96
-
97
-
98
-
99
-
100
-
101
-
102
-
103
-
104
-
105
-
106
-
107
-
108
-
109
-
110
-
111
-
112
-
113
-
114
-
115
-
116
-
117
-
118
-
119
-
120
-
121
-
122
-
123
-
124
-
125
-
126
-
127
-
128
-
129
-
130
-
131
-
132
-
133
-
134
-
135
-
136
-
137
-
138
-
139
-
140
-
141
-
142
-
143
-
144
-
145
-
146
-
147
-
148
-
149
-
150
-
151
-
152
-
153
-
154
-
155
-
156
-
157
-
158
-
159
-
160
-
161
-
162
-
163
-
164
-
165
-
166
-
167
-
168
-
169
-
170
-
171
-
172
-
173
-
174
-
175
-
176
-
177
-
178
-
179
-
180
-
181
-
182
-
183
-
184
-
185
-
186
-
187
-
188
-
189
-
190
-
191
-
192
-
193
-
194
-
195
-
196
-
197
-
198
-
199
-
200
-
201
-
202
-
203
-
204
-
205
-
206
-
207
-
208
-
209
-
210
 |
 |