HP Dx5150 HP Business Desktop dx5150 Series Service Reference Guide, 1st Editi - Page 76
Releasing the Drives
 |
UPC - 882780485433
View all HP Dx5150 manuals
Add to My Manuals
Save this manual to your list of manuals |
Page 76 highlights
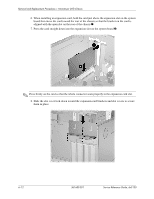
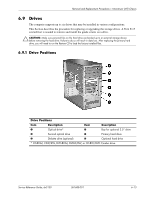
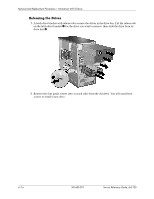
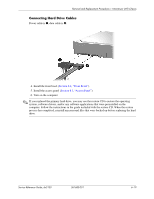
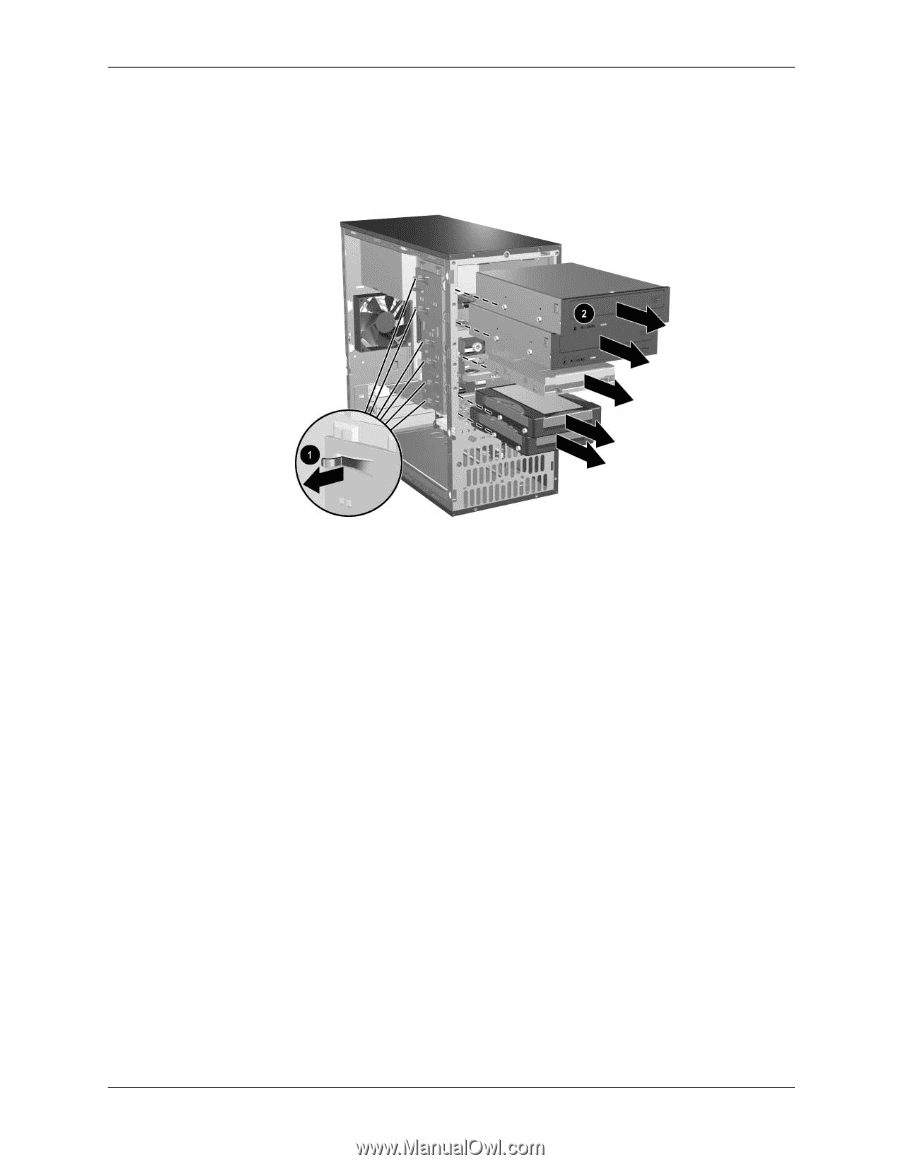
Removal and Replacement Procedures- Microtower (MT) Chassis Releasing the Drives 5. A latch drive bracket with release tabs secures the drives in the drive bay. Lift the release tab on the latch drive bracket 1 for the drive you want to remove, then slide the drive from its drive bay 2. 6. Remove the four guide screws (two on each side) from the old drive. You will need these screws to install a new drive. 6-16 361685-001 Service Reference Guide, dx5150
-
 1
1 -
2
-
3
-
4
-
5
-
6
-
7
-
8
-
9
-
10
-
11
-
12
-
13
-
14
-
15
-
16
-
17
-
18
-
19
-
20
-
21
-
22
-
23
-
24
-
25
-
26
-
27
-
28
-
29
-
30
-
31
-
32
-
33
-
34
-
35
-
36
-
37
-
38
-
39
-
40
-
41
-
42
-
43
-
44
-
45
-
46
-
47
-
48
-
49
-
50
-
51
-
52
-
53
-
54
-
55
-
56
-
57
-
58
-
59
-
60
-
61
-
62
-
63
-
64
-
65
-
66
-
67
-
68
-
69
-
70
-
 71
71 -
 72
72 -
 73
73 -
 74
74 -
 75
75 -
 76
76 -
 77
77 -
 78
78 -
 79
79 -
 80
80 -
 81
81 -
82
-
83
-
84
-
85
-
86
-
87
-
88
-
89
-
90
-
91
-
92
-
93
-
94
-
95
-
96
-
97
-
98
-
99
-
100
-
101
-
102
-
103
-
104
-
105
-
106
-
107
-
108
-
109
-
110
-
111
-
112
-
113
-
114
-
115
-
116
-
117
-
118
-
119
-
120
-
121
-
122
-
123
-
124
-
125
-
126
-
127
-
128
-
129
-
130
-
131
-
132
-
133
-
134
-
135
-
136
-
137
-
138
-
139
-
140
-
141
-
142
-
143
-
144
-
145
-
146
-
147
-
148
-
149
-
150
-
151
-
152
-
153
-
154
-
155
-
156
-
157
-
158
-
159
-
160
-
161
-
162
-
163
-
164
-
165
-
166
-
167
-
168
-
169
-
170
-
171
-
172
-
173
-
174
-
175
-
176
-
177
-
178
-
179
-
180
-
181
-
182
 |
 |
6–16
361685-001
Service Reference Guide, dx5150
Removal and Replacement Procedures— Microtower (MT) Chassis
Releasing the Drives
5. A latch drive bracket with release tabs secures the drives in the drive bay. Lift the release tab
on the latch drive bracket
1
for the drive you want to remove, then slide the drive from its
drive bay
2
.
6. Remove the four guide screws (two on each side) from the old drive. You will need these
screws to install a new drive.