HP Pavilion dv4000 Hardware and Software Guide - Page 153
Restoring Default Settings in the Setup Utility, Using Advanced Setup Utility Features
 |
View all HP Pavilion dv4000 manuals
Add to My Manuals
Save this manual to your list of manuals |
Page 153 highlights
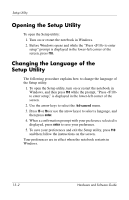
Setup Utility Restoring Default Settings in the Setup Utility The following procedure explains how to restore the Setup utility default settings. 1. To open the Setup utility, turn on or restart the notebook in Windows, and then press f10 while the prompt, "Press to enter setup," is displayed in the lower-left corner of the screen. 2. Use the arrow keys to select Exit > Load Setup Defaults. 3. When the Setup Confirmation is displayed, press enter to save your preferences. 4. To save your preferences and exit the Setup utility, press f10, and then follow the instructions on the screen. The Setup utility default settings are set when you exit the Setup utility and are in effect when the notebook restarts. Identification information, including ROM version information, is retained. Using Advanced Setup Utility Features This guide describes the Setup utility features recommended for all users. For more information about the Setup utility features recommended for advanced users only, refer to the Help and Support Center, which is accessible only when the notebook is in Windows. To access the Help and Support Center, select Start > Help and Support. The Setup utility features available for advanced users include a hard drive self-test, a Network Service Boot, and settings for boot order preferences. 13-4 Hardware and Software Guide
-
 1
1 -
2
-
3
-
4
-
5
-
6
-
7
-
8
-
9
-
10
-
11
-
12
-
13
-
14
-
15
-
16
-
17
-
18
-
19
-
20
-
21
-
22
-
23
-
24
-
25
-
26
-
27
-
28
-
29
-
30
-
31
-
32
-
33
-
34
-
35
-
36
-
37
-
38
-
39
-
40
-
41
-
42
-
43
-
44
-
45
-
46
-
47
-
48
-
49
-
50
-
51
-
52
-
53
-
54
-
55
-
56
-
57
-
58
-
59
-
60
-
61
-
62
-
63
-
64
-
65
-
66
-
67
-
68
-
69
-
70
-
71
-
72
-
73
-
74
-
75
-
76
-
77
-
78
-
79
-
80
-
81
-
82
-
83
-
84
-
85
-
86
-
87
-
88
-
89
-
90
-
91
-
92
-
93
-
94
-
95
-
96
-
97
-
98
-
99
-
100
-
101
-
102
-
103
-
104
-
105
-
106
-
107
-
108
-
109
-
110
-
111
-
112
-
113
-
114
-
115
-
116
-
117
-
118
-
119
-
120
-
121
-
122
-
123
-
124
-
125
-
126
-
127
-
128
-
129
-
130
-
131
-
132
-
133
-
134
-
135
-
136
-
137
-
138
-
139
-
140
-
141
-
142
-
143
-
144
-
145
-
146
-
147
-
 148
148 -
 149
149 -
 150
150 -
 151
151 -
 152
152 -
 153
153 -
 154
154 -
 155
155 -
 156
156 -
 157
157 -
 158
158 -
159
-
160
-
161
-
162
-
163
-
164
-
165
-
166
-
167
-
168
-
169
-
170
-
171
-
172
-
173
-
174
-
175
-
176
-
177
-
178
-
179
-
180
-
181
-
182
-
183
-
184
-
185
-
186
-
187
-
188
-
189
 |
 |