HP Pavilion dv4000 Hardware and Software Guide - Page 161
Start > All Programs > Accessories > Windows Explorer., My Computer
 |
View all HP Pavilion dv4000 manuals
Add to My Manuals
Save this manual to your list of manuals |
Page 161 highlights
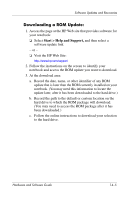
Software Updates and Recoveries 2. Follow the instructions on the screen to identify your notebook and access the SoftPaq you want to download. 3. At the download area: a. Write down the date, name, or other identifier of the SoftPaq you plan to download. (You may need this information to locate the update later, after it has been downloaded to the hard drive.) b. Follow the online instructions to download the SoftPaq to the hard drive. 4. When the download is complete, open Windows Explorer. To open Windows Explorer from the Start button, select Start > All Programs > Accessories > Windows Explorer. 5. In the left pane of the Windows Explorer window, select My Computer and then your hard drive designation (which is typically Local Disk C). 6. Select the SWSetup folder, which is the destination folder for most downloads from the HP Web site. If you don't see the download in the SWSetup folder, look in the My Documents folder. 7. In the destination folder, select the name or number of the software package you have downloaded. 8. Select the file that includes an.exe extension-for example, Filename.exe. (The installation begins.) 9. To complete the installation, follow the instructions on the screen. ✎ After a message on the screen reports a successful installation, you can delete the downloaded file from the destination folder. Hardware and Software Guide 14-7
-
 1
1 -
2
-
3
-
4
-
5
-
6
-
7
-
8
-
9
-
10
-
11
-
12
-
13
-
14
-
15
-
16
-
17
-
18
-
19
-
20
-
21
-
22
-
23
-
24
-
25
-
26
-
27
-
28
-
29
-
30
-
31
-
32
-
33
-
34
-
35
-
36
-
37
-
38
-
39
-
40
-
41
-
42
-
43
-
44
-
45
-
46
-
47
-
48
-
49
-
50
-
51
-
52
-
53
-
54
-
55
-
56
-
57
-
58
-
59
-
60
-
61
-
62
-
63
-
64
-
65
-
66
-
67
-
68
-
69
-
70
-
71
-
72
-
73
-
74
-
75
-
76
-
77
-
78
-
79
-
80
-
81
-
82
-
83
-
84
-
85
-
86
-
87
-
88
-
89
-
90
-
91
-
92
-
93
-
94
-
95
-
96
-
97
-
98
-
99
-
100
-
101
-
102
-
103
-
104
-
105
-
106
-
107
-
108
-
109
-
110
-
111
-
112
-
113
-
114
-
115
-
116
-
117
-
118
-
119
-
120
-
121
-
122
-
123
-
124
-
125
-
126
-
127
-
128
-
129
-
130
-
131
-
132
-
133
-
134
-
135
-
136
-
137
-
138
-
139
-
140
-
141
-
142
-
143
-
144
-
145
-
146
-
147
-
148
-
149
-
150
-
151
-
152
-
153
-
154
-
155
-
 156
156 -
 157
157 -
 158
158 -
 159
159 -
 160
160 -
 161
161 -
 162
162 -
 163
163 -
 164
164 -
 165
165 -
 166
166 -
167
-
168
-
169
-
170
-
171
-
172
-
173
-
174
-
175
-
176
-
177
-
178
-
179
-
180
-
181
-
182
-
183
-
184
-
185
-
186
-
187
-
188
-
189
 |
 |