Hitachi DZ-HS903A Owners Guide - Page 113
Protecting the HDD
 |
UPC - 050585224117
View all Hitachi DZ-HS903A manuals
Add to My Manuals
Save this manual to your list of manuals |
Page 113 highlights
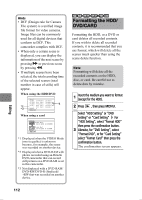
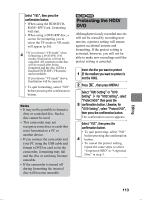
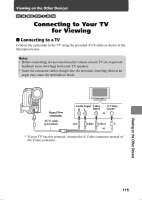
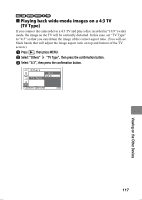
Select "YES", then press the confirmation button. • When using the HDD/DVD- RAM/+RW/Card, formatting will start. • When using a DVD-RW disc, a screen for prompting you to select the VF mode or VR mode will appear (p.36). 4 * If you choose "VR mode" when formatting a DVD-RW (VR mode), finalization will not be canceled. All contents on the disc will be erased after being formatted and the disc will be a finalized DVD-RW (VR mode) and recordable. If you choose "VF mode" above, finalization will be canceled. • To quit formatting, select "NO" before pressing the confirmation button. Notes • It may not be possible to format a dirty or scratched disc. Such a disc cannot be used. • This camcorder may not recognize some discs or cards that were formatted on a PC or another device. • If you connect the camcorder and your PC using the USB cable and format a DVD or card set in the camcorder, formatting may fail and the disc or card may become unusable. • If the camcorder is turned off during formatting the inserted disc will become unusable. HDD RAM -RW (VR) Protecting the HDD/ DVD Although previously recorded movies will not be erased by recording new movies, a protect setting will ensure against accidental erasure and formatting. If the protect setting is activated, however, you will not be able to make new recordings until the protect setting is canceled. Insert the disc you want to protect 1 (if the medium you want to protect is not the HDD). 2 Press , then press MENU. Select "HDD Setting" or "DVD Setting" For "HDD Setting", select "Protect HDD" then press the 3 confirmation button. Likewise, for "DVD Setting", select "Protect DVD", then press the confirmation button. The confirmation screen appears. Select "YES", then press the confirmation button. • To quit protecting, select "NO" before pressing the confirmation 4 button. • To cancel the protect setting, repeat the same steps to select "Unprotect HDD" or "Unprotect Disc" in step 3. Editing 113
-
 1
1 -
2
-
3
-
4
-
5
-
6
-
7
-
8
-
9
-
10
-
11
-
12
-
13
-
14
-
15
-
16
-
17
-
18
-
19
-
20
-
21
-
22
-
23
-
24
-
25
-
26
-
27
-
28
-
29
-
30
-
31
-
32
-
33
-
34
-
35
-
36
-
37
-
38
-
39
-
40
-
41
-
42
-
43
-
44
-
45
-
46
-
47
-
48
-
49
-
50
-
51
-
52
-
53
-
54
-
55
-
56
-
57
-
58
-
59
-
60
-
61
-
62
-
63
-
64
-
65
-
66
-
67
-
68
-
69
-
70
-
71
-
72
-
73
-
74
-
75
-
76
-
77
-
78
-
79
-
80
-
81
-
82
-
83
-
84
-
85
-
86
-
87
-
88
-
89
-
90
-
91
-
92
-
93
-
94
-
95
-
96
-
97
-
98
-
99
-
100
-
101
-
102
-
103
-
104
-
105
-
106
-
107
-
 108
108 -
 109
109 -
 110
110 -
 111
111 -
 112
112 -
 113
113 -
 114
114 -
 115
115 -
 116
116 -
 117
117 -
 118
118 -
119
-
120
-
121
-
122
-
123
-
124
-
125
-
126
-
127
-
128
-
129
-
130
-
131
-
132
-
133
-
134
-
135
-
136
-
137
-
138
-
139
-
140
-
141
-
142
-
143
-
144
-
145
-
146
-
147
-
148
-
149
-
150
-
151
-
152
-
153
-
154
-
155
-
156
-
157
-
158
-
159
-
160
-
161
-
162
-
163
-
164
-
165
-
166
-
167
-
168
-
169
-
170
-
171
-
172
-
173
-
174
-
175
-
176
-
177
-
178
-
179
-
180
-
181
-
182
-
183
-
184
-
185
-
186
-
187
-
188
-
189
-
190
-
191
 |
 |
