Hitachi DZ-HS903A Owners Guide - Page 135
How to Use the, Software - camcorder manual pdf
 |
UPC - 050585224117
View all Hitachi DZ-HS903A manuals
Add to My Manuals
Save this manual to your list of manuals |
Page 135 highlights
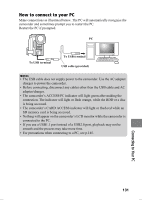
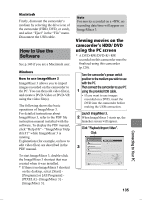
Macintosh Firstly, dismount the camcorder's medium by selecting the drive icon of the camcorder (HDD, DVD, or card), and select "Eject" in the "File" menu. Disconnect the USB cable. How to Use the Software See p.140 if you are a Macintosh user. Windows How to use ImageMixer 3 ImageMixer 3 allows you to import images recorded on the camcorder to the PC. You can then edit video file(s), and create a DVD-Video or DVD-VR using the video file(s). The following shows the basic operations of ImageMixer 3. For detailed instructions about ImageMixer 3, refer to the PDF file instruction manual installed with the software. To display the PDF manual, click "Help (H)" - "ImageMixer Help (H) F1" while ImageMixer 3 is running. Explanations (for example, on how to edit video files) are described in the PDF manual. To start ImageMixer 3, double-click the ImageMixer 3 shortcut that was created when it was installed. * If there is no ImageMixer 3 shortcut on the desktop, select [Start] [Programs] or [All Programs] [PIXELA] - [ImageMixer 3] [ImageMixer 3]. Note For movies recorded on a +RW, no recording date/time will appear on ImageMixer 3. Viewing movies on the camcorder's HDD/ DVD using the PC screen * A DVD-RW/DVD-R/+RW recorded on this camcorder must be finalized using this camcorder (p.120). Turn the camcorder's power switch position to the medium you wish to use with the PC. Then connect the camcorder to your PC 1 using the provided USB cable. • If you want to use images recorded on a DVD, insert the DVD into the camcorder before making the USB connection. Launch ImageMixer 3. 2 When ImageMixer 3 starts up, the launcher screen will appear. Click "Playback/Import Video". Click 3 135 Connecting to Your PC
-
 1
1 -
2
-
3
-
4
-
5
-
6
-
7
-
8
-
9
-
10
-
11
-
12
-
13
-
14
-
15
-
16
-
17
-
18
-
19
-
20
-
21
-
22
-
23
-
24
-
25
-
26
-
27
-
28
-
29
-
30
-
31
-
32
-
33
-
34
-
35
-
36
-
37
-
38
-
39
-
40
-
41
-
42
-
43
-
44
-
45
-
46
-
47
-
48
-
49
-
50
-
51
-
52
-
53
-
54
-
55
-
56
-
57
-
58
-
59
-
60
-
61
-
62
-
63
-
64
-
65
-
66
-
67
-
68
-
69
-
70
-
71
-
72
-
73
-
74
-
75
-
76
-
77
-
78
-
79
-
80
-
81
-
82
-
83
-
84
-
85
-
86
-
87
-
88
-
89
-
90
-
91
-
92
-
93
-
94
-
95
-
96
-
97
-
98
-
99
-
100
-
101
-
102
-
103
-
104
-
105
-
106
-
107
-
108
-
109
-
110
-
111
-
112
-
113
-
114
-
115
-
116
-
117
-
118
-
119
-
120
-
121
-
122
-
123
-
124
-
125
-
126
-
127
-
128
-
129
-
 130
130 -
 131
131 -
 132
132 -
 133
133 -
 134
134 -
 135
135 -
 136
136 -
 137
137 -
 138
138 -
 139
139 -
 140
140 -
141
-
142
-
143
-
144
-
145
-
146
-
147
-
148
-
149
-
150
-
151
-
152
-
153
-
154
-
155
-
156
-
157
-
158
-
159
-
160
-
161
-
162
-
163
-
164
-
165
-
166
-
167
-
168
-
169
-
170
-
171
-
172
-
173
-
174
-
175
-
176
-
177
-
178
-
179
-
180
-
181
-
182
-
183
-
184
-
185
-
186
-
187
-
188
-
189
-
190
-
191
 |
 |
