Hitachi DZ-HS903A Owners Guide - Page 138
select the drive used for writing,
 |
UPC - 050585224117
View all Hitachi DZ-HS903A manuals
Add to My Manuals
Save this manual to your list of manuals |
Page 138 highlights
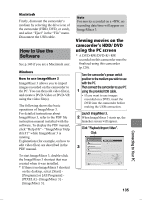
Click the "Authoring" tab to display the editing screen. The video files you just imported will appear under "Source". Choose the desired video file, and click "Add titles" to register the file. To register a previously imported video file (using ImageMixer 3), click "File" to choose the folder in which the video file is stored. 6 Click the "Write" tab to display the "Write" screen. Check the "Create disc" box, and select the drive used for writing, and then enter a disc name. Click 8 Summer Memory Click • Clicking "Theme" or "Set title menu" will allow you to change the design of the DVD-Video menu. Choose the type of disc to be created 7 (8 cm/12 cm/2-layer) using [Settings] - [Preference]. Insert a blank DVD-RW/DVD-R disc into the PC's DVD drive. Click the "Write" button. 9 Summer Memory Click The confirmation screen will appear. After checking the settings, click "OK". Writing will start. 10 When writing is complete, the drive will open to eject the DVD. Congratulations! Your original DVD is now finished. Connecting to Your PC 138
-
 1
1 -
2
-
3
-
4
-
5
-
6
-
7
-
8
-
9
-
10
-
11
-
12
-
13
-
14
-
15
-
16
-
17
-
18
-
19
-
20
-
21
-
22
-
23
-
24
-
25
-
26
-
27
-
28
-
29
-
30
-
31
-
32
-
33
-
34
-
35
-
36
-
37
-
38
-
39
-
40
-
41
-
42
-
43
-
44
-
45
-
46
-
47
-
48
-
49
-
50
-
51
-
52
-
53
-
54
-
55
-
56
-
57
-
58
-
59
-
60
-
61
-
62
-
63
-
64
-
65
-
66
-
67
-
68
-
69
-
70
-
71
-
72
-
73
-
74
-
75
-
76
-
77
-
78
-
79
-
80
-
81
-
82
-
83
-
84
-
85
-
86
-
87
-
88
-
89
-
90
-
91
-
92
-
93
-
94
-
95
-
96
-
97
-
98
-
99
-
100
-
101
-
102
-
103
-
104
-
105
-
106
-
107
-
108
-
109
-
110
-
111
-
112
-
113
-
114
-
115
-
116
-
117
-
118
-
119
-
120
-
121
-
122
-
123
-
124
-
125
-
126
-
127
-
128
-
129
-
130
-
131
-
132
-
 133
133 -
 134
134 -
 135
135 -
 136
136 -
 137
137 -
 138
138 -
 139
139 -
 140
140 -
 141
141 -
 142
142 -
 143
143 -
144
-
145
-
146
-
147
-
148
-
149
-
150
-
151
-
152
-
153
-
154
-
155
-
156
-
157
-
158
-
159
-
160
-
161
-
162
-
163
-
164
-
165
-
166
-
167
-
168
-
169
-
170
-
171
-
172
-
173
-
174
-
175
-
176
-
177
-
178
-
179
-
180
-
181
-
182
-
183
-
184
-
185
-
186
-
187
-
188
-
189
-
190
-
191
 |
 |
