IBM 7979B1U User Manual - Page 113
Configuring, controller
 |
View all IBM 7979B1U manuals
Add to My Manuals
Save this manual to your list of manuals |
Page 113 highlights
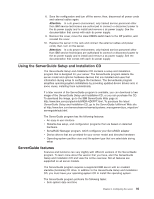
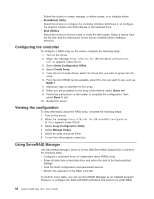
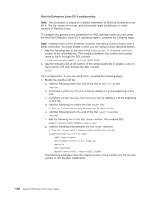
configuration on the server, you must run ServeRAID Manager in Startable CD mode, as described in the instructions in this section. For additional information about RAID technology and instructions for using ServeRAID Manager to configure the SAS and RAID controllers, see the ServeRAID documentation on the IBM ServeRAID Support CD. Additional information about ServeRAID Manager is also available from the Help menu. For information about a specific object in the ServeRAID Manager tree, select the object and click Actions --> Hints and tips. Configuring the RAID controller By running ServeRAID Manager in Startable CD mode, you can configure the RAID controller before you install the operating system. The information in this section assumes that you are running ServeRAID Manager in Startable CD mode. To run ServeRAID Manager in Startable CD mode, turn on the server; then, insert the CD into the CD-RW/DVD drive. If ServeRAID Manager detects an unconfigured controller and ready drives, the Configuration wizard starts. In the Configuration wizard, you can select express configuration or custom configuration. Express configuration automatically configures the controller by grouping the first two physical drives in the ServeRAID Manager tree into an array and creating a RAID level-1 logical drive. If you select custom configuration, you can select the two physical drives that you want to group into an array and create a hot-spare drive. Using express configuration To use express configuration, complete the following steps: 1. In the ServeRAID Manager tree, click the controller. 2. Click Express configuration. 3. Click Next. 4. In the "Configuration summary" window, review the information. To change the configuration, click Modify arrays. 5. Click Apply; when you are asked whether you want to apply the new configuration, click Yes. The configuration is saved in the controller and in the physical drives. 6. Exit from ServeRAID Manager and remove the CD from the CD-RW/DVD drive. 7. Restart the server. Using custom configuration To use custom configuration, complete the following steps: 1. In the ServeRAID Manager tree, click the controller. 2. Click Custom configuration. 3. Click Next. 4. In the "Create arrays" window, from the list of ready drives, select the two drives that you want to group into the array. 5. Click the (Add selected drives) icon to add the drives to the array. 6. If you want to configure a hot-spare drive, complete the following steps: a. Click the Spares tab. b. Select the physical drive that you want to designate as the hot-spare drive, and click the (Add selected drives) icon. 7. Click Next. Chapter 3. Configuring the server 97
-
 1
1 -
2
-
3
-
4
-
5
-
6
-
7
-
8
-
9
-
10
-
11
-
12
-
13
-
14
-
15
-
16
-
17
-
18
-
19
-
20
-
21
-
22
-
23
-
24
-
25
-
26
-
27
-
28
-
29
-
30
-
31
-
32
-
33
-
34
-
35
-
36
-
37
-
38
-
39
-
40
-
41
-
42
-
43
-
44
-
45
-
46
-
47
-
48
-
49
-
50
-
51
-
52
-
53
-
54
-
55
-
56
-
57
-
58
-
59
-
60
-
61
-
62
-
63
-
64
-
65
-
66
-
67
-
68
-
69
-
70
-
71
-
72
-
73
-
74
-
75
-
76
-
77
-
78
-
79
-
80
-
81
-
82
-
83
-
84
-
85
-
86
-
87
-
88
-
89
-
90
-
91
-
92
-
93
-
94
-
95
-
96
-
97
-
98
-
99
-
100
-
101
-
102
-
103
-
104
-
105
-
106
-
107
-
 108
108 -
 109
109 -
 110
110 -
 111
111 -
 112
112 -
 113
113 -
 114
114 -
 115
115 -
 116
116 -
 117
117 -
 118
118 -
119
-
120
-
121
-
122
-
123
-
124
-
125
-
126
-
127
-
128
-
129
-
130
-
131
-
132
-
133
-
134
-
135
-
136
-
137
-
138
-
139
-
140
-
141
-
142
-
143
-
144
 |
 |