IBM 7979B1U User Manual - Page 124
usr/sbin/smbridged
 |
View all IBM 7979B1U manuals
Add to My Manuals
Save this manual to your list of manuals |
Page 124 highlights
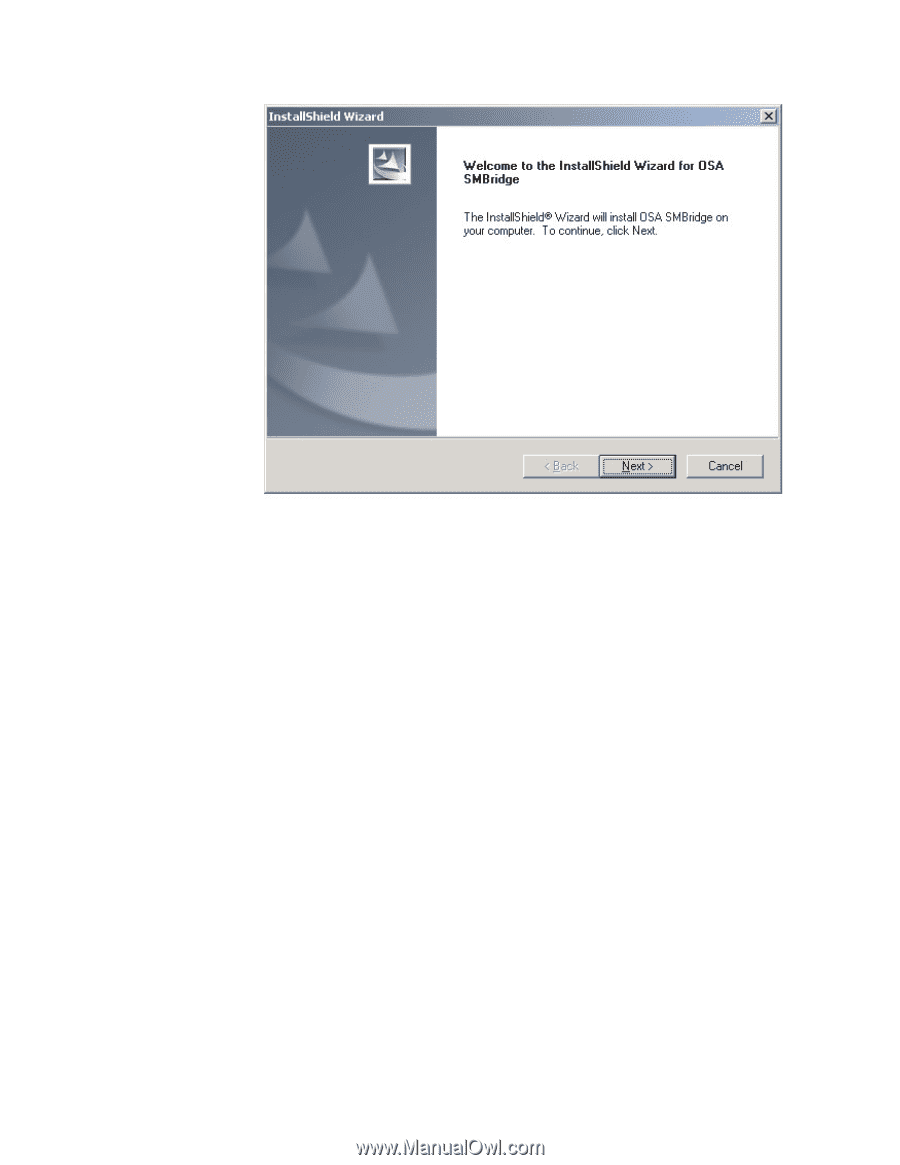
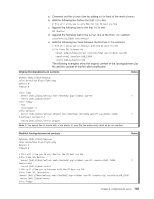
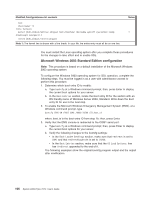
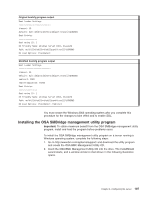
3. Follow the prompts to complete the installation. The installation program prompts you for a TCP/IP port number and an IP address. Specify an IP address, if you want to limit the connection requests that will be accepted by the utility program. To accept connections from any server, type INADDR_ANY as the IP address. Also specify the port number that the utility program will use. These values will be recorded in the smbridge.cfg file for the automatic startup of the utility program. To install the OSA SMBridge management utility program on a server running a Linux operating system, complete the following steps. You must be logged in as a root user to perform these procedures. 1. Go to http://www.ibm.com/systems/support/. Download the utility program and create the OSA BMC Management Utility CD. 2. Insert the OSA BMC Management Utility CD into the drive. 3. Type mount/mnt/cdrom. 4. Locate the directory where the installation RPM package is located and type cd/mnt/cdrom. 5. Type the following command to run the RPM package and start the installation: rpm -I've smbridge-2.0-xx.rpm where xx is the release level being installed. 6. Follow the prompts to complete the installation. When the installation is complete, the utility copies files to the following directories: /etc/init.d/SMBridge /etc/smbridge.cfg /usr/sbin/smbridged /var/log/smbridge/Liscense.txt /var/log/smbridge/Readme.txt 108 System x3650 Type 7979: User's Guide
-
 1
1 -
2
-
3
-
4
-
5
-
6
-
7
-
8
-
9
-
10
-
11
-
12
-
13
-
14
-
15
-
16
-
17
-
18
-
19
-
20
-
21
-
22
-
23
-
24
-
25
-
26
-
27
-
28
-
29
-
30
-
31
-
32
-
33
-
34
-
35
-
36
-
37
-
38
-
39
-
40
-
41
-
42
-
43
-
44
-
45
-
46
-
47
-
48
-
49
-
50
-
51
-
52
-
53
-
54
-
55
-
56
-
57
-
58
-
59
-
60
-
61
-
62
-
63
-
64
-
65
-
66
-
67
-
68
-
69
-
70
-
71
-
72
-
73
-
74
-
75
-
76
-
77
-
78
-
79
-
80
-
81
-
82
-
83
-
84
-
85
-
86
-
87
-
88
-
89
-
90
-
91
-
92
-
93
-
94
-
95
-
96
-
97
-
98
-
99
-
100
-
101
-
102
-
103
-
104
-
105
-
106
-
107
-
108
-
109
-
110
-
111
-
112
-
113
-
114
-
115
-
116
-
117
-
118
-
 119
119 -
 120
120 -
 121
121 -
 122
122 -
 123
123 -
 124
124 -
 125
125 -
 126
126 -
 127
127 -
 128
128 -
 129
129 -
130
-
131
-
132
-
133
-
134
-
135
-
136
-
137
-
138
-
139
-
140
-
141
-
142
-
143
-
144
 |
 |