IBM 7979B1U User Manual - Page 93
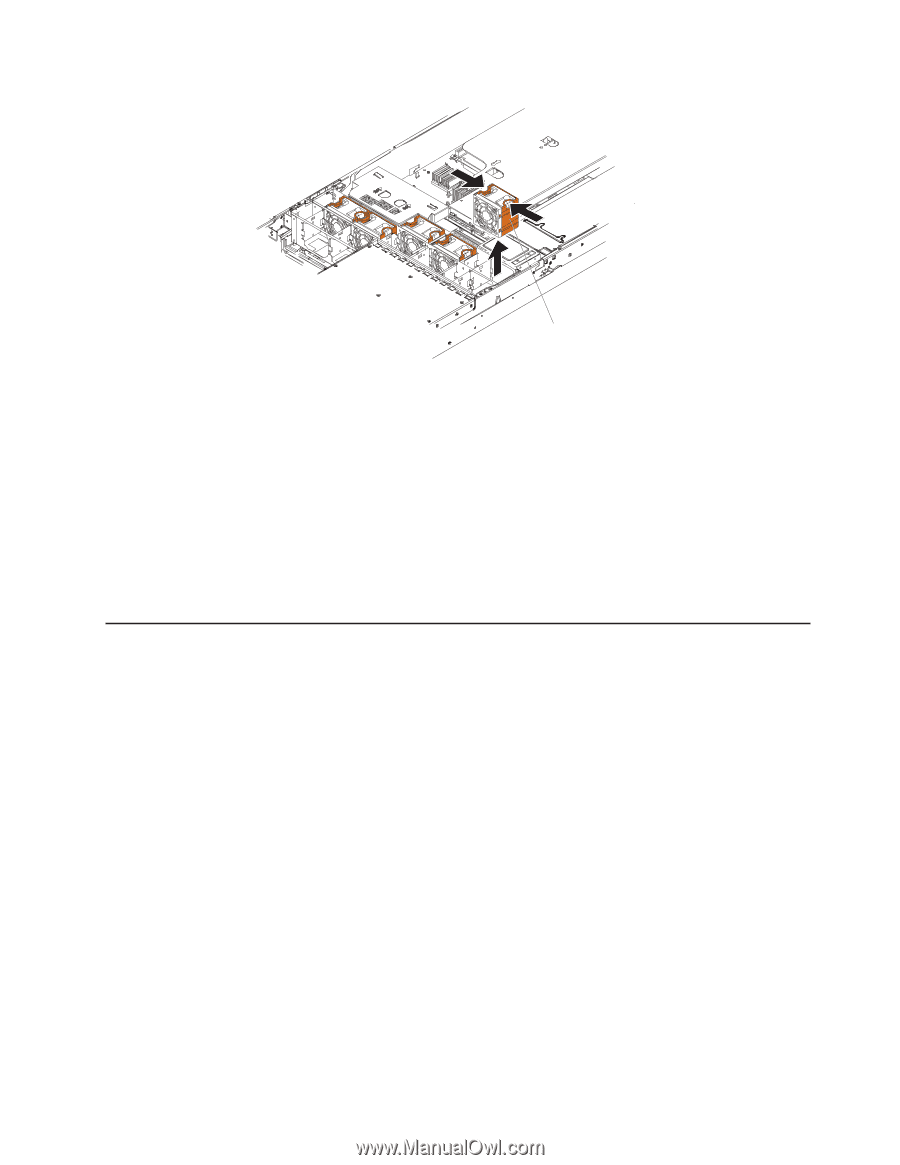
Removing, fan-bracket, assembly
 |
View all IBM 7979B1U manuals
Add to My Manuals
Save this manual to your list of manuals |
Page 93 highlights
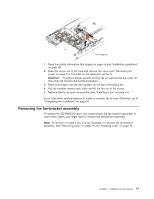
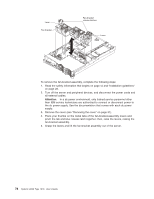
Hot-swap fan 1. Read the safety information that begins on page vii and "Installation guidelines" on page 28. 2. Slide the server out of the rack and remove the cover (see "Removing the cover" on page 31). The LED on the failing fan will be lit. Attention: To ensure proper system cooling, do not remove the top cover for more than 30 minutes during this procedure. 3. Place your fingers into the two handles on the top of the failing fan. 4. Pull the handles toward each other and lift the fan out of the server. 5. Replace the fan as soon as possible (see "Installing a fan" on page 75). If you have other optional devices to install or remove, do so now. Otherwise, go to "Completing the installation" on page 81. Removing the fan-bracket assembly To replace the CD-RW/DVD drive, you must remove the fan-bracket assembly; to route some cables, you might have to remove the fan-bracket assembly. Note: To remove or install a fan, it is not necessary to remove the fan-bracket assembly. See "Removing a fan" on page 76 and "Installing a fan" on page 75. Chapter 2. Installing optional devices 77
-
 1
1 -
2
-
3
-
4
-
5
-
6
-
7
-
8
-
9
-
10
-
11
-
12
-
13
-
14
-
15
-
16
-
17
-
18
-
19
-
20
-
21
-
22
-
23
-
24
-
25
-
26
-
27
-
28
-
29
-
30
-
31
-
32
-
33
-
34
-
35
-
36
-
37
-
38
-
39
-
40
-
41
-
42
-
43
-
44
-
45
-
46
-
47
-
48
-
49
-
50
-
51
-
52
-
53
-
54
-
55
-
56
-
57
-
58
-
59
-
60
-
61
-
62
-
63
-
64
-
65
-
66
-
67
-
68
-
69
-
70
-
71
-
72
-
73
-
74
-
75
-
76
-
77
-
78
-
79
-
80
-
81
-
82
-
83
-
84
-
85
-
86
-
87
-
 88
88 -
 89
89 -
 90
90 -
 91
91 -
 92
92 -
 93
93 -
 94
94 -
 95
95 -
 96
96 -
 97
97 -
 98
98 -
99
-
100
-
101
-
102
-
103
-
104
-
105
-
106
-
107
-
108
-
109
-
110
-
111
-
112
-
113
-
114
-
115
-
116
-
117
-
118
-
119
-
120
-
121
-
122
-
123
-
124
-
125
-
126
-
127
-
128
-
129
-
130
-
131
-
132
-
133
-
134
-
135
-
136
-
137
-
138
-
139
-
140
-
141
-
142
-
143
-
144
 |
 |