IBM 7979B1U User Manual - Page 66
Installing, optional, drive, 5-inch, model, server
 |
View all IBM 7979B1U manuals
Add to My Manuals
Save this manual to your list of manuals |
Page 66 highlights
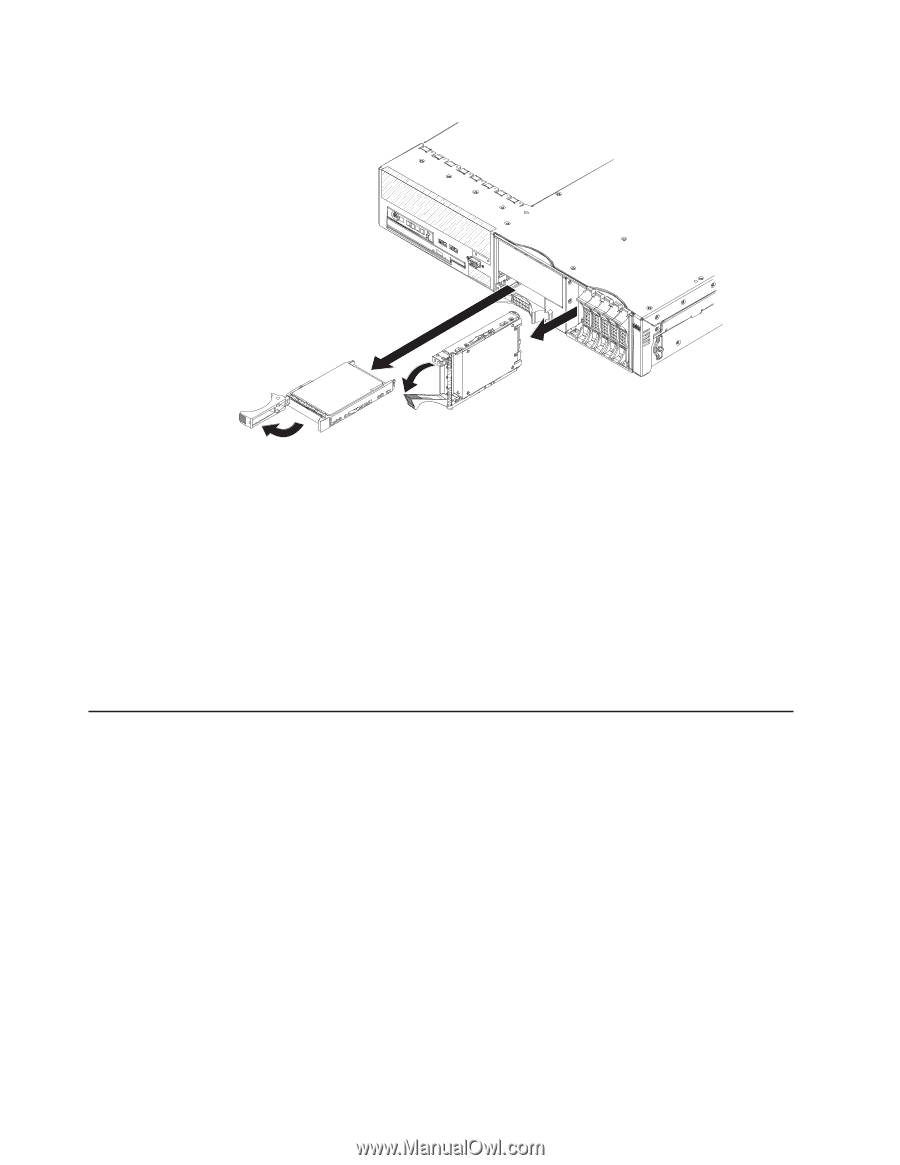
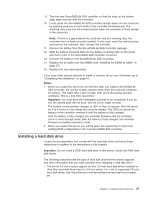
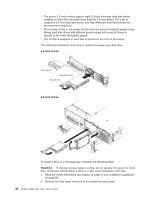
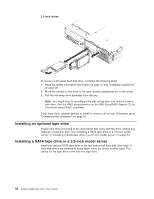
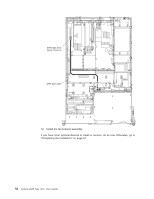
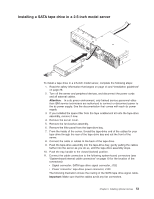
2.5-inch drives To remove a hot-swap hard disk drive, complete the following steps: 1. Read the safety information that begins on page vii and "Installation guidelines" on page 28. 2. Move the handle on the drive to the open position (perpendicular to the drive). 3. Pull the hot-swap drive assembly from the bay. Note: You might have to reconfigure the disk arrays after you remove a hard disk drive. See the RAID documentation on the IBM ServeRAID Support CD for information about RAID controllers. If you have other optional devices to install or remove, do so now. Otherwise, go to "Completing the installation" on page 81. Installing an optional tape drive Prepare the drive according to the instructions that come with the drive, setting any switches or jumpers; then, see "Installing a SATA tape drive in a 3.5-inch model server" or "Installing a SATA tape drive in a 2.5-inch model server" on page 53. Installing a SATA tape drive in a 3.5-inch model server Install the optional SATA tape drive in the two bottom-left hard disk drive bays. If hard disk drives are installed in those bays, move the drives to other bays. The cables for the tape drive come with the tape drive. 50 System x3650 Type 7979: User's Guide
-
 1
1 -
2
-
3
-
4
-
5
-
6
-
7
-
8
-
9
-
10
-
11
-
12
-
13
-
14
-
15
-
16
-
17
-
18
-
19
-
20
-
21
-
22
-
23
-
24
-
25
-
26
-
27
-
28
-
29
-
30
-
31
-
32
-
33
-
34
-
35
-
36
-
37
-
38
-
39
-
40
-
41
-
42
-
43
-
44
-
45
-
46
-
47
-
48
-
49
-
50
-
51
-
52
-
53
-
54
-
55
-
56
-
57
-
58
-
59
-
60
-
 61
61 -
 62
62 -
 63
63 -
 64
64 -
 65
65 -
 66
66 -
 67
67 -
 68
68 -
 69
69 -
 70
70 -
 71
71 -
72
-
73
-
74
-
75
-
76
-
77
-
78
-
79
-
80
-
81
-
82
-
83
-
84
-
85
-
86
-
87
-
88
-
89
-
90
-
91
-
92
-
93
-
94
-
95
-
96
-
97
-
98
-
99
-
100
-
101
-
102
-
103
-
104
-
105
-
106
-
107
-
108
-
109
-
110
-
111
-
112
-
113
-
114
-
115
-
116
-
117
-
118
-
119
-
120
-
121
-
122
-
123
-
124
-
125
-
126
-
127
-
128
-
129
-
130
-
131
-
132
-
133
-
134
-
135
-
136
-
137
-
138
-
139
-
140
-
141
-
142
-
143
-
144
 |
 |