IBM 86645RY Hardware Maintenance Manual - Page 166
Server, Library, Route all cables through the cable-management
 |
View all IBM 86645RY manuals
Add to My Manuals
Save this manual to your list of manuals |
Page 166 highlights
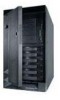
4. Attach the cables to the server. a. Attach all cables to the corresponding connectors on the server. Refer to the "Express Setup and Installation" section of this Server Library for instructions. b. Route the power cords, mouse cable, and keyboard cable through the cable-restraint bracket. c. Route all cables through the cable-management arm, attaching the cables to the arm with the hook and loop fastener strips provided. The wraps are provided for additional cable management. 5. Secure the server in the rack enclosure. a. Slide the server into the rack enclosure until the slide latches on the front chassis brackets click into place. 158 Netfinity Server HMM
-
 1
1 -
2
-
3
-
4
-
5
-
6
-
7
-
8
-
9
-
10
-
11
-
12
-
13
-
14
-
15
-
16
-
17
-
18
-
19
-
20
-
21
-
22
-
23
-
24
-
25
-
26
-
27
-
28
-
29
-
30
-
31
-
32
-
33
-
34
-
35
-
36
-
37
-
38
-
39
-
40
-
41
-
42
-
43
-
44
-
45
-
46
-
47
-
48
-
49
-
50
-
51
-
52
-
53
-
54
-
55
-
56
-
57
-
58
-
59
-
60
-
61
-
62
-
63
-
64
-
65
-
66
-
67
-
68
-
69
-
70
-
71
-
72
-
73
-
74
-
75
-
76
-
77
-
78
-
79
-
80
-
81
-
82
-
83
-
84
-
85
-
86
-
87
-
88
-
89
-
90
-
91
-
92
-
93
-
94
-
95
-
96
-
97
-
98
-
99
-
100
-
101
-
102
-
103
-
104
-
105
-
106
-
107
-
108
-
109
-
110
-
111
-
112
-
113
-
114
-
115
-
116
-
117
-
118
-
119
-
120
-
121
-
122
-
123
-
124
-
125
-
126
-
127
-
128
-
129
-
130
-
131
-
132
-
133
-
134
-
135
-
136
-
137
-
138
-
139
-
140
-
141
-
142
-
143
-
144
-
145
-
146
-
147
-
148
-
149
-
150
-
151
-
152
-
153
-
154
-
155
-
156
-
157
-
158
-
159
-
160
-
 161
161 -
 162
162 -
 163
163 -
 164
164 -
 165
165 -
 166
166 -
 167
167 -
 168
168 -
 169
169 -
 170
170 -
 171
171 -
172
-
173
-
174
-
175
-
176
-
177
-
178
-
179
-
180
-
181
-
182
-
183
-
184
-
185
-
186
-
187
-
188
-
189
-
190
-
191
-
192
-
193
-
194
-
195
-
196
-
197
-
198
-
199
-
200
-
201
-
202
-
203
-
204
-
205
-
206
-
207
-
208
-
209
-
210
-
211
-
212
-
213
-
214
-
215
-
216
-
217
-
218
-
219
-
220
-
221
-
222
-
223
-
224
-
225
-
226
-
227
-
228
-
229
-
230
-
231
-
232
-
233
-
234
-
235
-
236
-
237
-
238
-
239
-
240
-
241
-
242
-
243
-
244
-
245
-
246
-
247
-
248
-
249
-
250
-
251
-
252
-
253
-
254
-
255
-
256
-
257
-
258
-
259
-
260
-
261
-
262
-
263
-
264
-
265
-
266
-
267
-
268
-
269
-
270
-
271
-
272
-
273
-
274
-
275
-
276
 |
 |

4.
Attach the cables to the server.
a.
Attach all cables to the corresponding
connectors on the server.
Refer to the “Express
Setup and Installation” section of this
Server
Library
for instructions.
b.
Route the power cords, mouse cable, and
keyboard cable through the cable-restraint
bracket.
c.
Route all cables through the cable-management
arm, attaching the cables to the arm with the
hook and loop fastener strips provided.
The
wraps are provided for additional cable
management.
5.
Secure the server in the rack enclosure.
a.
Slide the server into the rack enclosure until the
slide latches on the front chassis brackets click
into place.
158
Netfinity Server HMM