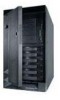
IBM 86645RY Hardware Maintenance Manual - Page 195
holes in the front bracket line up with the cage, above the cage nuts for the slide rail.
 |
View all IBM 86645RY manuals
Add to My Manuals
Save this manual to your list of manuals |
Page 195 highlights
Clip nuts Cage nuts 3. Attach the slide rails to the rack. a. Insert the left slide rail 1 rear bracket pin into the hole between the two cage nuts for the slide rail at the rear of the rack. The two holes in the rear bracket line up with the cage nuts. b. Pull the slide rail front bracket to the front of the rack; insert the front bracket pin into the hole above the cage nuts for the slide rail. The two holes in the front bracket line up with the cage nuts. c. Do the same for the other slide rail. 2 Left rear 3 Left front 1 Left slide rail d. From the outside of the rack enclosure, insert two M6 by 16-mm screws through each slide rail Netfinity 5600 - Type 8664 187
-
 1
1 -
2
-
3
-
4
-
5
-
6
-
7
-
8
-
9
-
10
-
11
-
12
-
13
-
14
-
15
-
16
-
17
-
18
-
19
-
20
-
21
-
22
-
23
-
24
-
25
-
26
-
27
-
28
-
29
-
30
-
31
-
32
-
33
-
34
-
35
-
36
-
37
-
38
-
39
-
40
-
41
-
42
-
43
-
44
-
45
-
46
-
47
-
48
-
49
-
50
-
51
-
52
-
53
-
54
-
55
-
56
-
57
-
58
-
59
-
60
-
61
-
62
-
63
-
64
-
65
-
66
-
67
-
68
-
69
-
70
-
71
-
72
-
73
-
74
-
75
-
76
-
77
-
78
-
79
-
80
-
81
-
82
-
83
-
84
-
85
-
86
-
87
-
88
-
89
-
90
-
91
-
92
-
93
-
94
-
95
-
96
-
97
-
98
-
99
-
100
-
101
-
102
-
103
-
104
-
105
-
106
-
107
-
108
-
109
-
110
-
111
-
112
-
113
-
114
-
115
-
116
-
117
-
118
-
119
-
120
-
121
-
122
-
123
-
124
-
125
-
126
-
127
-
128
-
129
-
130
-
131
-
132
-
133
-
134
-
135
-
136
-
137
-
138
-
139
-
140
-
141
-
142
-
143
-
144
-
145
-
146
-
147
-
148
-
149
-
150
-
151
-
152
-
153
-
154
-
155
-
156
-
157
-
158
-
159
-
160
-
161
-
162
-
163
-
164
-
165
-
166
-
167
-
168
-
169
-
170
-
171
-
172
-
173
-
174
-
175
-
176
-
177
-
178
-
179
-
180
-
181
-
182
-
183
-
184
-
185
-
186
-
187
-
188
-
189
-
 190
190 -
 191
191 -
 192
192 -
 193
193 -
 194
194 -
 195
195 -
 196
196 -
 197
197 -
 198
198 -
 199
199 -
 200
200 -
201
-
202
-
203
-
204
-
205
-
206
-
207
-
208
-
209
-
210
-
211
-
212
-
213
-
214
-
215
-
216
-
217
-
218
-
219
-
220
-
221
-
222
-
223
-
224
-
225
-
226
-
227
-
228
-
229
-
230
-
231
-
232
-
233
-
234
-
235
-
236
-
237
-
238
-
239
-
240
-
241
-
242
-
243
-
244
-
245
-
246
-
247
-
248
-
249
-
250
-
251
-
252
-
253
-
254
-
255
-
256
-
257
-
258
-
259
-
260
-
261
-
262
-
263
-
264
-
265
-
266
-
267
-
268
-
269
-
270
-
271
-
272
-
273
-
274
-
275
-
276
 |
 |

Cage
nuts
Clip
nuts
3.
Attach the slide rails to the rack.
a.
Insert the left slide rail
±1²
rear bracket pin into
the hole between the two cage nuts for the slide
rail at the rear of the rack.
The two holes in the
rear bracket line up with the cage nuts.
b.
Pull the slide rail front bracket to the front of the
rack; insert the front bracket pin into the hole
above the cage nuts for the slide rail.
The two
holes in the front bracket line up with the cage
nuts.
c.
Do the same for the other slide rail.
±2²
Left rear
±3²
Left front
±1²
Left slide rail
d.
From the outside of the rack enclosure, insert
two M6 by 16-mm screws through each slide rail
Netfinity 5600 - Type 8664
187