IBM 86645RY Hardware Maintenance Manual - Page 192
Insert two M3.5 by 7-mm screws through the left, Align the tabs on the back of the bezel with
 |
View all IBM 86645RY manuals
Add to My Manuals
Save this manual to your list of manuals |
Page 192 highlights
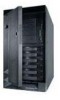
a. Insert the left bracket tab into the slot 2 in the left side of the server until the upper notch 1 aligns with the side of the server. Note The left bracket is marked with an L. b. Push the bracket up until the holes in the bracket align with the holes in the side of the server. c. Insert two M3.5 by 7-mm screws through the left bracket into the holes on the left side of the server; then, tighten the screws. d. Perform steps 16a through 16c using the right bracket and the right side of the server. 17. Install the new trim bezel from the conversion kit. a. Align the tabs on the back of the bezel with the tab openings on the front of the server. 184 Netfinity Server HMM
-
 1
1 -
2
-
3
-
4
-
5
-
6
-
7
-
8
-
9
-
10
-
11
-
12
-
13
-
14
-
15
-
16
-
17
-
18
-
19
-
20
-
21
-
22
-
23
-
24
-
25
-
26
-
27
-
28
-
29
-
30
-
31
-
32
-
33
-
34
-
35
-
36
-
37
-
38
-
39
-
40
-
41
-
42
-
43
-
44
-
45
-
46
-
47
-
48
-
49
-
50
-
51
-
52
-
53
-
54
-
55
-
56
-
57
-
58
-
59
-
60
-
61
-
62
-
63
-
64
-
65
-
66
-
67
-
68
-
69
-
70
-
71
-
72
-
73
-
74
-
75
-
76
-
77
-
78
-
79
-
80
-
81
-
82
-
83
-
84
-
85
-
86
-
87
-
88
-
89
-
90
-
91
-
92
-
93
-
94
-
95
-
96
-
97
-
98
-
99
-
100
-
101
-
102
-
103
-
104
-
105
-
106
-
107
-
108
-
109
-
110
-
111
-
112
-
113
-
114
-
115
-
116
-
117
-
118
-
119
-
120
-
121
-
122
-
123
-
124
-
125
-
126
-
127
-
128
-
129
-
130
-
131
-
132
-
133
-
134
-
135
-
136
-
137
-
138
-
139
-
140
-
141
-
142
-
143
-
144
-
145
-
146
-
147
-
148
-
149
-
150
-
151
-
152
-
153
-
154
-
155
-
156
-
157
-
158
-
159
-
160
-
161
-
162
-
163
-
164
-
165
-
166
-
167
-
168
-
169
-
170
-
171
-
172
-
173
-
174
-
175
-
176
-
177
-
178
-
179
-
180
-
181
-
182
-
183
-
184
-
185
-
186
-
 187
187 -
 188
188 -
 189
189 -
 190
190 -
 191
191 -
 192
192 -
 193
193 -
 194
194 -
 195
195 -
 196
196 -
 197
197 -
198
-
199
-
200
-
201
-
202
-
203
-
204
-
205
-
206
-
207
-
208
-
209
-
210
-
211
-
212
-
213
-
214
-
215
-
216
-
217
-
218
-
219
-
220
-
221
-
222
-
223
-
224
-
225
-
226
-
227
-
228
-
229
-
230
-
231
-
232
-
233
-
234
-
235
-
236
-
237
-
238
-
239
-
240
-
241
-
242
-
243
-
244
-
245
-
246
-
247
-
248
-
249
-
250
-
251
-
252
-
253
-
254
-
255
-
256
-
257
-
258
-
259
-
260
-
261
-
262
-
263
-
264
-
265
-
266
-
267
-
268
-
269
-
270
-
271
-
272
-
273
-
274
-
275
-
276
 |
 |

a.
Insert the left bracket tab into the slot
±2²
in the
left side of the server until the upper notch
±1²
aligns with the side of the server.
Note
The left bracket is marked with an
L
.
b.
Push the bracket up until the holes in the bracket
align with the holes in the side of the server.
c.
Insert two M3.5 by 7-mm screws through the left
bracket into the holes on the left side of the
server; then, tighten the screws.
d.
Perform steps 16a through 16c using the right
bracket and the right side of the server.
17.
Install the new trim bezel from the conversion kit.
a.
Align the tabs on the back of the bezel with the
tab openings on the front of the server.
184
Netfinity Server HMM