Konica Minolta AccurioPress C14000 UK-301 Auto Inspection User Guide - Page 52
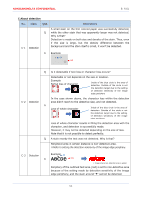
Open the Job Properties window.
 |
View all Konica Minolta AccurioPress C14000 manuals
Add to My Manuals
Save this manual to your list of manuals |
Page 52 highlights
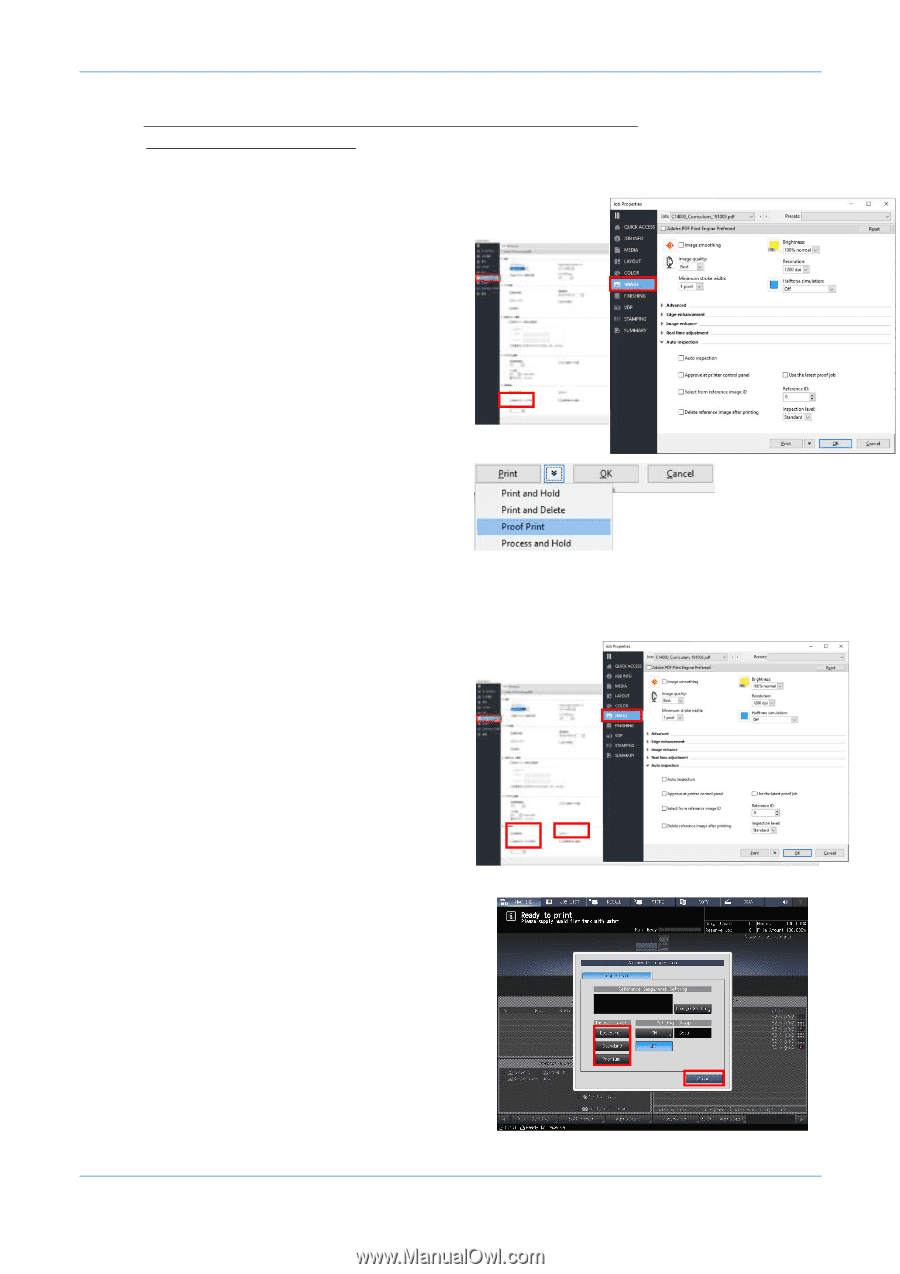
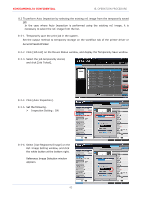
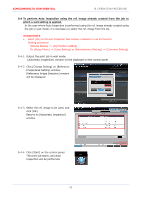
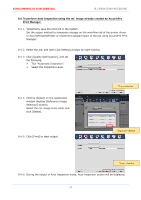
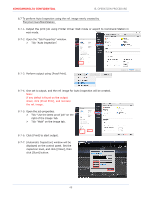
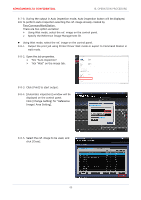
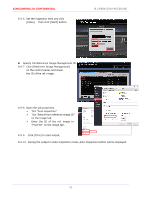
KONICAMINOLTA CONFIDENTIAL 8. OPERATION PROCEDURE 8.7 To perform Auto Inspection using the ref. image newly created by FieryCommandWorkStation 8-7-1. Output the print job using Printer Driver Wait mode or export to Command Station in wait mode. 8-7-2. Open the "Job Properties" window. Tick "Auto inspection". 8-7-3. Perform output using [Proof Print]. 8-7-4. One set is output, and the ref. image for Auto Inspection will be created. Note: If any defect is found on the output sheet, click [Proof Print], and recreate the ref. image. 8-7-5. Open the job properties. Tick "Use the latest proof job" on the right of the Image Tab. Tick "Wait" on the image tab. 8-7-6. Click [Print] to start output. 8-7-7. [Automatic Inspection] window will be displayed on the control panel. Set the inspection level, and click [Close], then click [Start] button. 48
-
 1
1 -
2
-
3
-
4
-
5
-
6
-
7
-
8
-
9
-
10
-
11
-
12
-
13
-
14
-
15
-
16
-
17
-
18
-
19
-
20
-
21
-
22
-
23
-
24
-
25
-
26
-
27
-
28
-
29
-
30
-
31
-
32
-
33
-
34
-
35
-
36
-
37
-
38
-
39
-
40
-
41
-
42
-
43
-
44
-
45
-
46
-
 47
47 -
 48
48 -
 49
49 -
 50
50 -
 51
51 -
 52
52 -
 53
53 -
 54
54 -
 55
55 -
 56
56 -
 57
57 -
58
-
59
-
60
-
61
-
62
-
63
-
64
-
65
 |
 |