LG LS660P Sprint Owners Manual - English - Page 13
Set Up Voicemail
 |
View all LG LS660P Sprint manuals
Add to My Manuals
Save this manual to your list of manuals |
Page 13 highlights
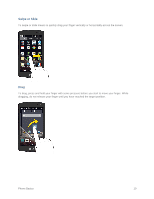
Note: During or after setup, you may see a Connections Optimizer notice. Read the notice and touch I Agree to allow your phone to connect automatically to the best available data network, including Wi-Fi. To turn Connections Optimizer off at any time, tap > touch and hold > System settings > More... > Mobile networks > Connections Optimizer and uncheck the box. See Connections Optimizer for details. 1. Before activation, you can turn on the TalkBack voice navigation feature for the visually impaired. Double tap the center of the screen to activate this feature. To enable other features, tap Accessibility settings. To continue the activation process, tap Next. For more information on Talkback, see Accessibility. 2. Choose your language and tap Next. 3. Connect to a Wi-Fi network if desired. Then tap Next. 4. Configure your Google Account if desired. 5. Set your Google & location settings and tap Next. 6. Enter your name, if desired, to personalize some apps. 7. Tap Set Knock Code to set the lock screen as Knock Code. Otherwise tap Skip. 8. Your initial setup is complete. You can now enjoy your phone and personalize it to your liking. Set Up Voicemail You should set up your voicemail and personal greeting as soon as your phone is activated. Always use a password to protect against unauthorized access. Your phone automatically transfers all unanswered calls to your voicemail, even if your phone is in use or turned off. 1. Tap > > Voicemail . 2. Tap Personalize now. 3. Follow the system prompts to: Create your password. Record your name announcement. Record your greeting. Important: Voicemail Password - It is strongly recommended that you create a password when setting up your voicemail to protect against unauthorized access. Without a password, anyone who has access to your phone is able to access your voicemail messages. For more information about voicemail, see Voicemail or Visual Voicemail. Get Started 5
-
 1
1 -
2
-
3
-
4
-
5
-
6
-
7
-
 8
8 -
 9
9 -
 10
10 -
 11
11 -
 12
12 -
 13
13 -
 14
14 -
 15
15 -
 16
16 -
 17
17 -
 18
18 -
19
-
20
-
21
-
22
-
23
-
24
-
25
-
26
-
27
-
28
-
29
-
30
-
31
-
32
-
33
-
34
-
35
-
36
-
37
-
38
-
39
-
40
-
41
-
42
-
43
-
44
-
45
-
46
-
47
-
48
-
49
-
50
-
51
-
52
-
53
-
54
-
55
-
56
-
57
-
58
-
59
-
60
-
61
-
62
-
63
-
64
-
65
-
66
-
67
-
68
-
69
-
70
-
71
-
72
-
73
-
74
-
75
-
76
-
77
-
78
-
79
-
80
-
81
-
82
-
83
-
84
-
85
-
86
-
87
-
88
-
89
-
90
-
91
-
92
-
93
-
94
-
95
-
96
-
97
-
98
-
99
-
100
-
101
-
102
-
103
-
104
-
105
-
106
-
107
-
108
-
109
-
110
-
111
-
112
-
113
-
114
-
115
-
116
-
117
-
118
-
119
-
120
-
121
-
122
-
123
-
124
-
125
-
126
-
127
-
128
-
129
-
130
-
131
-
132
-
133
-
134
-
135
-
136
-
137
-
138
-
139
-
140
 |
 |
