LG U8210 User Guide - Page 42
Settings
 |
View all LG U8210 manuals
Add to My Manuals
Save this manual to your list of manuals |
Page 42 highlights
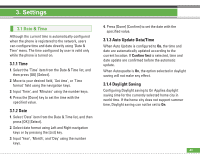
3. Settings 3.1 Date & Time Although the current time is automatically configured when the phone is registered to the network, users can configure time and date directly using 'Date & Time' menu. The time configured by user is valid only while the phone is turned on. 3.1.1 Time 1. Select the 'Time' item from the Date & Time list, and then press [OK] [Select]. 2. Move to your desired field, 'Set time', or 'Time format' field using the navigation keys. 3. Input 'Time', and 'Minutes' using the number keys. 4. Press the [Done] key to set the time with the specified value. 3.1.2 Date 1. Select 'Date' item from the Date & Time list, and then press [OK] [Select]. 2. Select date format using Left and Right navigation keys or by pressing the [List] key. 3. Input 'Year', 'Month', and 'Day' using the number keys. 4. Press [Done] [Confirm] to set the date with the specified value. 3.1.3 Auto Update Data/Time When Auto Update is configured to On, the time and date are automatically updated according to the current location. If Confirm first is selected, time and date update are confirmed before the automatic update. When Autoupadte is On, the option selected in daylight saving will not make any effect. 3.1.4 Daylight Saving Configuring Daylight saving to On Applies daylight saving time for the currently selected home city in world time. If the home city does not support summer time, Daylight saving can not be set to On. 41
-
 1
1 -
2
-
3
-
4
-
5
-
6
-
7
-
8
-
9
-
10
-
11
-
12
-
13
-
14
-
15
-
16
-
17
-
18
-
19
-
20
-
21
-
22
-
23
-
24
-
25
-
26
-
27
-
28
-
29
-
30
-
31
-
32
-
33
-
34
-
35
-
36
-
 37
37 -
 38
38 -
 39
39 -
 40
40 -
 41
41 -
 42
42 -
 43
43 -
 44
44 -
 45
45 -
 46
46 -
 47
47 -
48
-
49
-
50
-
51
-
52
-
53
-
54
-
55
-
56
-
57
-
58
-
59
-
60
-
61
-
62
-
63
-
64
-
65
-
66
-
67
-
68
-
69
-
70
-
71
-
72
-
73
-
74
-
75
-
76
-
77
-
78
-
79
-
80
-
81
-
82
-
83
-
84
-
85
-
86
-
87
-
88
-
89
-
90
-
91
-
92
-
93
-
94
-
95
-
96
-
97
-
98
-
99
-
100
-
101
-
102
-
103
-
104
-
105
-
106
-
107
-
108
-
109
-
110
-
111
-
112
-
113
 |
 |