Ricoh PJ WX4152N Operating Instructions - Page 73
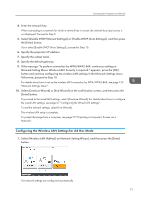
Configuring the Wireless LAN Settings for Ad Hoc Mode
 |
View all Ricoh PJ WX4152N manuals
Add to My Manuals
Save this manual to your list of manuals |
Page 73 highlights
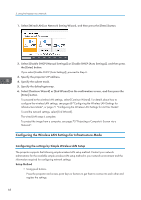
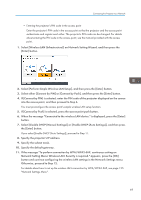
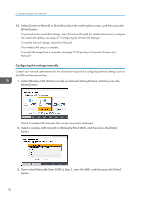
Connecting the Projector to a Network 4. Enter the network key. When connecting to a network for which a network key is not set, the network key input screen is not displayed. Proceed to Step 5. 5. Select [Disable DHCP (Manual Settings)] or [Enable DHCP (Auto Settings)], and then press the [Enter] button. If you select [Enable DHCP (Auto Settings)], proceed to Step 10. 6. Specify the projector's IP address. 7. Specify the subnet mask. 8. Specify the default gateway. 9. If the message "To perform connection by WPA/WPA2-EAP, continuous setting on Network Setting Menu: Wireless LAN: Security is required." appears, press the [OK] button and continue configuring the wireless LAN settings in the Network Settings menu. Otherwise, proceed to Step 10. For details about how to set up the wireless LAN connection by WPA/WPA2-EAP, see page 125 "Network Settings Menu". 10. Select [Continue Wizard] or [End Wizard] on the confirmation screen, and then press the [Enter] button. To proceed to the wired LAN settings, select [Continue Wizard]. For details about how to configure the wired LAN settings, see page 67 "Configuring the Wired LAN Settings". To end the network settings, select [End Wizard]. The wireless LAN setup is complete. To project the image from a computer, see page 73 "Projecting a Computer's Screen via a Network". Configuring the Wireless LAN Settings for Ad Hoc Mode 1. Select [Wireless LAN (Adhoc)] on Network Setting Wizard, and then press the [Enter] button. The network settings are configured automatically. 71
-
 1
1 -
2
-
3
-
4
-
5
-
6
-
7
-
8
-
9
-
10
-
11
-
12
-
13
-
14
-
15
-
16
-
17
-
18
-
19
-
20
-
21
-
22
-
23
-
24
-
25
-
26
-
27
-
28
-
29
-
30
-
31
-
32
-
33
-
34
-
35
-
36
-
37
-
38
-
39
-
40
-
41
-
42
-
43
-
44
-
45
-
46
-
47
-
48
-
49
-
50
-
51
-
52
-
53
-
54
-
55
-
56
-
57
-
58
-
59
-
60
-
61
-
62
-
63
-
64
-
65
-
66
-
67
-
 68
68 -
 69
69 -
 70
70 -
 71
71 -
 72
72 -
 73
73 -
 74
74 -
 75
75 -
 76
76 -
 77
77 -
 78
78 -
79
-
80
-
81
-
82
-
83
-
84
-
85
-
86
-
87
-
88
-
89
-
90
-
91
-
92
-
93
-
94
-
95
-
96
-
97
-
98
-
99
-
100
-
101
-
102
-
103
-
104
-
105
-
106
-
107
-
108
-
109
-
110
-
111
-
112
-
113
-
114
-
115
-
116
-
117
-
118
-
119
-
120
-
121
-
122
-
123
-
124
-
125
-
126
-
127
-
128
-
129
-
130
-
131
-
132
-
133
-
134
-
135
-
136
-
137
-
138
-
139
-
140
-
141
-
142
-
143
-
144
-
145
-
146
-
147
-
148
-
149
-
150
-
151
-
152
-
153
-
154
-
155
-
156
-
157
-
158
-
159
-
160
-
161
-
162
-
163
-
164
-
165
-
166
-
167
-
168
-
169
-
170
-
171
-
172
-
173
-
174
-
175
-
176
-
177
-
178
-
179
-
180
-
181
-
182
-
183
-
184
-
185
-
186
-
187
-
188
-
189
-
190
-
191
-
192
-
193
-
194
-
195
-
196
 |
 |
