Samsung SF-565PR User Manual (user Manual) (ver.3.00) (English) - Page 128
Adding Documents to a Scheduled Fax
 |
UPC - 635753610277
View all Samsung SF-565PR manuals
Add to My Manuals
Save this manual to your list of manuals |
Page 128 highlights
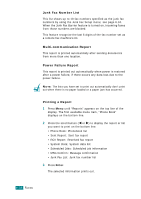
To select "AM" or "PM" for 12-hour format, press the or button or any number button. If you set a time earlier than the current time, your machine will poll at that time on the following day. 8 When the remote machine is secured with a 4-digit poll code, enter the correct code and press Enter. If not, press Enter to accept "0000" which represents no code, or enter 0000. 9 Press Enter when the starting time displays correctly. At the specified time, the machine will dial the numbers in the order you entered and receive documents from the remote machines. Adding Documents to a Scheduled Fax You can add documents to the delayed transmission previously reserved in your machine's memory. 1 Load the document(s) face down into the ADF. 6 For details about loading a document, see page 6.5. 2 Adjust the document resolution to suit your fax needs. See page 6.6. If you need to change the darkness, see page 6.3. 3 Press Menu until "Fax Feature" appears on the top line of the display. 4 Press the scroll button (W or X) to display "Add Page" on the bottom line and press Enter. The display shows the last job reserved in the memory. FAXING 6.27
-
 1
1 -
2
-
3
-
4
-
5
-
6
-
7
-
8
-
9
-
10
-
11
-
12
-
13
-
14
-
15
-
16
-
17
-
18
-
19
-
20
-
21
-
22
-
23
-
24
-
25
-
26
-
27
-
28
-
29
-
30
-
31
-
32
-
33
-
34
-
35
-
36
-
37
-
38
-
39
-
40
-
41
-
42
-
43
-
44
-
45
-
46
-
47
-
48
-
49
-
50
-
51
-
52
-
53
-
54
-
55
-
56
-
57
-
58
-
59
-
60
-
61
-
62
-
63
-
64
-
65
-
66
-
67
-
68
-
69
-
70
-
71
-
72
-
73
-
74
-
75
-
76
-
77
-
78
-
79
-
80
-
81
-
82
-
83
-
84
-
85
-
86
-
87
-
88
-
89
-
90
-
91
-
92
-
93
-
94
-
95
-
96
-
97
-
98
-
99
-
100
-
101
-
102
-
103
-
104
-
105
-
106
-
107
-
108
-
109
-
110
-
111
-
112
-
113
-
114
-
115
-
116
-
117
-
118
-
119
-
120
-
121
-
122
-
 123
123 -
 124
124 -
 125
125 -
 126
126 -
 127
127 -
 128
128 -
 129
129 -
 130
130 -
 131
131 -
 132
132 -
 133
133 -
134
-
135
-
136
-
137
-
138
-
139
-
140
-
141
-
142
-
143
-
144
-
145
-
146
-
147
-
148
-
149
-
150
-
151
-
152
-
153
-
154
-
155
-
156
-
157
-
158
-
159
-
160
-
161
-
162
-
163
-
164
-
165
-
166
-
167
-
168
-
169
-
170
-
171
-
172
-
173
-
174
-
175
-
176
-
177
-
178
-
179
-
180
-
181
-
182
-
183
-
184
-
185
-
186
-
187
-
188
-
189
-
190
-
191
-
192
-
193
-
194
-
195
-
196
-
197
-
198
-
199
-
200
-
201
-
202
-
203
-
204
-
205
-
206
-
207
-
208
-
209
-
210
-
211
-
212
 |
 |