Sharp MX-M232D Operation Guide - Page 28
Disabling Enabling Auto Tray Switching
 |
View all Sharp MX-M232D manuals
Add to My Manuals
Save this manual to your list of manuals |
Page 28 highlights
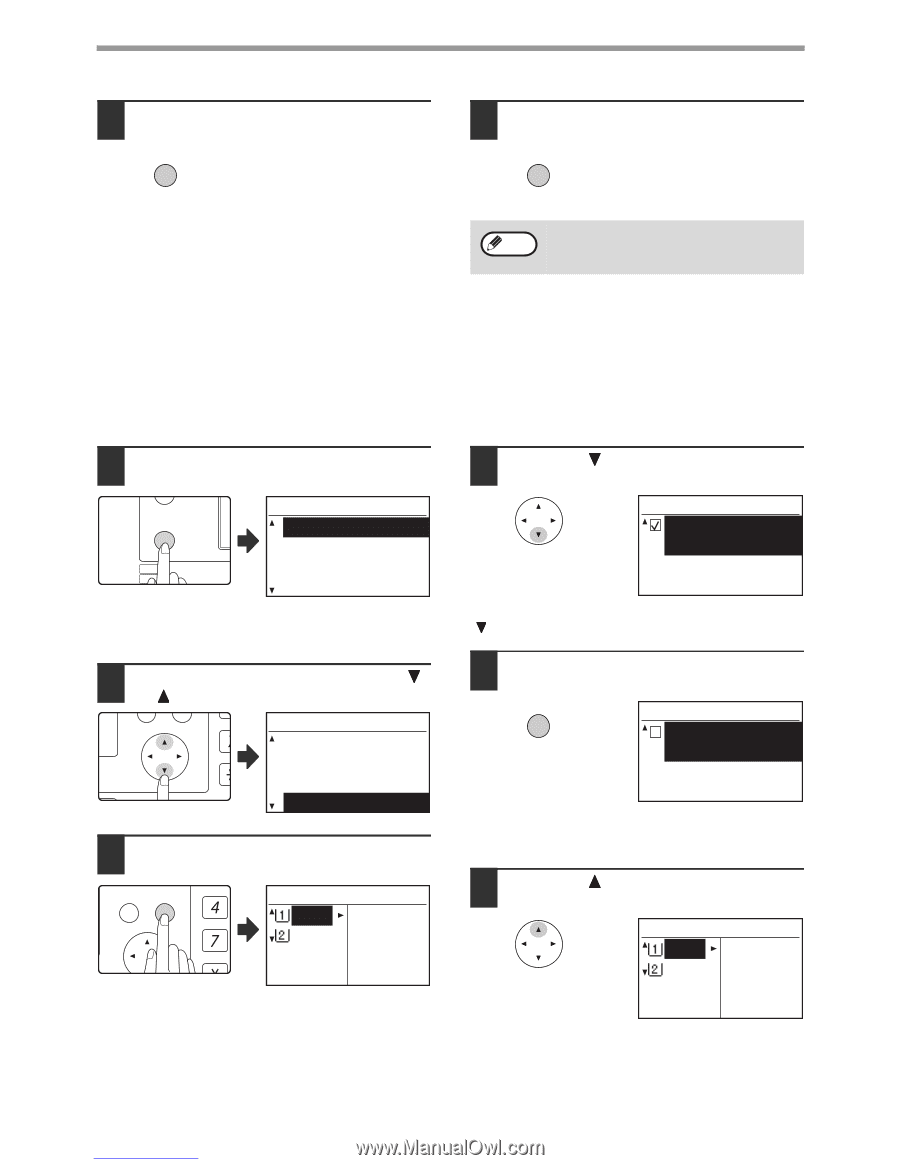
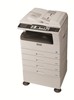
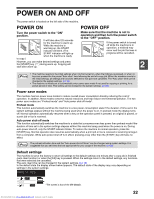
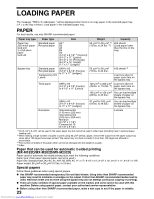
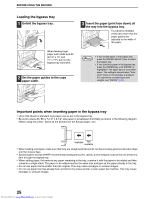
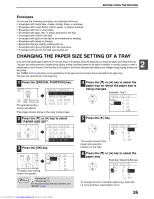
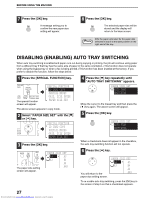
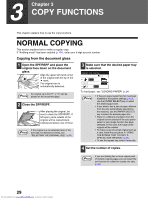
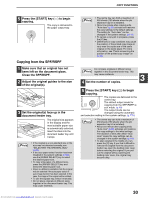
BEFORE USING THE MACHINE 7 Press the [OK] key. OK A message asking you to confirm the new paper size setting will appear. 8 Press the [OK] key. OK The selected paper size will be stored and the display will return to the base screen. Note Affix the paper size label for the paper size selected in step 6 to the label position on the right end of the tray. DISABLING (ENABLING) AUTO TRAY SWITCHING When auto tray switching is enabled and paper runs out during copying or printing, the job will continue using paper from a different tray if that tray has the same size of paper in the same orientation. (This function does not operate when using the bypass tray or when a fax is being printed.) This function has been enabled at the factory. If you prefer to disable the function, follow the steps below. 1 Press the [SPECIAL FUNCTION] key. ON LINE DATA SPECIAL FUNCTION LINE DATA COPY EXPOSURE PAPER SE SCAN COLOUR MODE RESOLUT The special function screen will appear. SPECIAL FUNCTION ID CARD COPY SPECIAL MODES ORIG. SIZE ENTER PAPER SIZE SET The above screen appears in copy mode. 2 Select "PAPER SIZE SET" with the [ ] or [ ] key. PQ SPECIAL FUNCTION ID CARD COPY ED COPY SPECIAL MODES LEX SCAN LEX SCAN ORIG. SIZE ENTER ACC PAPER SIZE SET 3 Press the [OK] key. BACK OK GHI PQRS PY AN The paper size setting screen will appear. PAPER SIZE SET A4 A3 A3 B4 A4 A4R 4 Press the [ ] key repeatedly until "AUTO TRAY SWITCHING" appears. PAPER SIZE SET AUTO TRAY SWITCHING Move the cursor to the lowest tray and then press the [ ] key again. The above screen will appear. 5 Press the [OK] key. OK PAPER SIZE SET AUTO TRAY SWITCHING When a checkmark does not appear in the checkbox, the auto tray switching function will not operate. 6 Press the [ ] key. You will return to the paper size setting screen. PAPER SIZE SET A4 A3 A3 B4 A4 A4R To re-enable auto tray switching, press the [OK] key in the screen of step 5 so that a checkmark appears. 27 Downloaded from www.Manualslib.com manuals search engine
-
 1
1 -
2
-
3
-
4
-
5
-
6
-
7
-
8
-
9
-
10
-
11
-
12
-
13
-
14
-
15
-
16
-
17
-
18
-
19
-
20
-
21
-
22
-
 23
23 -
 24
24 -
 25
25 -
 26
26 -
 27
27 -
 28
28 -
 29
29 -
 30
30 -
 31
31 -
 32
32 -
 33
33 -
34
-
35
-
36
-
37
-
38
-
39
-
40
-
41
-
42
-
43
-
44
-
45
-
46
-
47
-
48
-
49
-
50
-
51
-
52
-
53
-
54
-
55
-
56
-
57
-
58
-
59
-
60
-
61
-
62
-
63
-
64
-
65
-
66
-
67
-
68
-
69
-
70
-
71
-
72
-
73
-
74
-
75
-
76
-
77
-
78
-
79
-
80
-
81
-
82
-
83
-
84
-
85
-
86
-
87
-
88
-
89
-
90
-
91
-
92
-
93
-
94
-
95
-
96
-
97
-
98
-
99
-
100
-
101
-
102
-
103
-
104
-
105
-
106
-
107
-
108
-
109
-
110
-
111
-
112
-
113
-
114
-
115
-
116
-
117
-
118
-
119
-
120
-
121
-
122
-
123
-
124
-
125
 |
 |