Sony CCD-VX3 Operation Manual - Page 18
cordi
 |
View all Sony CCD-VX3 manuals
Add to My Manuals
Save this manual to your list of manuals |
Page 18 highlights
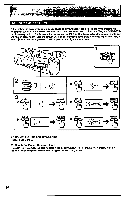
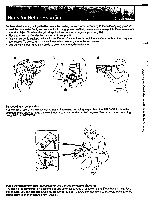
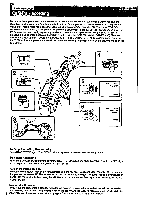
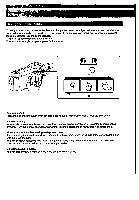
cording Basic Operation Make sure that a power source is installed and a cassette is inserted. You can obtain a worry-free camera recording with the camcorder's full-automatic functions. Before you record one-time events, you may want to make a test recording to make sure that you are using the camcorder correctly. (1) Slide the AUTO LOCK switch up to the topmost (green) position for automatic adjustment (p.31). (2) Set the FOCUS switch to AUTO. (3) Remove the hood cap by squeezing its tabs and hook it to the cap holder on the grip strap. (4) While pressing the small green button on the POWER switch, slide the POWER switch to CAMERA. (5) Slide the STANDBY switch up until it snaps into STANDBY. (6) Press START/STOP. The camcorder starts recording. the "REC" indicator appears in the viewfinder, and the recording lamps light up inside the viewfinder and on the camcorder. ND FILTER 2 Focus AUTO rMANUAL dm.b.PUSHAUTO AUTO LOCK o 0 RIAU 'n=4% 5 STALNoDBc;Y•i I• STARTA STOP 6 STANDS/ LOCI4 START/ STOP POWER LIAL; On VTR HIS STBY 0:00:00 MEM MO REC 0:00:00 VERWe 1=M To Stop Recording Momentarily Press START/STOP again. The "STBY" indicator appears in the viewfinder (standby mode). To Finish Recording Push the STANDBY switch down to cover the START/STOP button and slide the POWER switch to OFF. If you do not expect to continue shooting, eject the tape. (p.15) Note on the internal ND filter Although the camcorder may be set for automatic use, the ND filter is still controlled manually. We recommend that you use the internal ND filter when the "ND ON" indicator flashes upper left corner inside the viewfinder. If the "ND OFF" indicator flashes, using the ND filter is not recommended. See page 19 for details about the ND FILTER switch. Note on standby mode If you leave the camcorder in standby mode for five minutes or more with a cassette inserted, the camcorder automatically switches off. This prevents wear on the battery and the tape. To resume standby mode, slide the 18 STANDBY switch down once and slide it up again. To start recording, press START/STOP.
-
 1
1 -
2
-
3
-
4
-
5
-
6
-
7
-
8
-
9
-
10
-
11
-
12
-
 13
13 -
 14
14 -
 15
15 -
 16
16 -
 17
17 -
 18
18 -
 19
19 -
 20
20 -
 21
21 -
 22
22 -
 23
23 -
24
-
25
-
26
-
27
-
28
-
29
-
30
-
31
-
32
-
33
-
34
-
35
-
36
-
37
-
38
-
39
-
40
-
41
-
42
-
43
-
44
-
45
-
46
-
47
-
48
-
49
-
50
-
51
-
52
-
53
-
54
-
55
-
56
-
57
-
58
-
59
-
60
-
61
-
62
-
63
-
64
-
65
-
66
-
67
-
68
-
69
-
70
-
71
-
72
-
73
-
74
-
75
-
76
-
77
-
78
-
79
-
80
-
81
-
82
-
83
-
84
-
85
-
86
-
87
-
88
-
89
-
90
-
91
-
92
-
93
-
94
-
95
-
96
 |
 |
