Sony CCD-VX3 Operation Manual - Page 65
Erasing, Index, Signal
 |
View all Sony CCD-VX3 manuals
Add to My Manuals
Save this manual to your list of manuals |
Page 65 highlights
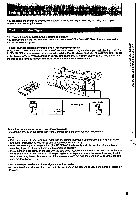
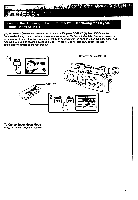
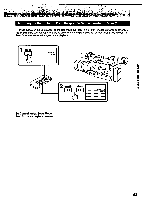
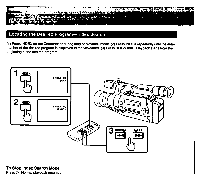
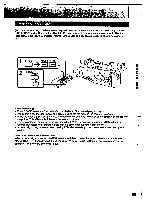
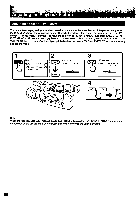
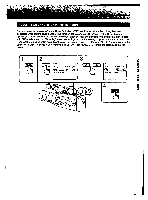
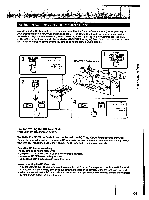
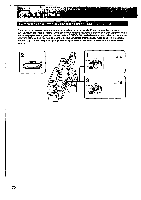
uonounA )(elm, anBuisfl Erasing the Index Signal (1) Locate the index signal to be erased using the index scan or index search function. (p.62 - 64) (2) Press INDEX ERASE on the Commander within 2 to 10 seconds while the desired program plays back. After the index signal is erased, the camcorder returns to index scan or index search mode, whichever was used in step 1. INDEX FtEwe FF 2 INDEX ERASE 1 O C:s 0 Notes on erasing • Press ERASE more than 2 seconds after the playback of the desired program begins. • You cannot erase the index signal on a tape on which the red mark on the cassette is exposed. • While the index signal is being erased, the sound cannot be heard and a black band appears at the bottom of the picture. This will not affect the recorded sound or picture. • The camcorder can detect index signals marked with VCRs, but cannot erase them. VCRs with a index function can detect index signals marked with this camcorder but cannot erase them. • An index signal may be erased when making PCM after recording in the portion where the index signal is marked. Note on RC time code and data code When an index signal is erased, the RC time code and data code on the same portion of the tape is also erased. Bars (----) appear when the portion is played back. To use that tape for editing using an editing controller, rewrite the RC time code (p.69). 65
-
 1
1 -
2
-
3
-
4
-
5
-
6
-
7
-
8
-
9
-
10
-
11
-
12
-
13
-
14
-
15
-
16
-
17
-
18
-
19
-
20
-
21
-
22
-
23
-
24
-
25
-
26
-
27
-
28
-
29
-
30
-
31
-
32
-
33
-
34
-
35
-
36
-
37
-
38
-
39
-
40
-
41
-
42
-
43
-
44
-
45
-
46
-
47
-
48
-
49
-
50
-
51
-
52
-
53
-
54
-
55
-
56
-
57
-
58
-
59
-
 60
60 -
 61
61 -
 62
62 -
 63
63 -
 64
64 -
 65
65 -
 66
66 -
 67
67 -
 68
68 -
 69
69 -
 70
70 -
71
-
72
-
73
-
74
-
75
-
76
-
77
-
78
-
79
-
80
-
81
-
82
-
83
-
84
-
85
-
86
-
87
-
88
-
89
-
90
-
91
-
92
-
93
-
94
-
95
-
96
 |
 |
