Sony STR-DN1040 Operating Instructions (Large File - 14.3 MB) - Page 115
Troubleshooting, Power, Image
 |
View all Sony STR-DN1040 manuals
Add to My Manuals
Save this manual to your list of manuals |
Page 115 highlights
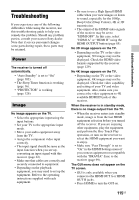
Additional Information Troubleshooting If you experience any of the following difficulties while using the receiver, use this troubleshooting guide to help you remedy the problem. Should any problem persist, consult your nearest Sony dealer. Note that if service personnel changes some parts during repair, these parts may be retained. Power The receiver is turned off automatically. • "Auto Standby" is set to "On" (page 102). • The Sleep Timer function is working (page 16). • "PROTECTOR" is working (page 126). Image No image appears on the TV. • Select the appropriate input using the input buttons. • Set your TV to the appropriate input mode. • Move your audio equipment away from the TV. • Assign the component video input correctly. • The input signal should be same as the input function when you are upconverting an input signal with this receiver (page 22). • Make sure that cables are correctly and securely connected to equipment. • Depending on the playback equipment, you may need to set up the equipment. Refer to the operating instructions supplied with each equipment. • Be sure to use a High Speed HDMI cable when you view images or listen to sound, especially for the 1080p, Deep Color (Deep Colour), 4K or 3D transmission. • The output of the HDMI video signals of the receiver may be set to "HDMI OFF". In this case, select "HDMI A" or "HDMI B" using the HDMI OUTPUT button (page 85). No 3D image appears on the TV. • Depending on the TV or the video equipment, 3D images may not be displayed. Check the HDMI video formats supported by the receiver (page 129). No 4K image appears on the TV. • Depending on the TV or the video equipment, 4K images may not be displayed. Check the video capability and setting of your TV and video equipment. Also, make sure you connect the video equipment to 4K available HDMI IN jack of this receiver. When the receiver is in standby mode, there is no image output from the TV. • When the receiver enters into standby mode, image is from the last HDMI equipment selection before you turned off the receiver. If you are enjoying other equipment, play the equipment and perform the One-Touch Play operation, or turn on the receiver to select the HDMI equipment you want to enjoy. • Make sure "Pass Through" is set to "On" in the HDMI Settings menu if you connect equipment not compatible with the "BRAVIA" Sync to the receiver (page 99). The GUI menu does not appear on the TV screen. • GUI is only available when you connect to the HDMI OUT A or HDMI OUT B jacks. • Press HOME to turn the GUI on. 115US
-
 1
1 -
2
-
3
-
4
-
5
-
6
-
7
-
8
-
9
-
10
-
11
-
12
-
13
-
14
-
15
-
16
-
17
-
18
-
19
-
20
-
21
-
22
-
23
-
24
-
25
-
26
-
27
-
28
-
29
-
30
-
31
-
32
-
33
-
34
-
35
-
36
-
37
-
38
-
39
-
40
-
41
-
42
-
43
-
44
-
45
-
46
-
47
-
48
-
49
-
50
-
51
-
52
-
53
-
54
-
55
-
56
-
57
-
58
-
59
-
60
-
61
-
62
-
63
-
64
-
65
-
66
-
67
-
68
-
69
-
70
-
71
-
72
-
73
-
74
-
75
-
76
-
77
-
78
-
79
-
80
-
81
-
82
-
83
-
84
-
85
-
86
-
87
-
88
-
89
-
90
-
91
-
92
-
93
-
94
-
95
-
96
-
97
-
98
-
99
-
100
-
101
-
102
-
103
-
104
-
105
-
106
-
107
-
108
-
109
-
 110
110 -
 111
111 -
 112
112 -
 113
113 -
 114
114 -
 115
115 -
 116
116 -
 117
117 -
 118
118 -
 119
119 -
 120
120 -
121
-
122
-
123
-
124
-
125
-
126
-
127
-
128
-
129
-
130
-
131
-
132
-
133
-
134
-
135
-
136
 |
 |