Sony STR-DN1040 Operating Instructions (Large File - 14.3 MB) - Page 82
“BRAVIA” Sync Features, What is “BRAVIA” Sync?, Preparing for the “BRAVIA” Sync
 |
View all Sony STR-DN1040 manuals
Add to My Manuals
Save this manual to your list of manuals |
Page 82 highlights
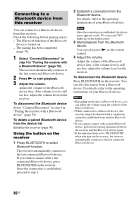
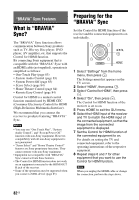
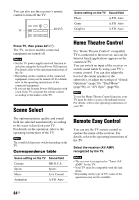
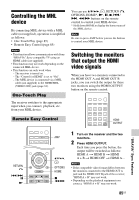
"BRAVIA" Sync Features What is "BRAVIA" Sync? The "BRAVIA" Sync function allows communication between Sony products such as TV, Blu-ray Disc player, DVD player, AV amplifier, etc. that supports the Control for HDMI function. By connecting Sony equipment that is compatible with the "BRAVIA" Sync with an HDMI cable (not supplied), operation is simplified as follows: • One-Touch Play (page 83) • System Audio Control (page 83) • System Power-Off (page 83) • Scene Select (page 84) • Home Theatre Control (page 84) • Remote Easy Control (page 84) Control for HDMI is a mutual control function standard used by HDMI CEC (Consumer Electronics Control) for HDMI (High-Definition Multimedia Interface). We recommend that you connect the receiver to products featuring "BRAVIA" Sync. Notes • You may use "One Touch Play", "System Audio Control", and "System Power-Off" function with non-Sony equipment. However, compatibility with all non-Sony equipment is not guaranteed. • "Scene Select" and "Home Theatre Control" features are Sony proprietary functions. They cannot operate with non-Sony equipment. • Equipment not compatible with "BRAVIA" Sync cannot activate these features. • The Control for HDMI function does not work on an equipment connected to the HDMI OUT B jack of the receiver. • Some of the operations may be supported when you connect a MHL device (page 85). Preparing for the "BRAVIA" Sync Set the Control for HDMI function of the receiver and the connected equipment to on individually. V/v/b, HOME 1 Select "Settings" from the home menu, then press . The Settings menu list appears on the TV screen. 2 Select "HDMI", then press . 3 Select "Control for HDMI", then press . 4 Select "On", then press . The Control for HDMI function of the receiver is set to on. 5 Press HOME to exit the GUI menu. 6 Select the HDMI input of the receiver and TV to match the HDMI input of the connected equipment, so that the image from the connected equipment is displayed. 7 Set the Control for HDMI function of the connected equipment to on. For details on setting the TV and connected equipment, refer to the operating instructions of the respective equipment. 8 Repeat steps 6 and 7 for other equipment that you want to use the Control for HDMI function. Note When you unplug the HDMI cable or change the connection, perform the steps above. 82US
-
 1
1 -
2
-
3
-
4
-
5
-
6
-
7
-
8
-
9
-
10
-
11
-
12
-
13
-
14
-
15
-
16
-
17
-
18
-
19
-
20
-
21
-
22
-
23
-
24
-
25
-
26
-
27
-
28
-
29
-
30
-
31
-
32
-
33
-
34
-
35
-
36
-
37
-
38
-
39
-
40
-
41
-
42
-
43
-
44
-
45
-
46
-
47
-
48
-
49
-
50
-
51
-
52
-
53
-
54
-
55
-
56
-
57
-
58
-
59
-
60
-
61
-
62
-
63
-
64
-
65
-
66
-
67
-
68
-
69
-
70
-
71
-
72
-
73
-
74
-
75
-
76
-
 77
77 -
 78
78 -
 79
79 -
 80
80 -
 81
81 -
 82
82 -
 83
83 -
 84
84 -
 85
85 -
 86
86 -
 87
87 -
88
-
89
-
90
-
91
-
92
-
93
-
94
-
95
-
96
-
97
-
98
-
99
-
100
-
101
-
102
-
103
-
104
-
105
-
106
-
107
-
108
-
109
-
110
-
111
-
112
-
113
-
114
-
115
-
116
-
117
-
118
-
119
-
120
-
121
-
122
-
123
-
124
-
125
-
126
-
127
-
128
-
129
-
130
-
131
-
132
-
133
-
134
-
135
-
136
 |
 |
