Sony STR-DN1040 Operating Instructions (Large File - 14.3 MB) - Page 39
Configuring the network settings of the receiver, Using a wireless LAN, connection - airplay
 |
View all Sony STR-DN1040 manuals
Add to My Manuals
Save this manual to your list of manuals |
Page 39 highlights
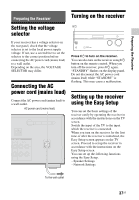
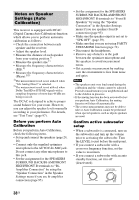
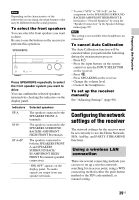
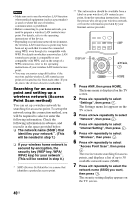
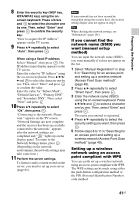
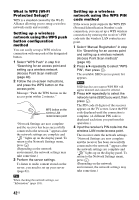
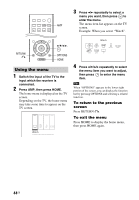
Preparing the Receiver Note Depending on the characteristics of the subwoofer you are using, the setup distance value may be different from the actual position. To select the front speakers You can select the front speakers you want to drive. Be sure to use the buttons on the receiver to perform this operation. SPEAKERS Press SPEAKERS repeatedly to select the front speaker system you want to drive. You can confirm the selected speakers terminals by checking the indicators on the display panel. Indicators SP A SP B* SP A+B* Selected speakers The speakers connected to the SPEAKERS FRONT A terminals. The speakers connected to the SPEAKERS SURROUND BACK/BI-AMP/FRONT HIGH/ FRONT B terminals. The speakers connected to both the SPEAKERS FRONT A and SPEAKERS SURROUND BACK/ BI-AMP/FRONT HIGH/ FRONT B terminals (parallel connection). "SPK OFF" appears on the display panel. No audio signals are output from any speaker terminals. * To select "SP B" or "SP A+B", set the assignment for the SPEAKERS SURROUND BACK/BI-AMP/FRONT HIGH/FRONT B terminals to "Front B Speakers" by using the "Speaker Connection" in the Speaker Settings menu (page 95). Note This setting is not available when headphones are connected. To cancel Auto Calibration The Auto Calibration function will be canceled when you perform the following during the measurement process: - Press ?/1. - Press the input buttons on the remote control or turn the INPUT SELECTOR on the receiver. - Press . - Press SPEAKERS on the receiver. - Change the volume level. - Connect the headphones. To set up the receiver manually See "Adjusting Settings" (page 90). Configuring the network settings of the receiver The network settings for the receiver must be set correctly to use the Home Network, SEN, AirPlay, and PARTY STREAMING functions. Using a wireless LAN connection There are several connecting methods you can use to set up a wireless network: searching for an access point, using a WPS connecting method (either the push-button method or the PIN code method), or manual setting. 39US
-
 1
1 -
2
-
3
-
4
-
5
-
6
-
7
-
8
-
9
-
10
-
11
-
12
-
13
-
14
-
15
-
16
-
17
-
18
-
19
-
20
-
21
-
22
-
23
-
24
-
25
-
26
-
27
-
28
-
29
-
30
-
31
-
32
-
33
-
 34
34 -
 35
35 -
 36
36 -
 37
37 -
 38
38 -
 39
39 -
 40
40 -
 41
41 -
 42
42 -
 43
43 -
 44
44 -
45
-
46
-
47
-
48
-
49
-
50
-
51
-
52
-
53
-
54
-
55
-
56
-
57
-
58
-
59
-
60
-
61
-
62
-
63
-
64
-
65
-
66
-
67
-
68
-
69
-
70
-
71
-
72
-
73
-
74
-
75
-
76
-
77
-
78
-
79
-
80
-
81
-
82
-
83
-
84
-
85
-
86
-
87
-
88
-
89
-
90
-
91
-
92
-
93
-
94
-
95
-
96
-
97
-
98
-
99
-
100
-
101
-
102
-
103
-
104
-
105
-
106
-
107
-
108
-
109
-
110
-
111
-
112
-
113
-
114
-
115
-
116
-
117
-
118
-
119
-
120
-
121
-
122
-
123
-
124
-
125
-
126
-
127
-
128
-
129
-
130
-
131
-
132
-
133
-
134
-
135
-
136
 |
 |
