Uniden BCD996P2 English Manual - Page 20
Removing the Scanner from the DIN-E Sleeve, Mounting Using ISO Technique - gps
 |
View all Uniden BCD996P2 manuals
Add to My Manuals
Save this manual to your list of manuals |
Page 20 highlights
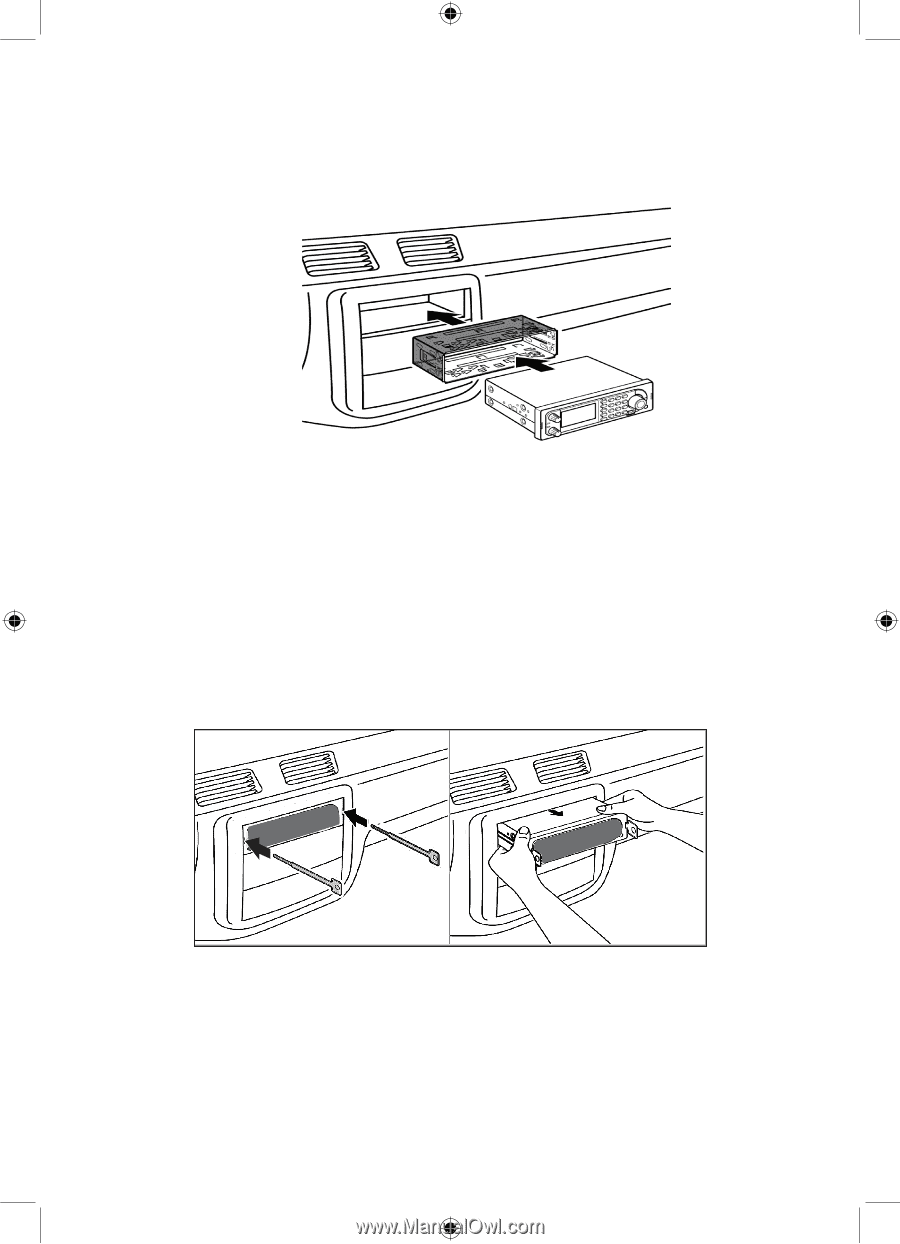
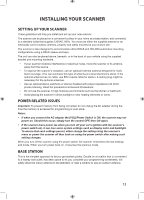
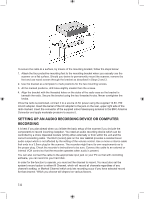
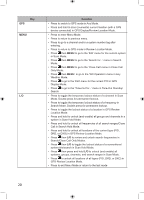
7. Slowly slide the scanner into the sleeve until it locks in place. 8. To remove the unit, fully insert the removal keys into each slot on the left and right edges of the front panel. Carefully slide the radio from the sleeve. Note: If you plan to connect a GPS unit or external speaker at a later time, expect to remove the unit for ease of making those connections. Removing the Scanner from the DIN-E Sleeve If you plan to connect other devices or wires to the radio, such as a GPS unit, at a later time, you should plan to remove the scanner from the DIN-E sleeve. This is easily done using the provided Removal Keys that come with the optional DIN-E sleeve. Refer to the illustration that follows, showing the Removal Keys. Fully insert both Removal Keys into the slots on the left and the right edges of the radio's dress panel. You cannot remove the radio with only one key. Press in fully,and do not twist the keys. The radio will unlock from the sleeve making withdrawal from the sleeve possible. Store the keys in a safe place for future use. Mounting Using ISO Technique Some vehicles can take advantage of another approach to mounting a radio in a vehicle, called the ISO technique. However, this technique requires a very detailed and thorough knowledge of the technique. Therefore, we strongly suggest that if you have any doubt about your experience and abilities, please consult with a professional installer who is familiar with the ISO approach to radio installation. 16
-
 1
1 -
2
-
3
-
4
-
5
-
6
-
7
-
8
-
9
-
10
-
11
-
12
-
13
-
14
-
 15
15 -
 16
16 -
 17
17 -
 18
18 -
 19
19 -
 20
20 -
 21
21 -
 22
22 -
 23
23 -
 24
24 -
 25
25 -
26
-
27
-
28
-
29
-
30
-
31
-
32
-
33
-
34
-
35
-
36
-
37
-
38
-
39
-
40
-
41
-
42
-
43
-
44
-
45
-
46
-
47
-
48
-
49
-
50
-
51
-
52
-
53
-
54
-
55
-
56
-
57
-
58
-
59
-
60
-
61
-
62
-
63
-
64
-
65
-
66
-
67
-
68
-
69
-
70
-
71
-
72
-
73
-
74
-
75
-
76
-
77
-
78
-
79
-
80
-
81
-
82
-
83
-
84
-
85
-
86
-
87
-
88
-
89
-
90
-
91
-
92
-
93
-
94
-
95
-
96
-
97
-
98
-
99
-
100
-
101
-
102
-
103
-
104
-
105
-
106
-
107
-
108
-
109
-
110
-
111
-
112
 |
 |