Uniden BCD996P2 English Manual - Page 97
Weather Scan, Program SAME, Set Attenuator, Set Audio AGC, Weather Alert, Priority, Set Delay Time,
 |
View all Uniden BCD996P2 manuals
Add to My Manuals
Save this manual to your list of manuals |
Page 97 highlights
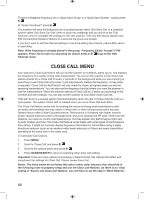
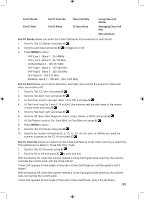
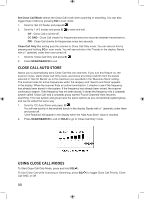
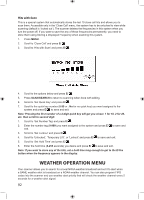
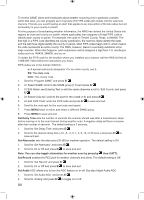
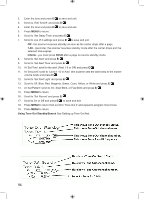
To Edit Weather Options: 1. Press MENU. 2. Scroll to 'WX Operation' and press E/ . 3. Scroll to the settings and options below and press E/ . 4. Press SCAN/SEARCH to return to scanning when done with editing. Weather Scan Program SAME Set Attenuator Set Audio AGC Weather Alert Priority Set Delay Time Set Record Weather Alert Weather Scan The scanner starts scanning the preprogrammed weather frequencies and stops on the first good signal. If the signal is lost, the scanner resumes searching for another weather transmission. Note: You can also turn on weather scan by pressing and holding the WX button in scan or search modes. 1. Scroll to 'Weather Scan' press E/ . 2. Press SCAN/SEARCH to exit. In Weather Scan Mode: 1. To search for another weather channel turn the scroll control. 2. To start Weather Alert press then WX. 3. Scroll to 'Alert Only', 'SAME 1-5', or 'All FIP' and press E/ . 4. To return to Weather Scan from Weather Alert press then WX. 5. To turn Intermediate Frequency Exchange on or off press then 4(IFX). 6. To turn the attenuation on or off press then 7(ATT). 7. To store a frequency press E/ then see Storing a Displayed Frequency. 8. To go to the Weather Menu in any weather mode press then MENU. Weather Alert Priority turning the weather alert priority feature on allows the scanner to check the weather channels every 5 seconds for a 1050 Hz weather alert signal and still scan or search. If you should receive an alert, you will hear a loud warbling then the weather channel audio. You will see WX in the display when Weather Alert Priority is on. Warning! If you receive an alert it will be at FULL volume. Note: You can also toggle weather alert priority in scan or search modes by pressing the WX button. 1. Scroll to 'WX Alt Priority' and press E/ . 2. Scroll to On or Off and press E/ to save and exit. Programming SAME Groups SAME (Specific Area Messaging System) is a system developed by the National Weather Service to reduce the number of alerts received by consumers by allowing them to hear alerts only for the county(ies) they are interested in. Each alert contains information about the type and severity of the alert, as well as the specific geographic locations affected by the alert. In addition, certain special regions and wildcard settings can be assigned. Your scanner can receive all SAME alert signals broadcast within about a 50-mile radius of where you use it. 93
-
 1
1 -
2
-
3
-
4
-
5
-
6
-
7
-
8
-
9
-
10
-
11
-
12
-
13
-
14
-
15
-
16
-
17
-
18
-
19
-
20
-
21
-
22
-
23
-
24
-
25
-
26
-
27
-
28
-
29
-
30
-
31
-
32
-
33
-
34
-
35
-
36
-
37
-
38
-
39
-
40
-
41
-
42
-
43
-
44
-
45
-
46
-
47
-
48
-
49
-
50
-
51
-
52
-
53
-
54
-
55
-
56
-
57
-
58
-
59
-
60
-
61
-
62
-
63
-
64
-
65
-
66
-
67
-
68
-
69
-
70
-
71
-
72
-
73
-
74
-
75
-
76
-
77
-
78
-
79
-
80
-
81
-
82
-
83
-
84
-
85
-
86
-
87
-
88
-
89
-
90
-
91
-
 92
92 -
 93
93 -
 94
94 -
 95
95 -
 96
96 -
 97
97 -
 98
98 -
 99
99 -
 100
100 -
 101
101 -
 102
102 -
103
-
104
-
105
-
106
-
107
-
108
-
109
-
110
-
111
-
112
 |
 |