Uniden BCD996P2 English Manual - Page 37
Set Quick Key, Set Start-up Key, Set Number Tag, Set Lockout, Set Hold Time in seconds - digital scanner
 |
View all Uniden BCD996P2 manuals
Add to My Manuals
Save this manual to your list of manuals |
Page 37 highlights
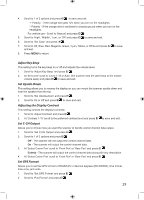
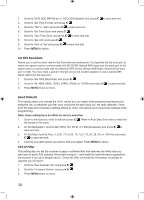
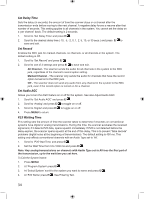
Set Quick Key Assigns a quick key to a system. The system will be scanned when its quick key is enabled. The default setting is no quick key. 1. Scroll to 'Set Quick Key' and press E/ . 2. Scroll to the quick key number (0-99 or .No for no quick key) you want assigned to the system and press E/ to save and exit. Note: Pressing the first number of a 2-digit quick key will get you closer, 1 for 10, 2 for 20, etc. then scroll to second digit. Set Start-up Key Allows you to automatically lock or unlock a system when you turn on the scanner. If you hold down the system's start-up key while turning on the scanner, the system (and other systems assigned to the same key) will be unlocked, and systems with different start-up keys will be locked out (systems with no start-up key assigned will not be affected). This does not affect the quick key status, only the lock/unlock status. The default setting is no startup key. 1. Scroll to 'Set Startup Key' and press E/ . 2. Scroll to (or enter) the startup key number (0-9 or .No for no startup key) you want assigned to the system and press E/ to save and exit. Set Number Tag Allows you to number a system for rapid access. The default setting is no number tag (blank). See also Using Number Tags. 1. Scroll to 'Set Number Tag' and press E/ . 2. Enter the number tag (0-999) (Press .No to clear the display) and press E/ to save and exit. Set Lockout Determines whether a system will be scanned or not (even if the quick key for the system is turned on). 'Temporary L/O' locks out the system until you cycle power. The default setting is unlocked. 1. Scroll to 'Set Lockout' and press E/ . 2. Scroll to 'Temporary L/O', 'Unlocked' or 'Locked' and press E/ to save and exit. Note: You can also toggle system lockout by holding on the system in scan mode and pressing E/ then L/O. Set Hold Time (in seconds) Determines the amount of time the scanner will scan the system before moving on to the next system. When set to 0, all (unlocked) channels will be scanned at least once. The scanner moves to the next system after the hold time expires, any current transmission ends, and the channel delay time expires. The default setting is 0 seconds for each system. 1. Scroll to 'Set Hold Time' and press E/ . 2. Enter the hold time (0-255 seconds) you desire and press E/ to save and exit. 33
-
 1
1 -
2
-
3
-
4
-
5
-
6
-
7
-
8
-
9
-
10
-
11
-
12
-
13
-
14
-
15
-
16
-
17
-
18
-
19
-
20
-
21
-
22
-
23
-
24
-
25
-
26
-
27
-
28
-
29
-
30
-
31
-
 32
32 -
 33
33 -
 34
34 -
 35
35 -
 36
36 -
 37
37 -
 38
38 -
 39
39 -
 40
40 -
 41
41 -
 42
42 -
43
-
44
-
45
-
46
-
47
-
48
-
49
-
50
-
51
-
52
-
53
-
54
-
55
-
56
-
57
-
58
-
59
-
60
-
61
-
62
-
63
-
64
-
65
-
66
-
67
-
68
-
69
-
70
-
71
-
72
-
73
-
74
-
75
-
76
-
77
-
78
-
79
-
80
-
81
-
82
-
83
-
84
-
85
-
86
-
87
-
88
-
89
-
90
-
91
-
92
-
93
-
94
-
95
-
96
-
97
-
98
-
99
-
100
-
101
-
102
-
103
-
104
-
105
-
106
-
107
-
108
-
109
-
110
-
111
-
112
 |
 |