Uniden BCD996P2 English Manual - Page 54
Edit Band Plan Motorola Custom/P25/VHF/UHF only
 |
View all Uniden BCD996P2 manuals
Add to My Manuals
Save this manual to your list of manuals |
Page 54 highlights
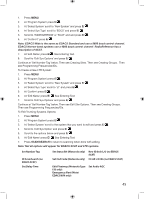
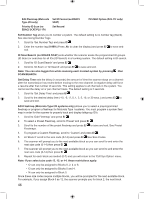
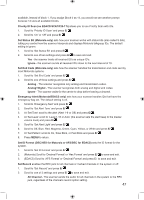
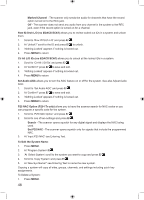
Set Quick Key assigns quick key to a site and will be scanned when the key is turned on. The default setting is no quick key. 1. Scroll to 'Set Quick Key' and press E/ . 2. Scroll to the quick key number (0-99 or .No for no quick key) you want assigned to the site and press E/ . to save and exit. Note: Pressing the first number of a 2-digit quick key will get you closer, 1 for 10, 2 for 20, etc. then scroll to second digit. Set Start-up Key allows you to turn on the scanner with the site enabled for scan using the Startup Configuration. The default setting is no startup key. 1. Scroll to 'Set Startup Key' and press E/ . 2. Scroll to (or enter) the startup key number (0-9 or .No for no startup key) you want assigned to the site and press E/ to save and exit. Edit Band Plan (Motorola Custom/P25/VHF/UHF only) band plans are required so the scanner can correctly determine the voice channel frequencies. For P25 Systems there are two types of P25 systems: Explicit mode and Implicit mode channel assignment. Explicit mode systems include all information needed to determine voice frequencies on the control channel. For Explicit mode systems, leave all entries blank. The system will automatically detect the band plan and fill in the entries. You must supply the system's band plan for Implicit systems for the scanner to correctly determine voice frequencies. 1. Scroll to 'Edit Band Plan' and press E/ . 2. At 'Select Plan' scroll to 'Band Plan 0-9, A-F' and press E/ . 3. At 'Input Base Freq' enter the base frequency press E/ . 4. Repeat for each band plan as needed E/ . 5. Press MENU to return. For Standard Motorola 800/900/Splinter Systems Splinter - analog 800Mhz systems with frequencies between 866-869 MHz. Rebanded - 851-854 MHz ending with 0 instead of 5 e.g. 852.1250, not 852.1375. 1. Scroll to 'Edit Band Plan' and press E/ . 2. Scroll to '800/900 Standard' or '800Splinter' and press E/ . 3. The scanner will use the regular old Motorola band plan and return to the menu. For Custom (rebanded) Motorola/VHF/UHF Systems this allows you to create a custom band plan for rebanded/VHF/UHF systems. Custom band plans require that you enter both a lower and an upper base frequency value. The lower base frequency (or base) is always the base frequency as provided in the Radio Reference Database. Use this Excel spreadsheet to calculate the upper base frequency value. The upper base frequency can also be found using the Band Plan Calculator at the online Wiki. 1. Scroll to 'Edit Band Plan' and press E/ . 2. At 'Select Plan' scroll to 'Band Plan 1-6' and press E/ . 3. At 'Set Base Freq' press E/ . 4. At 'Input Lower' enter the lower base frequency and press E/ . 5. At 'Input Upper' enter the upper base frequency and press E/ . 50
-
 1
1 -
2
-
3
-
4
-
5
-
6
-
7
-
8
-
9
-
10
-
11
-
12
-
13
-
14
-
15
-
16
-
17
-
18
-
19
-
20
-
21
-
22
-
23
-
24
-
25
-
26
-
27
-
28
-
29
-
30
-
31
-
32
-
33
-
34
-
35
-
36
-
37
-
38
-
39
-
40
-
41
-
42
-
43
-
44
-
45
-
46
-
47
-
48
-
 49
49 -
 50
50 -
 51
51 -
 52
52 -
 53
53 -
 54
54 -
 55
55 -
 56
56 -
 57
57 -
 58
58 -
 59
59 -
60
-
61
-
62
-
63
-
64
-
65
-
66
-
67
-
68
-
69
-
70
-
71
-
72
-
73
-
74
-
75
-
76
-
77
-
78
-
79
-
80
-
81
-
82
-
83
-
84
-
85
-
86
-
87
-
88
-
89
-
90
-
91
-
92
-
93
-
94
-
95
-
96
-
97
-
98
-
99
-
100
-
101
-
102
-
103
-
104
-
105
-
106
-
107
-
108
-
109
-
110
-
111
-
112
 |
 |
