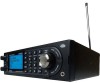
Uniden BCD996P2 English Manual - Page 89
Custom Search, Set Search Key, Auto Search and Store
 |
View all Uniden BCD996P2 manuals
Add to My Manuals
Save this manual to your list of manuals |
Page 89 highlights
11. Press MENU to exit. Press MENU and scroll to another custom search and repeat the previous steps or press L/O to exit. Custom Search Custom Search allows you search the scanner's 10 programmed frequency ranges. See Editing a Custom Search first. To start a Custom Search: 1. Press MENU. 2. Scroll to 'Search for...' and press E/ . 3. Scroll to 'Custom Search' and press E/ to start searching. Or, Hold on any channel/frequency and press then the number key (1-3) assigned to the search. Then see Searching. Set Search Key The scanner has three search keys that you can assign to a special search range. The search keys are set to number keys 1, 2, and 3. This allows you to start a service, custom, Tone-Out, or Band Scope search without having to go into the menus. To program a Search Key: 1. Press MENU. 2. Scroll to 'Search for...' and press E/ . 3. Scroll to 'Set Search Key' and press E/ . 4. At 'Select Key No.' scroll to 'Search Key 1-3' and press E/ . 5. Scroll to any service search, custom search, 'Tone-Out', or 'Band Scope' and press E/ . 6. Repeat for any other search keys you want to program. Press L/O to exit. The default settings for the BCD996P2 are: SRCH 1: Custom 1 SRCH 2: Public Safety SRCH 3: Band Scope Mode Auto Search and Store Auto Search and Store allows you search and store frequencies from enabled custom search ranges or a service search range into a conventional system, or new talkgroup IDs into a trunked system. To store frequencies or talkgroup IDs you find during Auto Store, you must first select a system where the frequencies or talkgroup IDs will be stored. You will not hear any audio in this mode. See Max Auto Store first to set the maximum number of hits the scanner will store. Tip: Before you start an auto search and store, run the custom search(es) or service search first to lock out the birdies, data, noise, etc. This will prevent the scanner from stopping on them and doing a memory check each time it passes. To Auto Store Conventional Frequencies: 1. Press MENU. 2. Scroll to 'Search for...' and press E/ . 3. Scroll to 'Search and Store' and press E/ . 85
-
 1
1 -
2
-
3
-
4
-
5
-
6
-
7
-
8
-
9
-
10
-
11
-
12
-
13
-
14
-
15
-
16
-
17
-
18
-
19
-
20
-
21
-
22
-
23
-
24
-
25
-
26
-
27
-
28
-
29
-
30
-
31
-
32
-
33
-
34
-
35
-
36
-
37
-
38
-
39
-
40
-
41
-
42
-
43
-
44
-
45
-
46
-
47
-
48
-
49
-
50
-
51
-
52
-
53
-
54
-
55
-
56
-
57
-
58
-
59
-
60
-
61
-
62
-
63
-
64
-
65
-
66
-
67
-
68
-
69
-
70
-
71
-
72
-
73
-
74
-
75
-
76
-
77
-
78
-
79
-
80
-
81
-
82
-
83
-
 84
84 -
 85
85 -
 86
86 -
 87
87 -
 88
88 -
 89
89 -
 90
90 -
 91
91 -
 92
92 -
 93
93 -
 94
94 -
95
-
96
-
97
-
98
-
99
-
100
-
101
-
102
-
103
-
104
-
105
-
106
-
107
-
108
-
109
-
110
-
111
-
112
 |
 |