Uniden BCD996P2 English Manual - Page 42
Emergency Alert Motorola/EDACS only - scanner review
 |
View all Uniden BCD996P2 manuals
Add to My Manuals
Save this manual to your list of manuals |
Page 42 highlights
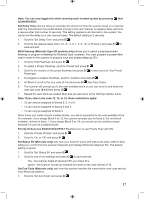
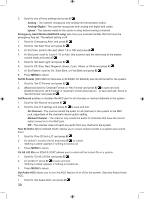
2. Scroll to one of three settings and press E/ . Analog - The scanner recognizes only analog end transmission codes. Analog+Digital - The scanner recognizes both analog and digital end codes. Ignore - The scanner waits for the carrier to drop before leaving a channel. Emergency Alert (Motorola/EDACS only) sets how your scanner handles IDs that have the emergency flag set. The default setting is off. 1. Scroll to 'Emergency Alert' and press E/ . 2. Scroll to 'Set Alert Tone' and press E/ . 3. At 'Set Tone' scroll to the alert (Alert 1-9 or Off) and press E/ . 4. At 'Set Level' scroll to 'Level 1-15 or Auto' (the scanner sets the alert beep to the master volume level) and press E/ . 5. Scroll to 'Set Alert Light' and press E/ . 6. Scroll to Off, Blue, Red, Magenta, Green, Cyan, Yellow, or White and press E/ . 7. At 'Set Pattern' scroll to On, Slow Blink, or Fast Blink and press E/ . 8. Press MENU to return. Set ID Format (DEC/HEX for Motorola or AFS/DEC for EDACS) sets the ID format for the system. 1. Scroll to 'Set ID Format' and press E/ . 2. (Motorola) Scroll to 'Decimal Format' or 'Hex Format' and press E/ to save and exit. (EDACS) Scroll to 'AFS Format' or 'Decimal Format' and press E/ to save and exit. Scroll to 'Set ID Format' and press E/ . Set Record enables or disables the REC jack for all channels or marked channels in the system. 1. Scroll to 'Set Record' and press E/ . 2. Scroll to one of 3 settings and press E/ to save and exit. All Channel - The scanner sends the audio for all channels in the system to the REC jack, regardless of the channel's record option setting. Marked Channel - The scanner only sends the audio for channels that have the record option turned on to the REC jack. Off - The scanner does not send any audio from any channel in the system Rvw ID:Srch L/O (no EDACS SCAT) allows you to review locked out IDs in a system and unlock them. 1. Scroll to 'Rvw ID:Srch L/O' and press E/ . 2. At 'Unlock?' scroll to the ID and press E/ to unlock. 'Nothing Locked' appears if nothing is locked out. 3. Press MENU to return. Clr All L/O IDs (no EDACS SCAT) allows you to unlock all the locked IDs in a system. 1. Scroll to 'Clr All L/O IDs' and press E/ . 2. At 'Confirm?' press E/ to save and exit. 'Nothing Locked' appears if nothing is locked out. 3. Press MENU to return. Set Audio AGC allows you to turn the AGC feature on or off for the system. See also Adjust Audio AGC. 1. Scroll to 'Set Audio AGC' and press E/ . 38
-
 1
1 -
2
-
3
-
4
-
5
-
6
-
7
-
8
-
9
-
10
-
11
-
12
-
13
-
14
-
15
-
16
-
17
-
18
-
19
-
20
-
21
-
22
-
23
-
24
-
25
-
26
-
27
-
28
-
29
-
30
-
31
-
32
-
33
-
34
-
35
-
36
-
 37
37 -
 38
38 -
 39
39 -
 40
40 -
 41
41 -
 42
42 -
 43
43 -
 44
44 -
 45
45 -
 46
46 -
 47
47 -
48
-
49
-
50
-
51
-
52
-
53
-
54
-
55
-
56
-
57
-
58
-
59
-
60
-
61
-
62
-
63
-
64
-
65
-
66
-
67
-
68
-
69
-
70
-
71
-
72
-
73
-
74
-
75
-
76
-
77
-
78
-
79
-
80
-
81
-
82
-
83
-
84
-
85
-
86
-
87
-
88
-
89
-
90
-
91
-
92
-
93
-
94
-
95
-
96
-
97
-
98
-
99
-
100
-
101
-
102
-
103
-
104
-
105
-
106
-
107
-
108
-
109
-
110
-
111
-
112
 |
 |