Uniden BCD996P2 English Manual - Page 22
Operation Basics, Navigating The Menu
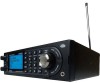 |
View all Uniden BCD996P2 manuals
Add to My Manuals
Save this manual to your list of manuals |
Page 22 highlights
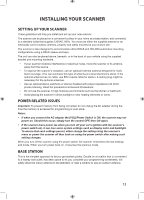
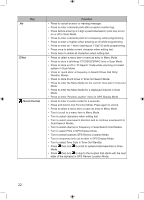
WARNING! Never connect any part of the headphone jack to the antenna jack or connect the radio to an installation where the antenna and audio connection are grounded. This might also damage the scanner. OPERATION BASICS TURNING ON THE SCANNER AND SETTING THE SQUELCH Note: this applies to a fresh scanner right out of the box or one that has been reset with the preprogrammed systems reloaded. Rotate VOL clockwise to turn on the scanner and set the volume to around 6-8. The scanner should start scanning after the welcome screen disappears or will display Nothing to Scan if nothing has been programmed into the scanner, yet-in that event tune to a local weather channel to set the volume. Press HOLD. Find a comfortable volume level. Rotate the SQ knob counterclockwise all the way then clockwise until the noise stops, then one notch more. Press HOLD to resume scanning. Right away you may want to check these settings in the 'Settings' menu. Set Backlight/Dimmer, Adjust Key Beep, Adjust Contrast, and Set Serial Port (if you plan to upload/download). Right out of the box you can do a service search, custom search, weather scan, auto search and store, close call search, or close call auto store. To listen to local systems, you first must program them into the scanner. NAVIGATING THE MENU The scanner's menu lets you select options that let you set up and use the scanner using the MENU key. To select a menu item, rotate the scroll control clockwise or counterclockwise. The currently selected menu item is highlighted with a bar on the display. When the menu item you want to select is highlighted, press E/Yes or (the scroll control) to select it. To back up a level, press MENU. To exit all menus press L/O or SCAN. 18
-
 1
1 -
2
-
3
-
4
-
5
-
6
-
7
-
8
-
9
-
10
-
11
-
12
-
13
-
14
-
15
-
16
-
 17
17 -
 18
18 -
 19
19 -
 20
20 -
 21
21 -
 22
22 -
 23
23 -
 24
24 -
 25
25 -
 26
26 -
 27
27 -
28
-
29
-
30
-
31
-
32
-
33
-
34
-
35
-
36
-
37
-
38
-
39
-
40
-
41
-
42
-
43
-
44
-
45
-
46
-
47
-
48
-
49
-
50
-
51
-
52
-
53
-
54
-
55
-
56
-
57
-
58
-
59
-
60
-
61
-
62
-
63
-
64
-
65
-
66
-
67
-
68
-
69
-
70
-
71
-
72
-
73
-
74
-
75
-
76
-
77
-
78
-
79
-
80
-
81
-
82
-
83
-
84
-
85
-
86
-
87
-
88
-
89
-
90
-
91
-
92
-
93
-
94
-
95
-
96
-
97
-
98
-
99
-
100
-
101
-
102
-
103
-
104
-
105
-
106
-
107
-
108
-
109
-
110
-
111
-
112
 |
 |
