Uniden BCD996P2 English Manual - Page 71
Priority/priority Id/priority Plus Scan
 |
View all Uniden BCD996P2 manuals
Add to My Manuals
Save this manual to your list of manuals |
Page 71 highlights
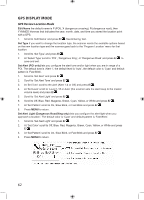
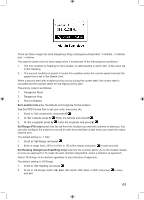
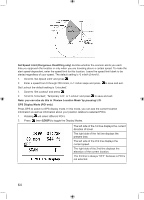
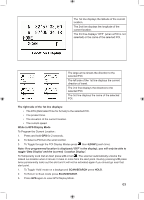
While in Review Location Mode: 1. To Select a Location turn the scroll control. 2. To Return to 'GPS Display' Mode press MENU. 3. To Overwrite and Store the Current Location press and hold GPS for 2 seconds. 4. To Edit the Current Location press E/ . 5. To Toggle the Lockout Status of the Location press L/O to toggle 'Temporary L/O, Locked Out, and Unlocked'. 6. To Unlock all Locations of the Current type (POI, DXG, or DRD) press and hold L/O. 7. To Unlock all Locations of All types press E/ then press and hold L/O. 8. To Return to Scan mode press SCAN/SEARCH. PRIORITY/PRIORITY ID/PRIORITY PLUS SCAN Priority Scan When the scanner is scanning a conventional system, it interrupts scanning (based on the priority check interval setting) to check priority channels for activity. The more channels you have set to priority, the longer the interruption will be. The scanner is unable to scan over 100 priority channels at once. The quick keys for the system(s) and group(s) containing the priority channel(s) have to be enabled (and unlocked) or the scanner will display 'Priority Scan No Channel'. Priority Plus Scan the scanner only scans priority channels in (unlocked) conventional systems with system and group quick keys enabled. The highest priority is for channels in system/site and group quick key 1. The lowest priority is for channels in system/site quick key 90 and group quick key 0. Priority for priority channels in the same channel group follows the order in which the channels were created. Priority ID Scan this function is similar to conventional priority although there is no interruption during the transmission. Priority ID Scan is always on for a system if enabled in the system setting. Priority is checked in between transmissions, when the scanner is receiving the control channel, and during the channel delay period. The scanner can only look for priority IDs in the trunked system it is currently scanning. Preemptive Priority preemptive priority is a feature that works on Motorola systems. If the Motorola system has priority channels, and you assign one of those TGs as priority in the scanner, then when one of those channels becomes active, the scanner will jump to it even if it is on a different system voice channel (i.e. it preempts your current reception). This feature relies on the system itself having talkgroups assigned as priority (so the active channel information is included on voice channel low-speed data). If a talkgroup you assign as priority is not also a priority channel on the transmitting system, then the scanner will use standard trunking priority for the talkgroup. To Use Priority Scan you must first set your priority channels. To Use Priority ID Scan you must also enable Priority ID Scan for each system. To Edit Priority Scan Options: 1. Press MENU. 2. Scroll to 'Priority Scan' and press E/ . 3. Scroll to the options below and press E/ . 4. Press SCAN/SEARCH to return to scanning when done with editing. 67
-
 1
1 -
2
-
3
-
4
-
5
-
6
-
7
-
8
-
9
-
10
-
11
-
12
-
13
-
14
-
15
-
16
-
17
-
18
-
19
-
20
-
21
-
22
-
23
-
24
-
25
-
26
-
27
-
28
-
29
-
30
-
31
-
32
-
33
-
34
-
35
-
36
-
37
-
38
-
39
-
40
-
41
-
42
-
43
-
44
-
45
-
46
-
47
-
48
-
49
-
50
-
51
-
52
-
53
-
54
-
55
-
56
-
57
-
58
-
59
-
60
-
61
-
62
-
63
-
64
-
65
-
 66
66 -
 67
67 -
 68
68 -
 69
69 -
 70
70 -
 71
71 -
 72
72 -
 73
73 -
 74
74 -
 75
75 -
 76
76 -
77
-
78
-
79
-
80
-
81
-
82
-
83
-
84
-
85
-
86
-
87
-
88
-
89
-
90
-
91
-
92
-
93
-
94
-
95
-
96
-
97
-
98
-
99
-
100
-
101
-
102
-
103
-
104
-
105
-
106
-
107
-
108
-
109
-
110
-
111
-
112
 |
 |