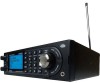
Uniden BCD996P2 English Manual - Page 88
Standard, 800Splinter, Custom, 255 seconds
 |
View all Uniden BCD996P2 manuals
Add to My Manuals
Save this manual to your list of manuals |
Page 88 highlights
20. Scroll to 1 of 3 options and press E/ . 800/900 Standard - The scanner will use the regular old Motorola band plan and return to the menu. 800Splinter - The scanner will use the regular old Motorola band plan and return to the menu. Custom - Allows you to create a custom band plan for rebanded systems. 21. At 'Select Plan' scroll to 'Band Plan 1-6' and press E/ . 22. At 'Set Base Freq' press E/ . 23. At 'Input Lower' enter the lower base frequency and press E/ . 24. At 'Input Upper' enter the upper base frequency and press E/ . 25. Scroll to 'Set Offset' and press E/ . 26. At 'Input Offset' enter the offset and press E/ . 27. At 'Select Polarity' scroll to + or - and press E/ . 28. Scroll to 'Set Spacing' and press E/ . 29. Scroll to the step size and press E/ . 30. Press MENU to return and repeat for each band plan as needed. Press MENU three times to return. 31. Scroll to Set Record and press E/ . 32. Scroll to On or Off and press E/ to save and exit. 33. Scroll to Set Audio AGC and press E/ . See also Adjust Audio AGC. 34. Scroll to 'Analog' and press E/ to toggle on or off. 35. Scroll to 'Digital' and press E/ to toggle on or off. 36. Press MENU to return. 37. Scroll to P25 Waiting Time and press E/ . 38. Set the Wait Time from 0 to 1000 ms and press E/ . 39. Scroll to Search with Scan and press E/ . 40. Scroll to Set Quick Key and press E/ . (Used for 'Search with Scan' only): 1. Scroll to 0-99 or .No for no quick key and press E/ to save and exit. 2. Scroll to Set Startup key and press E/ . 3. Scroll to 0-9 or .No for no startup key and press E/ to save and exit. 4. Scroll to Set Number Tag and press E/ . 5. Enter 0-999 and press E/ . 6. Scroll to Set Lockout and press E/ . 7. (Used for 'Search with Scan' only). 8. Scroll to 'Unlocked', 'Temporary L/O', or 'Lockout' and press E/ to save and exit. 9. Scroll to Set Hold Time (the amount of time the search will search in Scan Mode) and press E/ . 10. Enter the hold time (0-255 seconds) you desire and press E/ to save and exit. (0 will search the whole band before continuing). 84
-
 1
1 -
2
-
3
-
4
-
5
-
6
-
7
-
8
-
9
-
10
-
11
-
12
-
13
-
14
-
15
-
16
-
17
-
18
-
19
-
20
-
21
-
22
-
23
-
24
-
25
-
26
-
27
-
28
-
29
-
30
-
31
-
32
-
33
-
34
-
35
-
36
-
37
-
38
-
39
-
40
-
41
-
42
-
43
-
44
-
45
-
46
-
47
-
48
-
49
-
50
-
51
-
52
-
53
-
54
-
55
-
56
-
57
-
58
-
59
-
60
-
61
-
62
-
63
-
64
-
65
-
66
-
67
-
68
-
69
-
70
-
71
-
72
-
73
-
74
-
75
-
76
-
77
-
78
-
79
-
80
-
81
-
82
-
 83
83 -
 84
84 -
 85
85 -
 86
86 -
 87
87 -
 88
88 -
 89
89 -
 90
90 -
 91
91 -
 92
92 -
 93
93 -
94
-
95
-
96
-
97
-
98
-
99
-
100
-
101
-
102
-
103
-
104
-
105
-
106
-
107
-
108
-
109
-
110
-
111
-
112
 |
 |