Uniden BCD996P2 English Manual - Page 87
Service Search, Editing a Custom Search
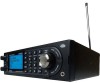 |
View all Uniden BCD996P2 manuals
Add to My Manuals
Save this manual to your list of manuals |
Page 87 highlights
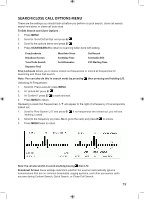
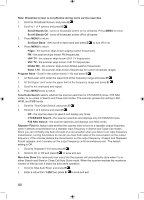
4. Press MENU to exit. Press MENU and scroll to another service search and repeat the previous steps or press L/O to exit. Service Search allows you quickly select and search the scanner's preprogrammed frequencies. See Edit Service Search first. To start a Service Search: 1. Press MENU. 2. Scroll to 'Search for...' and press E/ . 3. At 'Service Search' press E/ . 4. Scroll to: 'Public Safety', 'News', 'Ham Radio', 'Marine', 'Railroad', 'Air', 'CB Radio', 'FRS/ GMRS', 'Racing', 'FM Broadcast', 'Military Air, or 'Special' (itinerant?) and press E/ to start searching. Or, HOLD on any channel/frequency and press then the number key (1-3) assigned to the search. Then see Searching. Editing a Custom Search allows you to edit the 10 custom search ranges. The default custom search range names appear as Custom 1, Custom 2, and so on. See also Band Defaults. To Edit a Custom Search: 1. Press MENU. 2. To Edit a Custom Search, press MENU. 3. Scroll to 'Search for...' and press E/ . 4. Scroll to 'Edit Custom' and press E/ . 5. Scroll to the custom search you want to edit (1-10) and press E/ . 6. Scroll to Edit Name and press E/ . See Entering Text. 7. Scroll to Edit Srch Limit and press E/ . At 'Set Lower Limit', enter the lower limit of the search range and press E/ . At 'Set Upper Limit', enter the upper limit of the search range and press E/ . 8. Scroll to Set Delay Time and press E/ . 9. Scroll to the desired delay time (-10, -5, -2, 0, 1, 2, 5, 10, or 30 secs.) and press E/ to save and exit. A negative delay will force a resume after that number of seconds. 10. Scroll to Set Modulation and press E/ . 11. Scroll to Auto, AM, NFM, FM, WFM, or FMB (Broadcast) then press E/ to save and exit. 12. Scroll to Set Attenuator and press E/ . 13. Scroll to On or Off then press E/ to save and exit. 14. Scroll to Set Step and press E/ . See also Auto Step Sizes. 15. Scroll to Auto, 5, 6.25, 7.5, 8.33, 10, 12.5, 15, 20, 25, 50, or 100 kHz then press E/ to save and exit. 16. Scroll to Set C-Ch only and press E/ . (for Motorola and LTR systems). 17. Scroll to 'C-Ch Only Mode' and press E/ . 18. Scroll to On or Off then press E/ to save and exit. 19. Scroll to 'Set MOT BandPlan' and press E/ . See also Edit Band Plan. 83
-
 1
1 -
2
-
3
-
4
-
5
-
6
-
7
-
8
-
9
-
10
-
11
-
12
-
13
-
14
-
15
-
16
-
17
-
18
-
19
-
20
-
21
-
22
-
23
-
24
-
25
-
26
-
27
-
28
-
29
-
30
-
31
-
32
-
33
-
34
-
35
-
36
-
37
-
38
-
39
-
40
-
41
-
42
-
43
-
44
-
45
-
46
-
47
-
48
-
49
-
50
-
51
-
52
-
53
-
54
-
55
-
56
-
57
-
58
-
59
-
60
-
61
-
62
-
63
-
64
-
65
-
66
-
67
-
68
-
69
-
70
-
71
-
72
-
73
-
74
-
75
-
76
-
77
-
78
-
79
-
80
-
81
-
 82
82 -
 83
83 -
 84
84 -
 85
85 -
 86
86 -
 87
87 -
 88
88 -
 89
89 -
 90
90 -
 91
91 -
 92
92 -
93
-
94
-
95
-
96
-
97
-
98
-
99
-
100
-
101
-
102
-
103
-
104
-
105
-
106
-
107
-
108
-
109
-
110
-
111
-
112
 |
 |