Canon MP370 MultiPASS MP370/360 User's Guide - Page 23
Setting The Paper Thickness Lever
 |
UPC - 013803037111
View all Canon MP370 manuals
Add to My Manuals
Save this manual to your list of manuals |
Page 23 highlights
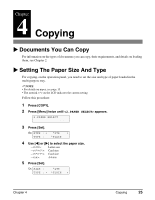
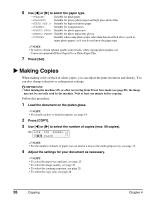
X Setting The Paper Thickness Lever The paper thickness lever adjusts the gap between the print head and the paper to accommodate the thickness of various paper types. Before printing, be sure to set the paper thickness lever. Follow this procedure: 1 Lift the scan unit until it locks into place . • When the machine is ON, the paper output tray automatically opens when the scan unit is lifted . If the paper output tray does not open, press the Open button to open the paper output tray. 1 Click • The print head holder moves to the middle. 2 2 Open the inner cover. 3 Move the paper thickness lever to the right or left according to the paper type 1 A . NOTE • For envelopes and T-shirt Transfer, set the paper thickness lever position to the right. For the other paper types, set it to the left. 4 Close the inner cover. CAUTION • Press the center of the inner cover until the cover locks into place. • Printing with the inner cover open may result in injury. 5 Return the scan unit to its original position. • The LCD displays the following message. INK TANK CHANGED? - YES NO + 6 Press [X]. NOTE • When not replacing an ink tank, be sure to press [X], and no other key. Chapter 3 Paper Handling 21
-
 1
1 -
2
-
3
-
4
-
5
-
6
-
7
-
8
-
9
-
10
-
11
-
12
-
13
-
14
-
15
-
16
-
17
-
 18
18 -
 19
19 -
 20
20 -
 21
21 -
 22
22 -
 23
23 -
 24
24 -
 25
25 -
 26
26 -
 27
27 -
 28
28 -
29
-
30
-
31
-
32
-
33
-
34
-
35
-
36
-
37
-
38
-
39
-
40
-
41
-
42
-
43
-
44
-
45
-
46
-
47
-
48
-
49
-
50
-
51
-
52
-
53
-
54
-
55
-
56
-
57
-
58
-
59
-
60
-
61
-
62
-
63
-
64
-
65
-
66
-
67
-
68
-
69
-
70
-
71
-
72
-
73
-
74
-
75
-
76
-
77
-
78
-
79
-
80
-
81
-
82
-
83
-
84
-
85
-
86
-
87
-
88
-
89
-
90
-
91
-
92
-
93
-
94
-
95
-
96
-
97
-
98
-
99
-
100
-
101
-
102
-
103
-
104
-
105
-
106
-
107
-
108
-
109
-
110
-
111
-
112
-
113
-
114
-
115
-
116
-
117
-
118
-
119
-
120
-
121
-
122
-
123
-
124
-
125
-
126
-
127
-
128
-
129
-
130
-
131
-
132
-
133
-
134
-
135
-
136
-
137
-
138
-
139
-
140
 |
 |
