Canon MP370 MultiPASS MP370/360 User's Guide - Page 45
Setting Vivid Photo Printing, VIVID PHOTO
 |
UPC - 013803037111
View all Canon MP370 manuals
Add to My Manuals
Save this manual to your list of manuals |
Page 45 highlights
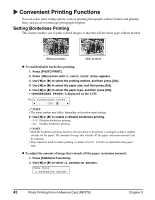
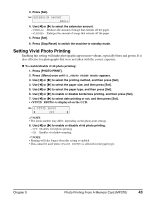
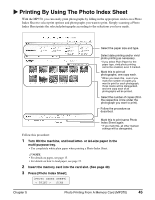
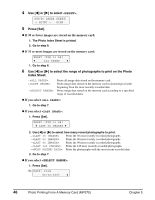
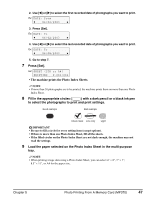
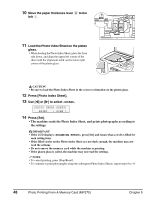
3. Press [Set]. Ex: EXTENSION AMOUNT SMALL 4. Use [W] or [X] to select the extension amount. - : Reduces the amount of image that extends off the paper. - : Enlarges the amount of image that extends off the paper. 5. Press [Set]. 6. Press [Stop/Reset] to switch the machine to standby mode. Setting Vivid Photo Printing Enabling this setting will make photographs appear more vibrant, especially blues and greens. It is also effective for photographs that were not taken with the correct exposure. z To enable/disable vivid photo printing: 1. Press [PHOTO PRINT]. 2. Press [Menu] once until appears. 3. Use [W] or [X] to select the printing method, and then press [Set]. 4. Use [W] or [X] to select the paper size, and then press [Set]. 5. Use [W] or [X] to select the paper type, and then press [Set]. 6. Use [W] or [X] to enable or disable borderless printing, and then press [Set]. 7. Use [W] or [X] to select date printing or not, and then press [Set]. • is displayed on the LCD. Ex: 6.VIVID PHOTO W OFF X NOTE • The menu number may differ, depending on the photo print settings. 8. Use [W] or [X] to enable or disable vivid photo printing. - OFF: Disables vivid photo printing. - ON: Enables vivid photo printing. NOTE • Printing will take longer when this setting is enabled. • This cannot be used when is selected for the paper type. Chapter 5 Photo Printing From A Memory Card (MP370) 43
-
 1
1 -
2
-
3
-
4
-
5
-
6
-
7
-
8
-
9
-
10
-
11
-
12
-
13
-
14
-
15
-
16
-
17
-
18
-
19
-
20
-
21
-
22
-
23
-
24
-
25
-
26
-
27
-
28
-
29
-
30
-
31
-
32
-
33
-
34
-
35
-
36
-
37
-
38
-
39
-
 40
40 -
 41
41 -
 42
42 -
 43
43 -
 44
44 -
 45
45 -
 46
46 -
 47
47 -
 48
48 -
 49
49 -
 50
50 -
51
-
52
-
53
-
54
-
55
-
56
-
57
-
58
-
59
-
60
-
61
-
62
-
63
-
64
-
65
-
66
-
67
-
68
-
69
-
70
-
71
-
72
-
73
-
74
-
75
-
76
-
77
-
78
-
79
-
80
-
81
-
82
-
83
-
84
-
85
-
86
-
87
-
88
-
89
-
90
-
91
-
92
-
93
-
94
-
95
-
96
-
97
-
98
-
99
-
100
-
101
-
102
-
103
-
104
-
105
-
106
-
107
-
108
-
109
-
110
-
111
-
112
-
113
-
114
-
115
-
116
-
117
-
118
-
119
-
120
-
121
-
122
-
123
-
124
-
125
-
126
-
127
-
128
-
129
-
130
-
131
-
132
-
133
-
134
-
135
-
136
-
137
-
138
-
139
-
140
 |
 |
