Canon MP370 MultiPASS MP370/360 User's Guide - Page 52
Press [Color]., Select whether to enable vivid photo printing or not. See
 |
UPC - 013803037111
View all Canon MP370 manuals
Add to My Manuals
Save this manual to your list of manuals |
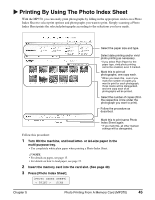
Page 52 highlights
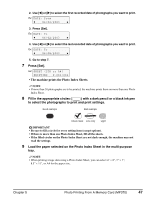
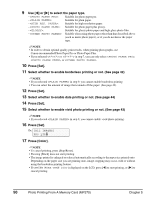
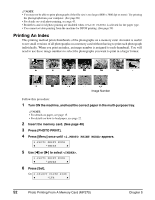
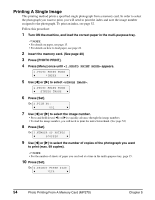
9 Use [W] or [X] to select the paper type. - : Suitable for photo paper pro. - : Suitable for plain paper. - : Suitable for high resolution paper. - : Suitable for photo paper plus glossy. - : Suitable for glossy photo paper and high gloss photo film. - : Suitable when using photo paper other than that described above (such as matte photo paper), or if you do not know the paper type. NOTE • In order to obtain optimal quality print results, when printing photographs, use Canon-recommended Photo Paper Pro or Photo Paper Plus. • If you selected or in step 7, you can only select , , or . 10 Press [Set]. 11 Select whether to enable borderless printing or not. (See page 42) NOTE • If you selected in step 9, you cannot enable borderless printing. • You can select the amount of image that extends off the paper. (See page 42) 12 Press [Set]. 13 Select whether to enable date printing or not. (See page 44) 14 Press [Set]. 15 Select whether to enable vivid photo printing or not. (See page 43) NOTE • If you selected in step 9, you cannot enable vivid photo printing. 16 Press [Set]. Ex: [ALL IMAGES] PRO LTR 17 Press [Color]. NOTE • To cancel printing, press [Stop/Reset]. • Pressing [Black] does not start printing. • The image printed is enlarged or reduced automatically according to the paper size printed onto. Depending on the paper size you are printing onto, image cropping may occur, with or without using the borderless printing feature. • If is displayed on the LCD, press [W] to start printing, or [X] to cancel printing. 50 Photo Printing From A Memory Card (MP370) Chapter 5
-
 1
1 -
2
-
3
-
4
-
5
-
6
-
7
-
8
-
9
-
10
-
11
-
12
-
13
-
14
-
15
-
16
-
17
-
18
-
19
-
20
-
21
-
22
-
23
-
24
-
25
-
26
-
27
-
28
-
29
-
30
-
31
-
32
-
33
-
34
-
35
-
36
-
37
-
38
-
39
-
40
-
41
-
42
-
43
-
44
-
45
-
46
-
 47
47 -
 48
48 -
 49
49 -
 50
50 -
 51
51 -
 52
52 -
 53
53 -
 54
54 -
 55
55 -
 56
56 -
 57
57 -
58
-
59
-
60
-
61
-
62
-
63
-
64
-
65
-
66
-
67
-
68
-
69
-
70
-
71
-
72
-
73
-
74
-
75
-
76
-
77
-
78
-
79
-
80
-
81
-
82
-
83
-
84
-
85
-
86
-
87
-
88
-
89
-
90
-
91
-
92
-
93
-
94
-
95
-
96
-
97
-
98
-
99
-
100
-
101
-
102
-
103
-
104
-
105
-
106
-
107
-
108
-
109
-
110
-
111
-
112
-
113
-
114
-
115
-
116
-
117
-
118
-
119
-
120
-
121
-
122
-
123
-
124
-
125
-
126
-
127
-
128
-
129
-
130
-
131
-
132
-
133
-
134
-
135
-
136
-
137
-
138
-
139
-
140
 |
 |
