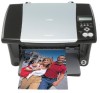
Canon MP370 MultiPASS MP370/360 User's Guide - Page 80
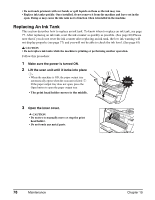
Replacing An Ink Tank, Make sure the power is turned ON., Lift the scan unit until it locks into place
 |
UPC - 013803037111
View all Canon MP370 manuals
Add to My Manuals
Save this manual to your list of manuals |
Page 80 highlights
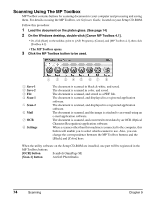
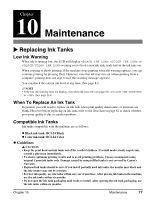
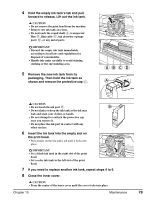
• Do not touch printouts with wet hands or spill liquids on them as the ink may run. • Replace ink tanks quickly. Once installed, do not remove it from the machine and leave out in the open. Doing so may cause the ink tank not to function when reinstalled in the machine. Replacing An Ink Tank This section describes how to replace an ink tank. To know when to replace an ink tank, see page 77. After replacing an ink tank, reset the ink counter as quickly as possible. (See page 80) Please note that if you do not reset the ink counter after replacing an ink tank, the low ink warning will not display properly (see page 77) and you will not be able to check the ink level. (See page 81) CAUTION • Do not replace ink tanks while the machine is printing or performing another operation. Follow this procedure: 1 Make sure the power is turned ON. 2 Lift the scan unit until it locks into place . • When the machine is ON, the paper output tray automatically opens when the scan unit is lifted . If the paper output tray does not open, press the Open button to open the paper output tray. • The print head holder moves to the middle. 1 2 Click 3 Open the inner cover. CAUTION • Do not try to manually move or stop the print head holder. • Do not touch any metal parts. 78 Maintenance Chapter 10
-
 1
1 -
2
-
3
-
4
-
5
-
6
-
7
-
8
-
9
-
10
-
11
-
12
-
13
-
14
-
15
-
16
-
17
-
18
-
19
-
20
-
21
-
22
-
23
-
24
-
25
-
26
-
27
-
28
-
29
-
30
-
31
-
32
-
33
-
34
-
35
-
36
-
37
-
38
-
39
-
40
-
41
-
42
-
43
-
44
-
45
-
46
-
47
-
48
-
49
-
50
-
51
-
52
-
53
-
54
-
55
-
56
-
57
-
58
-
59
-
60
-
61
-
62
-
63
-
64
-
65
-
66
-
67
-
68
-
69
-
70
-
71
-
72
-
73
-
74
-
 75
75 -
 76
76 -
 77
77 -
 78
78 -
 79
79 -
 80
80 -
 81
81 -
 82
82 -
 83
83 -
 84
84 -
 85
85 -
86
-
87
-
88
-
89
-
90
-
91
-
92
-
93
-
94
-
95
-
96
-
97
-
98
-
99
-
100
-
101
-
102
-
103
-
104
-
105
-
106
-
107
-
108
-
109
-
110
-
111
-
112
-
113
-
114
-
115
-
116
-
117
-
118
-
119
-
120
-
121
-
122
-
123
-
124
-
125
-
126
-
127
-
128
-
129
-
130
-
131
-
132
-
133
-
134
-
135
-
136
-
137
-
138
-
139
-
140
 |
 |
