Canon PowerShot A75 Software starter Guide Ver.16/17 - Page 20
Programs] or [All Programs], followed by [Canon Utilities]
 |
View all Canon PowerShot A75 manuals
Add to My Manuals
Save this manual to your list of manuals |
Page 20 highlights
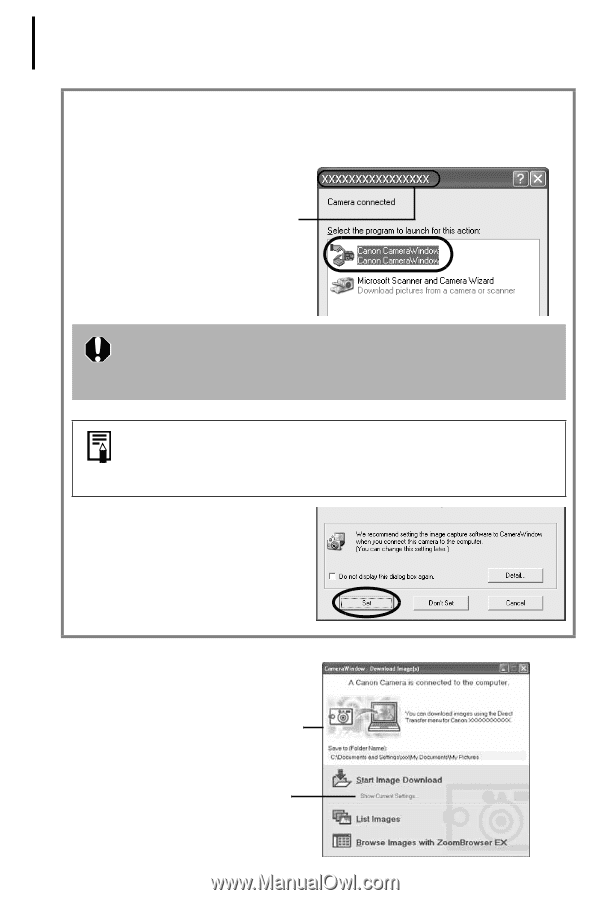
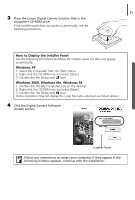
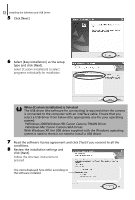
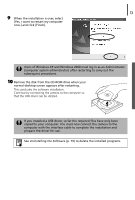
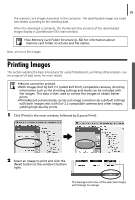
16 Downloading Images to the Computer Perform the following settings the first time you connect the camera to the computer. These procedures are not required from the second time onward. 1. Select [Canon CameraWindow] when a dialog (Events dialog) similar to that on the right displays and click [OK]. Your camera model name or "Canon Camera" will appear here. If the Events dialog fails to display, click the [Start] menu and select [Programs] or [All Programs], followed by [Canon Utilities], [CameraWindow], and [CameraWindow Set Auto-Launch]. Proceed to Step 2. A dialog allowing you to select the camera model will display if a camera and a memory card reader are connected at the same time. Confirm that your model name or "Canon Camera" is displayed and click [OK]. 2. Click [Set]. You must repeat Steps 1 and 2 above the next time you connect when you select the Don't Set option. 2 Download the images. Use the computer or camera to download images described as follows. The window may appear slightly different with some camera models. You can confirm information such as the destination folder for images.
-
 1
1 -
2
-
3
-
4
-
5
-
6
-
7
-
8
-
9
-
10
-
11
-
12
-
13
-
14
-
 15
15 -
 16
16 -
 17
17 -
 18
18 -
 19
19 -
 20
20 -
 21
21 -
 22
22 -
 23
23 -
 24
24 -
 25
25 -
26
-
27
-
28
-
29
-
30
-
31
-
32
-
33
-
34
-
35
-
36
-
37
-
38
-
39
-
40
-
41
-
42
-
43
-
44
-
45
-
46
-
47
-
48
-
49
-
50
-
51
-
52
-
53
-
54
-
55
-
56
-
57
-
58
-
59
-
60
-
61
-
62
-
63
-
64
-
65
-
66
-
67
-
68
-
69
-
70
-
71
-
72
-
73
-
74
-
75
-
76
-
77
-
78
-
79
-
80
-
81
-
82
-
83
-
84
-
85
-
86
-
87
-
88
-
89
-
90
-
91
-
92
-
93
-
94
-
95
-
96
-
97
-
98
-
99
-
100
-
101
-
102
-
103
-
104
-
105
-
106
 |
 |