Canon PowerShot A75 Software starter Guide Ver.16/17 - Page 38
and the Image Quality Adjustment Window
 |
View all Canon PowerShot A75 manuals
Add to My Manuals
Save this manual to your list of manuals |
Page 38 highlights
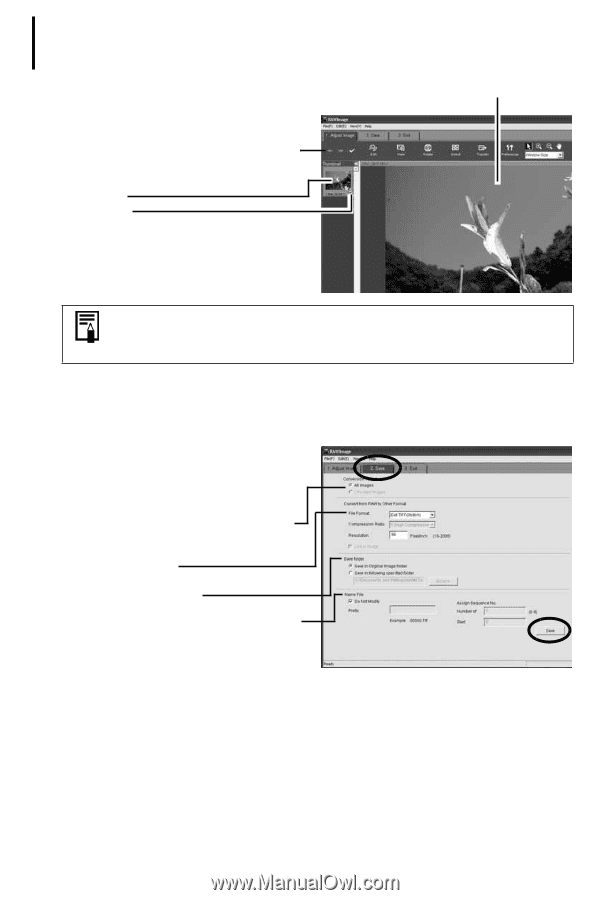
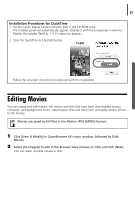
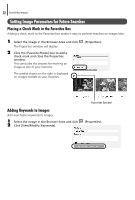
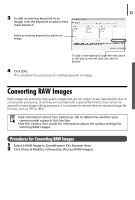
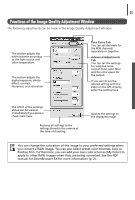
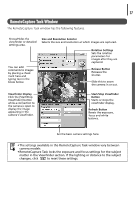
34 Converting RAW Images The main window, the Navigator window and the Image Quality Adjustment Window will display. Use the buttons here to switch between images and display modes, rotate images, and set the conversion parameters. Thumbnail Check Mark Main Window If the navigator window or the Image Quality Adjustment Window do not display, click the [View] menu and select [Show Navigator] or [Show Image Quality Adjustment Window]. 3 Adjust the image quality as required in the Image Quality Adjustment Window. This window is explained in the Functions of the Image Quality Adjustment Window section. 4 Click the [2. Save] tab, set the file format and destination, and then click [Save]. Select [All Images] or [Checked Images] (images checked in the main window) to apply the common conversion settings. Select a file format Set the file destination You can also change the image file name This will convert the image. 5 Click the [3. Exit] tab and click [OK].
-
 1
1 -
2
-
3
-
4
-
5
-
6
-
7
-
8
-
9
-
10
-
11
-
12
-
13
-
14
-
15
-
16
-
17
-
18
-
19
-
20
-
21
-
22
-
23
-
24
-
25
-
26
-
27
-
28
-
29
-
30
-
31
-
32
-
 33
33 -
 34
34 -
 35
35 -
 36
36 -
 37
37 -
 38
38 -
 39
39 -
 40
40 -
 41
41 -
 42
42 -
 43
43 -
44
-
45
-
46
-
47
-
48
-
49
-
50
-
51
-
52
-
53
-
54
-
55
-
56
-
57
-
58
-
59
-
60
-
61
-
62
-
63
-
64
-
65
-
66
-
67
-
68
-
69
-
70
-
71
-
72
-
73
-
74
-
75
-
76
-
77
-
78
-
79
-
80
-
81
-
82
-
83
-
84
-
85
-
86
-
87
-
88
-
89
-
90
-
91
-
92
-
93
-
94
-
95
-
96
-
97
-
98
-
99
-
100
-
101
-
102
-
103
-
104
-
105
-
106
 |
 |