Creative 70EM896106000 Owners Manual
Creative 70EM896106000 - Professional E-MU 1616M PCI Digital Audio System Sound Card Manual
 |
UPC - 054651126893
View all Creative 70EM896106000 manuals
Add to My Manuals
Save this manual to your list of manuals |
Creative 70EM896106000 manual content summary:
- Creative 70EM896106000 | Owners Manual - Page 1
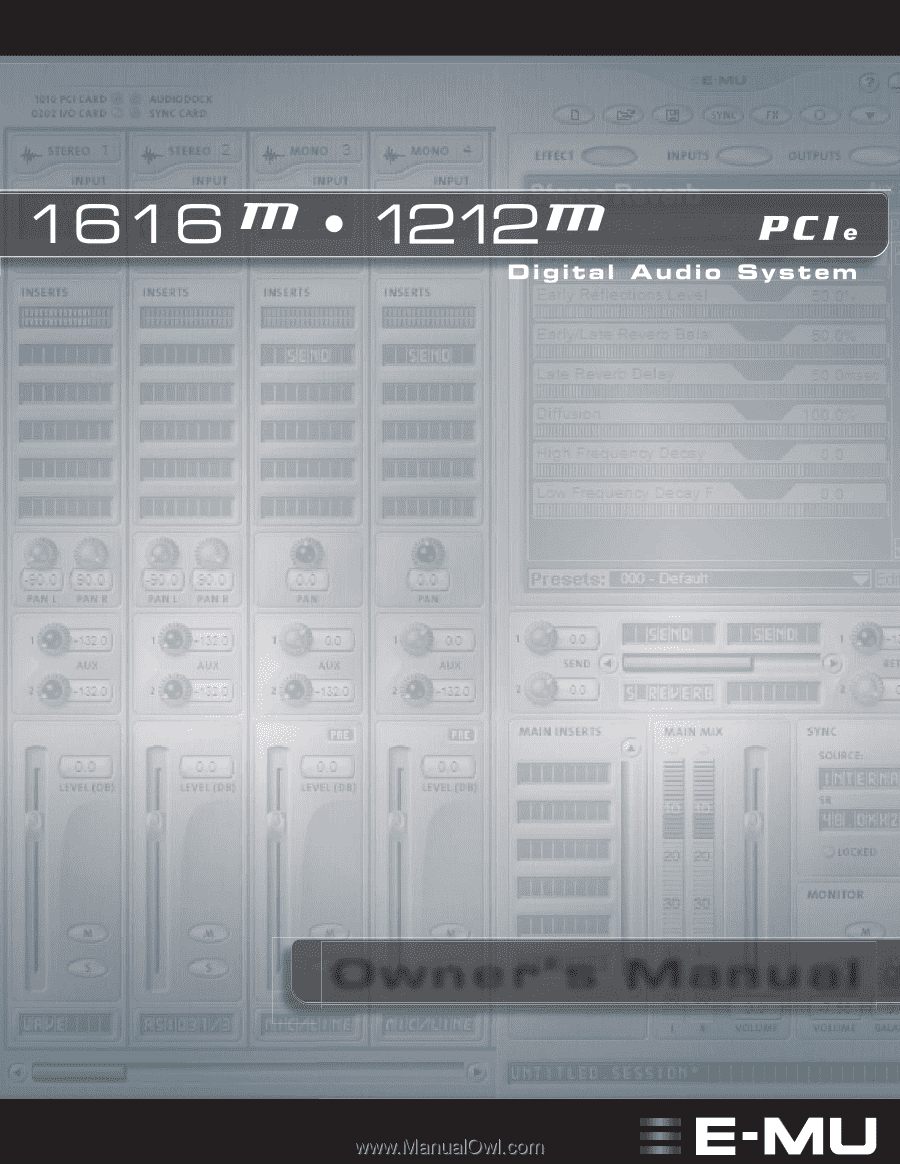
Owner's Manual E-MU PCIe Digital Audio Systems 1 - Creative 70EM896106000 | Owners Manual - Page 2
E-MU 1616m / 1212m PCIe Digital Audio System Owner's Manual © 2009 E-MU Systems All Rights Reserved Software Version: 2.20 E-MU World Headquarters E-MU Systems 1500 Green Hills Road Scotts Valley, CA 95066 USA Europe Creative Labs Ballycoolin Business Park Blanchardstown Dublin 15 IRELAND 2 E-MU - Creative 70EM896106000 | Owners Manual - Page 3
Installing the E-MU 1010 PCIe Card 15 1212m Owners - Install the 0202 Daughter Card 16 Connecting the MicroDock 16 WARNING: E-MU 0202 & MicroDock 17 Software Installation 18 Installing the E-MU 1010 PatchMix Software and Drivers 18 Windows XP, Windows XP x64, Windows Vista, Windows Vista x64 - Creative 70EM896106000 | Owners Manual - Page 4
MicroDock & 2 In/Outs 26 EDI Connector (Card 26 1212m System Connections 28 Output Connections 28 Mixer Window 30 Mixer Block Diagram 30 Pre Fader or Post Fader 30 E-MU Icon in the Windows Taskbar WAVE Files 38 Windows Media Player/DVD/Surround Sound Playback 38 Insert Creative Professional - Creative 70EM896106000 | Owners Manual - Page 5
80 Gate ...81 Applications 81 Parameters ...82 Threshold ...82 Release Time 82 Max Gain Reduction 82 Lookahead ...82 Level Meter 83 Gain Reduction Meter 83 E-MU PCIe Digital Audio Systems 5 - Creative 70EM896106000 | Owners Manual - Page 6
using PowerFX 106 Tips for using Freeze Mode on Cubase LE 106 Using E-MU PowerFX with WaveLab and SoundForge 106 E-MU VST E-Wire 107 E-Delay Compensator 108 E-Delay Compensator Use 109 E-Delay Units 115 Balanced Cables 115 Unbalanced Cables 115 Adapter Cables 116 6 Creative Professional - Creative 70EM896106000 | Owners Manual - Page 7
1/4" Adapters 116 Cinch (RCA) to 1/4" Adapters 116 Digital Cables 116 AES/EBU to S/PDIF Cable Adapter 116 Grounding ...117 Phantom Power 117 Appearance Settings in Windows 117 Technical Specifications 118 Internet References 124 Forums ...124 Index 127 E-MU PCIe Digital Audio Systems 7 - Creative 70EM896106000 | Owners Manual - Page 8
8 Creative Professional - Creative 70EM896106000 | Owners Manual - Page 9
equipped PC. 1616m PCIe System Components E-MU 1616m PCIe • E-MU 1010 PCIe Card • MicroDockm • EDI (E-MU Digital Interface Cable) • +48VDC AC Adapter • MIDI Breakout Cable • Digital Audio System Software/Driver Installation CD-ROM • Production Tools Software Bundle CD-ROM • Quick Start Guide Inputs - Creative 70EM896106000 | Owners Manual - Page 10
Introduction Welcome! 1212m PCIe System Components E-MU 1212m • E-MU 1010 PCIe Card • E-MU 0202 I/O Daughter Card • 0202 I/O Card Cable • (2) MIDI Adapter Cables • Digital Audio System Software/Driver Installation CD-ROM • Production Tools Software Bundle CD-ROM • Quick Start Guide Inputs & Outputs - Creative 70EM896106000 | Owners Manual - Page 11
, they don't add latency when you record. You MicroDock is connected. Sync Daughter Card The legacy Sync Daughter Card is NOT compatible with the 1010 PCIe card. The Sync Daughter Card was an option for the original 1010 PCI card and provided Word Clock, SMPTE and MIDI Time Code output. E-MU PCIe - Creative 70EM896106000 | Owners Manual - Page 12
mixing are hardware-based, you can record using effects with near zero-latency. You can even record a dry signal while monitoring yourself with your E-MU digital audio system. You can find all of this, plus other helpful information, at the E-MU Website: http://www.emu.com. Creative Professional - Creative 70EM896106000 | Owners Manual - Page 13
. (Once you are sure that the E-MU card works properly, your old sound card can be reinstalled if desired.) 2. Install the E-MU 1010 PCIe x1 card in your computer. Go there. 3. Install the 0202 Daughter Card (if applicable). Go there. 4. Connect the MicroDock (if applicable). 5. Install the PatchMix - Creative 70EM896106000 | Owners Manual - Page 14
back of the box and on the 1010 PCIe Card. This number can help EMU Customer Service troubleshoot any problems you may encounter-by writing the number down now, you'll avoid surfaces, the E-MU 1010 PCIe board and the interfaces are susceptible to electrostatic discharge, commonly known as "static - Creative 70EM896106000 | Owners Manual - Page 15
don't use screws to secure PCIe cards. In this case, follow the instructions that came with your computer. x16 PCIe x1 PCIe (mPoanyCnyIooSut rbleocoptmrsepsuetnetr) PCIe x16 PCPICeIe x1 x1 (mPoanyCnyIooSut rbleocoptmrsepsuetnetr) 5. Align the E-MU 1010 PCIe card with the slot and press gently - Creative 70EM896106000 | Owners Manual - Page 16
. Doing so may result in permanent damage to either your computer, the E-MU 1010 or both. Note: The 1616m MicroDocks cannot be used with older 1010 PCI cards identified by the 1394 FireWire port. EDI 1010 PCIe Card The Headphone Volume Control is the Power Switch. 16 Creative Professional - Creative 70EM896106000 | Owners Manual - Page 17
computer, the E-MU 1010 PCIe card, or the MicroDock. 2 - Installation Connecting the MicroDock WARNING: E-MU 0202 & MicroDock If you have both the E-MU 0202 I/O card and the MicroDock, DO NOT connect both to the E-MU 1010 PCIe card. They cannot be used together. E-MU PCIe Digital Audio Systems - Creative 70EM896106000 | Owners Manual - Page 18
E-MU 1010 PCIe card device drivers or applications. Note About Windows Logo Testing When you install the 1616M PCIe drivers, you will see a dialog box informing you either that the driver has not been certified by Windows Hardware Quality Labs (WHQL), or that the driver is signed by Creative Labs - Creative 70EM896106000 | Owners Manual - Page 19
The E-MU 1010 PCIe Card The E-MU 1010 PCIe Card The E-MU 1010 PCIe card is the heart of the system and contains E-MU's powerful E-DSP chip. The powerful hardware DSP on this card leaves more power free on your CPU for additional software plug-ins and other tasks. Important When the MicroDock is - Creative 70EM896106000 | Owners Manual - Page 20
PCIe Card & Interfaces The 0202 Daughter Card Daughter Card The 0202 Daughter card is the companion card for E-MU 1010 systems which don't include the MicroDock. The 0202 Daughter card that came with your 0202 Daughter card to the miniDIN connectors on the card. The adapter cables convert the mini - Creative 70EM896106000 | Owners Manual - Page 21
The MicroDock The MicroDock connects to the E-MU 1010 PCIe card via the EDI cable. The MicroDock provides (4) balanced analog inputs, (2) microphone preamp inputs, (6) balanced line-level analog outputs, (3) stereo 1/8" outputs for connecting powered computer speakers, (2) MIDI inputs, (2) MIDI - Creative 70EM896106000 | Owners Manual - Page 22
3 - PCIe Card & Interfaces The MicroDock Front Panel Connections Preamp Section The front panel mono Mic/Line inputs A & B can be used as balanced microphone power and may be damaged. Check the specifications and requirements of your microphone before using phantom power. Creative Professional - Creative 70EM896106000 | Owners Manual - Page 23
interface. See the chart below or go here for additional information. 3 - PCIe Card & Interfaces The MicroDock Important: When using any type of digital I/O such as S/PDIF or ADAT, you need it. Note: PatchMix DSP does not support AC3 passthrough at this time. E-MU PCIe Digital Audio Systems 23 - Creative 70EM896106000 | Owners Manual - Page 24
3 - PCIe Card & Interfaces The MicroDock Front Panel Analog Connections Mic Use the 4 5 6 7 8 9 0 . MIDI In MIDI In MIDI Sound Module IO VOLUME TRANSPOSE MASTER/GLOBAL SAMPLE SAMPLE MANAGEMENT DIGITAL PROCESSING MULTIMODE PRESET TUV WXY 7 8 9 QZ 0 MIDI Creative Professional - Creative 70EM896106000 | Owners Manual - Page 25
3 stereo pairs) Alternate Outputs (same as outputs 1-3) Connect to E-MU 1010 PCIe Card Line Level Analog Inputs 4 balanced 24-bit, line-level, analog inputs (pro or consumer) in the I/O preferences screen. 3 - PCIe Card & Interfaces The MicroDock Important! It's a good idea to MUTE the Dock In - Creative 70EM896106000 | Owners Manual - Page 26
and MIDI Out of your synth to MIDI In of the MicroDock MIDI cable. EDI Connector (Card) Connects the MicroDock to the E-MU 1010 PCIe card using a CAT5-type computer cable. The cable supplied with the MicroDock is specially shielded to prevent unwanted RF emissions. Basic Connections MIDI - Creative 70EM896106000 | Owners Manual - Page 27
2R Gnd MIDI Cable 3L 3R Out 1 2 3 3 - PCIe Card & Interfaces The MicroDock Right 48 VDC + - Front EDI Left Rear Sub-Woofer ( the outputs for 5.1 surround sound playback. Multichannel WAVE to Surround Sound Speaker Channels (using the . E-MU PCIe Digital Audio Systems Right Rear 27 - Creative 70EM896106000 | Owners Manual - Page 28
3 - PCIe Card & Interfaces 1212m System Connections connect to various types of equipment. The diagram is applicable to either the 1616M or1212M. 1212M Analog Output Connections To Mixer Inputs 1/4" male to 1/4" male 1/8" female adapter Stereo Powered Desktop Speakers 28 Creative Professional - Creative 70EM896106000 | Owners Manual - Page 29
Sends Volume Fader Solo/Mute Buttons User Definable Scribble Strip WAVE Strip Controls Windows Source Audio (Direct Sound, Windows Media, etc.) Main Inserts Current Session Name Main Mix Output Volume & Meters E-MU PCIe Digital Audio Systems "TV" Screen Aux Effects Section Sync/ Sample Rate - Creative 70EM896106000 | Owners Manual - Page 30
analog/digital inputs, or Host inputs such as ASIO or Direct Sound. Mixer strips can be added or deleted as necessary. This dragging the left edge of the frame. Effects Palette This popup window is invoked by pressing the FX button in the toolbar. Iconic representations Creative Professional - Creative 70EM896106000 | Owners Manual - Page 31
PatchMix DSP and driver settings. Closes the PatchMix DSP background program, disabling use of all audio I/O from the E-MU hardware. Open the Sessions Settings window. Session Settings. Global Preferences Calls up the Global Preferences window. About PatchMix DSP Right-Click on the E-MU logo to - Creative 70EM896106000 | Owners Manual - Page 32
desired sample rate Session Description Add your own comment or note about the Session Check this if you want to edit the New Session. 32 Creative Professional - Creative 70EM896106000 | Owners Manual - Page 33
copying or saving sessions into the "Session Templates" folder (Program Files\Creative Professional\E-MU PatchMix DSP\Session Templates). There is also a Comment area that you System Settings window shown below. Click the tabs to select System or I/O options. E-MU PCIe Digital Audio Systems 33 - Creative 70EM896106000 | Owners Manual - Page 34
at the system sample rate and can be embedded into a data stream such as S/PDIF or ADAT. Common symptoms of unsynced digital audio include, random clicks or pops in the audio or failure of the digital too weak? Use -10 Input setting. Output too weak? Use +4 Output setting Creative Professional - Creative 70EM896106000 | Owners Manual - Page 35
.) • Optical Input Select Selects between ADAT or optical S/PDIF for the MicroDock ADAT Input. The coaxial S/PDIF input is disabled when S/PDIF optical is Optical Output Select Selects between ADAT or optical S/PDIF for the MicroDock ADAT Output. The coaxial S/PDIF Output is disabled when S/PDIF - Creative 70EM896106000 | Owners Manual - Page 36
turn RED if the input is not available. (The MicroDock may be disconnected.) • Physical Input = Hardware (Analog/SPDIF/ADAT). • Host Input = Software (Direct Sound, WAV, ASIO source) Insert Section Inserts You can scribble strip and type a name of up to eight characters. 36 Creative Professional - Creative 70EM896106000 | Owners Manual - Page 37
Out 1-16, ASIO Out 1/2, 3/4, etc. Direct Sound, WDM, Windows Media (Sound generated or handled by Windows.) WAVE 1/2 - Default stereo source such as game sound, CD player, beep sounds, etc. WAVE 3/4, WAVE 5/6, WAVE 7/8 - Additional WDM channels E-MU PCIe Digital Audio Systems CDs & MP3s: The WAVE - Creative 70EM896106000 | Owners Manual - Page 38
Windows Media Player/DVD/Surround Sound Playback Select DirectSound as the output format when using Windows Media Player and other DVD player applications. Eight channel WAVE playback supports either 5.1, 6.1 or 7.1 surround audio. However, the 1616M Tip = RL Ring = RR) N/A 38 Creative Professional - Creative 70EM896106000 | Owners Manual - Page 39
calibrated sine wave or noise source, which can be used to track down audio problems. See "Test Tone/Signal Generator Insert". Working with Inserts The Inserts are one can completely change how the effects sound. To rearrange the order of effects or inserts, simply drag and drop them into - Creative 70EM896106000 | Owners Manual - Page 40
section. A pop-up dialog box appears. 2. Select "Insert Send/Return (Physical Output and Input)" from the list of options. The following dialog box appears. 40 Creative Professional - Creative 70EM896106000 | Owners Manual - Page 41
Host Output. The ASIO Direct Monitor Send/Return is unique in that it utilizes ASIO 2.0 zero-latency monitoring. In order to utilize this feature, Direct Monitoring must be enabled in the audio recording right, mono pan controls to center, and the fader to 0dB. E-MU PCIe Digital Audio Systems 41 - Creative 70EM896106000 | Owners Manual - Page 42
70 60 50 40 30 20 10 --12dB Each bar of the meter equals 1dB. The yellow bars begin at -12dB below full scale. 42 Creative Professional - Creative 70EM896106000 | Owners Manual - Page 43
is receiving a proper signal level. They're also great for troubleshooting, since you can place them virtually anywhere in the mixer. To external device (synthesizer, instrument, preamp, etc.) feeding the MicroDock. The meter should be in the yellow region most of MU PCIe Digital Audio Systems 43 - Creative 70EM896106000 | Owners Manual - Page 44
and will "hard clip" if the signal exceeds 0dBFS. Hard clipping sounds bad and will ruin your recording. Hard clipping occurs because at can be driven past 0dB, with some degradation of the signal. The MicroDock includes a pair of analog Soft Limiters on the preamp inputs, which Creative Professional - Creative 70EM896106000 | Owners Manual - Page 45
Pink noise and white noise are both useful as wideband sound sources for measuring speaker response. Using the Test Tone and Meter Inserts for Troubleshooting Sometimes it's useful to have a continuous tone to , simply drag and drop it into the desired position. E-MU PCIe Digital Audio Systems 45 - Creative 70EM896106000 | Owners Manual - Page 46
over the Effect you want to Solo (in the Insert section). A pop-up dialog box appears. 2. Select Solo Insert from the list of options. 46 Creative Professional - Creative 70EM896106000 | Owners Manual - Page 47
route one of the Aux buses to the Monitor out to create a monitor mix while sending the main mix off to your audio recording software. E-MU PCIe Digital Audio Systems 47 - Creative 70EM896106000 | Owners Manual - Page 48
Fader Mute Send Amount Amt Aux Bus 1 Send Amount Amt Aux Bus 2 Side Chain Side Chain Return Amount Return Amount Main / Monitor Bus Output 48 Creative Professional - Creative 70EM896106000 | Owners Manual - Page 49
side or the other. The Mute button does just what you would expect-press the button and the sound from that channel is cut off. Pressing the Solo button while the Mute button is pressed allows text, thus naming the strip, i.e. "vocals", "bass", "drums" and so on. E-MU PCIe Digital Audio Systems 49 - Creative 70EM896106000 | Owners Manual - Page 50
that indicates the signal strength for the main mix. The Monitor section has a volume, balance, and a mute control to cut off the monitor output. 50 Creative Professional - Creative 70EM896106000 | Owners Manual - Page 51
coming from. The bypass or solo buttons at the top of the display are available for Send/Return type inserts only. Send Destination Return Source E-MU PCIe Digital Audio Systems 51 - Creative 70EM896106000 | Owners Manual - Page 52
allows you to view the Host (ASIO or WAVE) outputs of the mixer. See "Insert Section" for information on how to connect the inserts. 52 Creative Professional - Creative 70EM896106000 | Owners Manual - Page 53
abrupt sample rate change or unplugging of physical master source). PatchMix DSP is tolerant to minor drifting within the supported rates of 44.1k, 48k, 88.2k, 96k, 176.4k and 192k, but if the sample an external clock source to make sure you are samplelocked. E-MU PCIe Digital Audio Systems 53 - Creative 70EM896106000 | Owners Manual - Page 54
Output Mute This button completely cuts off the monitor output and provides a convenient way to instantly kill all sound without having to re-adjust the monitor level later. When the telephone rings, just hit the monitor be used to control the Monitor Output Level on PatchMix. Creative Professional - Creative 70EM896106000 | Owners Manual - Page 55
Button Effect Categories Core Effects (Single Effect) Multi-Effects (Effect Combinations) Distortion Lo-fi Drums & Percussion Environment Equalization Guitar Multi Effects Reverb Synths & Keys Vocal E-MU PCIe Digital Audio Systems 55 - Creative 70EM896106000 | Owners Manual - Page 56
new preset name for your FX Chain. The order of effects in a chain can have a big effect on the sound. This icon will appear when you drag an effect to a new location. Trim pots, peak meters and test tone type in a new preset name and click OK. Your preset is now saved. 56 Creative Professional - Creative 70EM896106000 | Owners Manual - Page 57
or modify effects later during mixdown. This way if you don't like the way the effect sounds, you can change or modify the effect without having to perform the part again. Input rename the folder or Cancel to cancel the operation. E-MU PCIe Digital Audio Systems 5 - Effects The Effects Palette 57 - Creative 70EM896106000 | Owners Manual - Page 58
FX presets into the E-MU PatchMix DSP folder (normally located here: "C:\Program Files\Creative Professional\E-MU PatchMix DSP\Core Effects"). from the FX Palette. 2. Select Import FX Category. The "Browse for Folder" window appears. 3. Choose the folder where the FX Chains you wish to import are - Creative 70EM896106000 | Owners Manual - Page 59
very useful when adjusting the effect parameters. Method #1 1. Click on the Insert Effect (in the Insert section). 2. Click the Solo button in the TV display. E-MU PCIe Digital Audio Systems 59 - Creative 70EM896106000 | Owners Manual - Page 60
. A pop-up dialog box appears asking you to name the new preset. 5. Name the preset and click OK. Your new preset is now saved. 60 Creative Professional - Creative 70EM896106000 | Owners Manual - Page 61
new settings. Core Effects and Effects Presets The Core Effects cannot be removed or copied. Effect presets (stored in "C:\Program Files\Creative Professional\E-MU 1616\E-MU PatchMix DSP\Effect Presets") can be copied, e-mailed or shared like any other computer file. 5 - Effects FX Edit Screen Hint - Creative 70EM896106000 | Owners Manual - Page 62
factors which determine the total number of effects available for use at any given time: Tank Memory and DSP Instructions. Using too much of either resource will cause effects to be unavailable (grayed out) in have used all your effects and need another, try saving the session. Creative Professional - Creative 70EM896106000 | Owners Manual - Page 63
Corner Frequency Sets the frequency where the signal begins getting cut or boosted with the Gain control. Range: 80Hz to 16kHz 5 - Effects Core Effects Descriptions E-MU PCIe Digital Audio Systems 63 - Creative 70EM896106000 | Owners Manual - Page 64
frequencies or to a negative value to cut out frequencies. 5. Widen the Bandwidth to create a more natural sound. 6. Adjust and tweak as needed. Parameter Description High Shelf Gain Sets the amount of cut (-) or boost with the Low Gain control. Range: 50Hz to 800Hz 64 Creative Professional - Creative 70EM896106000 | Owners Manual - Page 65
to +24dB Low Corner Freq. Sets the frequency where the signal begins getting cut or boosted with the Low Gain control. Range: 50Hz to 800Hz E-MU PCIe Digital Audio Systems 65 - Creative 70EM896106000 | Owners Manual - Page 66
and down with each new note. The Attack controls the rate of the note-on sweep. As the input sound fades away, the filter sweeps back at a rate determined by the Release setting. The wah direction allows to 2400Hz Sets the width of the bandpass filter. Range: 1Hz to 800Hz 66 Creative Professional - Creative 70EM896106000 | Owners Manual - Page 67
delay time in this range, an effect called chorus is created, which gives the illusion of multiple sound sources. A slight amount of feedback serves to increase the effect. A very slow LFO rate is waveform between left and right channels. Range: -180° to +180° E-MU PCIe Digital Audio Systems 67 - Creative 70EM896106000 | Owners Manual - Page 68
signal exceeds the threshold. Release controls how fast the gain is returned to its normal setting after the signal has fallen below the threshold 68 Creative Professional - Creative 70EM896106000 | Owners Manual - Page 69
to preserve the attack transients in guitar, bass or drums while allowing the sustain portion of the sound to be compressed. Longer release times are generally used to reduce the so called "pumping" effect signal. Shows the amount of gain reduction being applied. E-MU PCIe Digital Audio Systems 69 - Creative 70EM896106000 | Owners Manual - Page 70
Sets the frequency of the output bandpass filter. Range: 80Hz to 24kHz Sets the width of the output bandpass filter. Range: 80Hz to 24kHz 70 Creative Professional - Creative 70EM896106000 | Owners Manual - Page 71
comb filter. Since the flanger is a type of filter, it works best with harmonically rich sounds. 5 - Effects Core Effects Descriptions A low frequency oscillator is included to slowly change the delay between the left and right sweeps. Range: -180° to +180° E-MU PCIe Digital Audio Systems 71 - Creative 70EM896106000 | Owners Manual - Page 72
signal by a fixed number of Hz which causes the harmonics to lose their normal relationship. The more common pitch shifter, in contrast, preserves the harmonic relationships of the signal and so is better suited to channel. Sets pitch shift up or down for the right channel. 72 Creative Professional - Creative 70EM896106000 | Owners Manual - Page 73
in a very subtle and musical way. This effect is a digital recreation of the leveling amps of yesteryear. The leveling amp uses a large to be used in situations where delay does not pose a problem, such as mastering a mix or compressing prerecorded stereo material. MU PCIe Digital Audio Systems 73 - Creative 70EM896106000 | Owners Manual - Page 74
five Lite Reverbs can be used at once. Decay time defines the time it takes for the reflected sound from the room to decay or die away. The diagram below shows a generalized reverberation envelope. Early the early reflections and the reverberation cloud. Range: 0% to 100% 74 Creative Professional - Creative 70EM896106000 | Owners Manual - Page 75
, allow you to make the most efficient use of the effect memory resource. Long delays produce echoes, short delays can be used for resonant flanging and comb filter effects or create monotone robotic-sounding effects (Hint: use feedback). Stereo signals are summed E-MU PCIe Digital Audio Systems 75 - Creative 70EM896106000 | Owners Manual - Page 76
static organ tones a pipe organ type of animation, but this distinctive sound became a legend in its own right. Spinning a sound around the room creates a doppler pitch shift along with many other complex speeds with acceleration and deceleration as the speed changes. 76 Creative Professional - Creative 70EM896106000 | Owners Manual - Page 77
, 1960's era, 2-speaker combo amplifier. 4 x 12 Combo Modeled from an American, 1960's era, 4-speaker amplifier set. Metal Stack 1 & 2 Modeled from a modern era, power amplifier stack. E-MU PCIe Digital Audio Systems 77 - Creative 70EM896106000 | Owners Manual - Page 78
lengths, from 100 ms to 1.5 seconds, allow you to make the most efficient use of the effect memory resource. Because the left and right channels can have different delay times, you can create a panning effect Damps high frequencies in the feedback path. Range: 0% to 100% 78 Creative Professional - Creative 70EM896106000 | Owners Manual - Page 79
have more diffusion than bare rooms. High frequency energy tends to fade away first as a sound is dissipated in a room. The High Frequency Damping parameter adjusts the time it takes for the which low frequencies die away. Range: -10.0 to +3.0 damping factor E-MU PCIe Digital Audio Systems 79 - Creative 70EM896106000 | Owners Manual - Page 80
them using an LFO. Phonemes are the consonants and vowels we use in articulating speech sounds and these sounds are very distinctive and evocative. 30 different phonemes are available and these can be shifted Selects the waveform for the morph: Sinusoid, Triangle, Sawtooth 80 Creative Professional - Creative 70EM896106000 | Owners Manual - Page 81
Release time parameter is very useful in order to achieve the least-obtrusive, most natural-sounding gating effect, which is highly dependent on the specific program material being processed. The gate by a signal level below the Threshold (with Lookahead Off). E-MU PCIe Digital Audio Systems 81 - Creative 70EM896106000 | Owners Manual - Page 82
solo vocal or instrument, where the complete lack of any sound between voiced segments sounds unnatural. For these applications, setting Max Gain Reduction somewhere For applications where this additional 1 millisecond latency is a problem, the Lookahead can be turned Off. 82 Creative Professional - Creative 70EM896106000 | Owners Manual - Page 83
through the Gate in its turn-on state. Except for the possibility of the 1 millisecond lookahead latency, the Gate behaves exactly as a straight wire in this turned-on state. Values less than 0dB the Release time parameter. 5 - Effects Core Effects Descriptions E-MU PCIe Digital Audio Systems 83 - Creative 70EM896106000 | Owners Manual - Page 84
next Attack phase. Threshold Release Threshold 0 dB Original Waveform 0 dB Sustain Level Release Level Attack Decay Time Time Reshaped Waveform Hold Release Time Time 84 Creative Professional - Creative 70EM896106000 | Owners Manual - Page 85
below the Release Threshold before transitioning to the Release phase. This extension of the Sustain phase is useful for altering the tail dynamics of the sound. E-MU PCIe Digital Audio Systems 85 - Creative 70EM896106000 | Owners Manual - Page 86
curves exactly as for the Attack Curve parameter, except that the selected curves apply to both the Decay and Release phases of the ADSR. 86 Creative Professional - Creative 70EM896106000 | Owners Manual - Page 87
The Multimode EQ is built from an array of filter sections that can be configured to support: • Lowpass filters with up to 48dB/octave rolloff • Highpass filters with up to 48dB and lowpass with a sharp transition region. 5 - Effects Core Effects Descriptions E-MU PCIe Digital Audio Systems 87 - Creative 70EM896106000 | Owners Manual - Page 88
can have up to a 48dB/octave rolloff slope. The Highpass Rolloff, Highpass Frequency and Highpass Resonance parameters are available for editing the filter response. 88 Creative Professional - Creative 70EM896106000 | Owners Manual - Page 89
one filter relative to the other. In normal use, the Highpass Freq parameter will be higher than the Lowpass Freq parameter, creating a bandcut-type response: E-MU PCIe Digital Audio Systems 89 - Creative 70EM896106000 | Owners Manual - Page 90
is symmetrical and is limited to a maximum of 24dB/octave. The Resonance is also common to both filter sections . Resonance = 0 1182ddBB//6oodccBtt/oct 24dB/oct Band Cut The Resonance is also common to both filter sections . Resonance = 0 121842dddB6BB/d//oBoo/cctcottct 90 Creative Professional - Creative 70EM896106000 | Owners Manual - Page 91
on some compressors. These are typically used to align the input signal range to the compression threshold. Instead, we've allowed the RFX Compressor's Threshold E-MU PCIe Digital Audio Systems 91 - Creative 70EM896106000 | Owners Manual - Page 92
"steered" to the appropriate range of the input signal. The output Gain parameter also operates - either manually or automatically - over the unusually large range of -60dB to +60dB in order to renormalize the fast attack/ release results in an effective peak limiter. 92 Creative Professional - Creative 70EM896106000 | Owners Manual - Page 93
to switch back and forth to the Gain parameter in order to perform the gain compensation manually. Auto Makeup looks at the gain reduction implied by the setting of the Threshold and (see the Neg Compression parameter on page 97. Use manual Gain control instead. E-MU PCIe Digital Audio Systems 93 - Creative 70EM896106000 | Owners Manual - Page 94
the Soft Knee at 60dB creates a compressor whose ratio varies smoothly from gentle compression at lower signal levels to peak limiting at maximum signal level Creative Professional - Creative 70EM896106000 | Owners Manual - Page 95
inserted into the sidechain path containing the level detector. This delay can be used intentionally to cause the compressor to miss signal peaks, retaining the E-MU PCIe Digital Audio Systems 5 - Effects Core Effects Descriptions 95 - Creative 70EM896106000 | Owners Manual - Page 96
sound. In general, both positive and negative values of this parameter are useful for applications where the normal envelope of a signal is being creatively level has fallen below it. This emulates the signal "memory effect" exhibited by some electro-optical compressors. In Compression-dependent - Creative 70EM896106000 | Owners Manual - Page 97
the Gain parameter to keep these restored peaks from clipping the compressor output since Auto Makeup gain doesn't automatically take the compressor tail into account. E-MU PCIe Digital Audio Systems 97 - Creative 70EM896106000 | Owners Manual - Page 98
to keep the background from masking the beginning of foreground sounds. Creating a Ducker Ducker Background Signal Pan -90 (L) right signal paths are gain controlled by a parallel sidechain path common to both inputs that contains the compressor's level detector. This Creative Professional - Creative 70EM896106000 | Owners Manual - Page 99
msec (Increase the time to hear more "stick" sound.) • Release: 60 msec (Adjust according to the tempo sound) • Ratio: 4:1 • Attack: 8 msec • Release: 70 msec • Gain: +4dB (adjust according to the sound) . • Threshold: -37dB (adjust according to the sound) • Ratio: 2:1 or 3:1 • Attack: Instantaneous - Creative 70EM896106000 | Owners Manual - Page 100
& Cymbals: This is a special effect which reverses the volume envelope of cymbals and drums. • Threshold: -37dB (adjust according to the sound) • Ratio: -1:1 (Neg. Compression enabled) • Attack: Instantaneous • Release: 200 msec • Gain: +19dB • Soft Knee: Off • Gate: Off • Comp. Lookahead: -24 msec - Creative 70EM896106000 | Owners Manual - Page 101
Creating a De-esser: A de-esser reduces the sibilance or "sss" sound in a vocal part. The sidechain feature of the RFX Compressor makes it possible Off • Max. Compression: Unlimited You can boost the low frequencies in the right channel to create a "deboomer." E-MU PCIe Digital Audio Systems 101 - Creative 70EM896106000 | Owners Manual - Page 102
MU PowerFX with Vista with little to no problems, we are unable to offer support for using PowerFX with Vista. E-MU PowerFX incorporate smart time alignment technology which automatically compensates for system latencies . See the "User Preset Section" for more information 102 Creative Professional - Creative 70EM896106000 | Owners Manual - Page 103
E-MU PowerFX plug-in window shown on the previous page. Setup E-MU PowerFX 4. Make sure the blue button is illuminated, indicating that E-MU MU PowerFX on any other audio tracks. That's it. Using any driver other than "E-MU ASIO" may produce undesirable results when using E-MU PowerFX. E-MU PCIe - Creative 70EM896106000 | Owners Manual - Page 104
Write" by pressing the WRITE button on, illuminating it. (Refers to Cubase LE. If you are using another appli- cation, refer to the documentation.) 3. Bring the E-MU PowerFX window Cubase LE manual for more specific information about automation editing. E-MU PowerFX Resource Creative Professional - Creative 70EM896106000 | Owners Manual - Page 105
E-MU PowerFX Compatibility Chart Application Name Steinberg Cubase VST 5.1 Steinberg Cubase SX 1 Steinberg Cubase SX 2 Steinberg Cubase LE Steinberg Cubase Extra Buffers Off Off Off Off Off Off Off Either Off Off Off Any On Off Off 5 - Effects E-MU PowerFX E-MU PCIe Digital Audio Systems 105 - Creative 70EM896106000 | Owners Manual - Page 106
E-MU PowerFX and the PatchMix DSP effects are strictly realtime processes. When EMU problems. E-MU PowerFX can be used with these applications if you are willing to follow certain guidelines. General Tips for Rendering using PowerFX • If an error message occurs, increase the "ASIO Buffer Latency - Creative 70EM896106000 | Owners Manual - Page 107
drop the effects you want to use into this strip. • For hosts that don't support automatic delay compensation, a manual delaycompensation plug-in can be inserted in Cubase tracks or channels that don't use E-Wire An ASIO Send routes the audio back to E-Wire VST. E-MU PCIe Digital Audio Systems 107 - Creative 70EM896106000 | Owners Manual - Page 108
and forth between the VST host application and the E-MU sound hardware, a delay in the audio stream is support this automatic compensation. A host will support PowerFX and E-Wire's plug-in delay compensation if it supports the SetInitialDelay feature of the VST 2.0 specification. 108 Creative - Creative 70EM896106000 | Owners Manual - Page 109
. The E-Delay Compensator utility plug-in is used to manually compensate for the transfer delay for hosts that DO NOT support plug-in delay compensation. The E-Delay Compensator plug-in that doesn't use a PowerFX or E-Wire send. 5 - Effects E-MU VST E-Wire E-MU PCIe Digital Audio Systems 109 - Creative 70EM896106000 | Owners Manual - Page 110
5 - Effects E-MU VST E-Wire E-Delay Units Parameter The Units value in the E-Delay track to a group or bus and use a single E-Delay Compensator on the output of the group or bus. • E-MU Digital Audio System and PatchMix DSP must be installed. • E-Wire is compatible with Cubase SX/SL/LE, Cubase VST, - Creative 70EM896106000 | Owners Manual - Page 111
these higher sample rates, you must have other equipment that supports the Sonorus S/MUX standard. Selecting a 176/192k Session a session template containing the desired I/O from the New Session window. Once you have selected one of the three session types, OK. E-MU PCIe Digital Audio Systems 111 - Creative 70EM896106000 | Owners Manual - Page 112
Analog I/O, but lose ADAT Line Inputs 2L/2R & Line Outputs 3L/3R E-MU 1616m Hardware Inputs & Outputs at 176.4k or 192k Source Input Analog & SPDIF ADAT 2 2 2 0 2 8 Output SPDIF & ADAT 2 2 2 2 2 8 Input Analog & ADAT 2 2 2 2 0 8 Output Analog & ADAT 2 2 2 2 0 8 112 Creative Professional - Creative 70EM896106000 | Owners Manual - Page 113
WDM recording and playback is supported at all PatchMix sample rates. The behavior of the driver with respect to PatchMix sample mismatched, NO AUDIO will be produced or recorded. In other words, the WDM driver does not perform sample rate conversion of any kind when PatchMix is running at 88 - Creative 70EM896106000 | Owners Manual - Page 114
are two commonly used digital converter to the E-MU Digital Audio System Master and the E-MU DAS is the Slave MicroDock is connected to the 1010 PCIe card, the digital I/O on the PCIe card is disabled. Use the digital I/O on the MicroDock MU Digital Audio System is the Master and the external A/D - D/A is - Creative 70EM896106000 | Owners Manual - Page 115
best audio performance, although unbalanced cables are fine for most applications. If you're having problems with hum and noise or just want the best possible performance, use balanced cables. Balanced cable, the less hum and noise is introduced into the system. E-MU PCIe Digital Audio Systems 115 - Creative 70EM896106000 | Owners Manual - Page 116
This simple adapter cable allows you to receive AES/EBU digital audio via the S/PDIF input on the E-MU 1010 PCIe card or MicroDock. This cable may also work to connect S/PDIF out from the 1010 PCIe card (or MicroDock) to the AES/EBU input of other digital equipment. 116 Creative Professional - Creative 70EM896106000 | Owners Manual - Page 117
. Failure to observe this common practice can result in a Pins 2 and 3 of the MicroDock microphone inputs each carry +48 volts Coupling capacitors at the input of the MicroDock block the +48 volt DC component Windows Adjusting the "Performance Options"in Windows 1. Open the Windows Control Panel. - Creative 70EM896106000 | Owners Manual - Page 118
PCIe x1Card • 3.3V I/O • PCIe Bus-Mastering DMA subsystem reduces CPU use Hardware DSP • 100MIPs custom 32-bit audio DSP with 67-bit accumulator. (double precision, with 3 headroom bits) • Zero-latency direct hardware monitoring with effects OpAmps NJM2068M, NJM2122, NJM2082 (JRC) Drivers Common - Creative 70EM896106000 | Owners Manual - Page 119
Specifications: 1616m PCIe ANALOG LINE OUTPUTS (6) Type Balanced, low-noise, 2-pole low-pass differential filter, AC- -110dB (.0003%) (20Hz - 20kHz, gain +40dB): ±0.08 dB +48V 5dB max compression (software selectable) E-MU PCIe Digital Audio Systems 6 - Appendix Technical Specifications 119 - Creative 70EM896106000 | Owners Manual - Page 120
6 - Appendix Technical Specifications Specifications: 1616m PCIe HEADPHONE AMP D/A Converter: Gain Range: Maximum Output Power: Output Impedance: Frequency Response: Dynamic Range: (44.1kHz - 192kHz) Optical S/PDIF (44.1kHz - 96kHz) Coaxial S/PDIF (44.1kHz - 192kHz) 120 Creative Professional - Creative 70EM896106000 | Owners Manual - Page 121
, with 3 headroom bits) • Zero-latency direct hardware monitoring with effects OpAmps NJM2068M (JRC) Drivers • ASIO2. WDM/MME/DirectSound. x64 Drivers • WDM: 2-in/8-out at 44.1kHz, 48kHz, 88.2kHz, 96kHz • WDM: 2-in/4-out at 176.4kHz & 192kHz EDI (E-MU Digital Interface) Proprietary 64-channel - Creative 70EM896106000 | Owners Manual - Page 122
, 96 kHz, 176.4kHz, 192 kHz ADAT (44.1kHz - 192kHz) External Sample Rate Sync: Optical S/PDIF (44.1kHz - 96kHz) Coaxial S/PDIF (44.1kHz - 192kHz) 122 Creative Professional - Creative 70EM896106000 | Owners Manual - Page 123
Dimensions & Weight MicroDock MicroDock Weight: Dimensions: 2.27 lb / 1.03 kg L: 7.75" L: 196 mm W: 7.25" W: 184 mm H: 1.625" H: 41 mm 1010 PCIe Card Weight: Dimensions: 0.30lb / 0.14kg L: 6.5" / 165 mm H: 4.0" / 102 mm 0202 Daughter Card Weight: Dimensions: 0.25lb / 0.10kg L: 5.04" / 128mm 6 - Creative 70EM896106000 | Owners Manual - Page 124
Recording Forum http://homerecording.com/bbs/ search.php?s=d866b60193933eb726660e7b d90dfb27 Sound-On-Sound Forum http://soundonsound.com/forum/ Studio-Central Cafe Forum http://studio-central.com/phpbb/search.php Sound Card Benchmarking http://audio.rightmark.org 124 Creative Professional - Creative 70EM896106000 | Owners Manual - Page 125
any changes or modifications not expressly approved in this manual could void your authority to operate this equipment. Note if not installed and used in accordance with the instructions, may cause harmful interference to radio communications. Internet References E-MU PCIe Digital Audio Systems 125 - Creative 70EM896106000 | Owners Manual - Page 126
). Notice If static electricity or electromagnetism causes data transfer to discontinue midway (fail), restart the application or disconnect and connect the Firewire cable again. 126 Creative Professional - Creative 70EM896106000 | Owners Manual - Page 127
Daughter Card 20 MicroDock 25 Anti-Pop Protection 118, 121 Appearance, improving 117 ASIO direct monitor 41 send 39 Attack basic compressor 68 curve, reshaper 86 threshold, reshaper 85 Auto Makeup, RFX compressor 93 Auto Volume Pedal, using reshaper effect 84 Automating PowerFX 104 E-MU PCIe Digital - Creative 70EM896106000 | Owners Manual - Page 128
, 22 Direct Sound Source 37 Distortion 70 Doppler, effect using Rotary 76 Drivers 118, 121 Drivers, installing 18 MU 0202 Daughter Card, description 20, 28 E-MU 1010 PCIe Card description 19 installing 15 E-MU Icon, in taskbar 31 Envelope, reverberation 74, 79 E-Wire 107 Exit PatchMix DSP Services - Creative 70EM896106000 | Owners Manual - Page 129
card 16 E-MU 1010 PCIe card 15 Interface ADAT 20, 23 EDI 26 MIDI 20, 26 required cable 17 S/PDIF 19, 22 Invert, polarity 44 J Jitter Spec 1212M system 121 1616M system 118 E-MU PCIe Digital Audio Systems L Label, scribble strip 49 Latency input levels using 43 MicroDock connecting 16 inputs/outputs - Creative 70EM896106000 | Owners Manual - Page 130
Controls 36 Parametric EQ, setting up 64 PatchMix DSP, disabling 31 PCIe Specification 118, 121 Peak Limiter 92 Peak Meters 42 Phantom Power 22 CDs 37 Post Gain, leveling amp 73 Power Switch, MicroDock 16 PowerFX 102 resource availability 104 under Vista 102 Preamp microphone Creative Professional - Creative 70EM896106000 | Owners Manual - Page 131
E-MU PCIe Digital Audio Systems Index S Specifications 1212M System 121 1616M System 118 Stereo Delays 78 Stereo Reverb 79 Strip add new 37 input type 36 mixer 36 Submixing 47 Subwoofer Filter, using multimode filter 87 Surround Sound 31 Trim Pot Insert 44 Troubleshooting, using test tone & - Creative 70EM896106000 | Owners Manual - Page 132
& Playback Behavior 113 Wet/Dry Mix, effects 59 White Noise Generator 45 Window Appearance Settings 117 Windows Media Player 37 multichannel sound playback 38 Windows Taskbar, E-MU icon 31 Windows Vista 18 Windows XP 18 X XLR Connector 22 Z Zero-Latency Monitoring 41 132 Creative Professional
-
 1
1 -
 2
2 -
 3
3 -
 4
4 -
 5
5 -
 6
6 -
 7
7 -
8
-
9
-
10
-
11
-
12
-
13
-
14
-
15
-
16
-
17
-
18
-
19
-
20
-
21
-
22
-
23
-
24
-
25
-
26
-
27
-
28
-
29
-
30
-
31
-
32
-
33
-
34
-
35
-
36
-
37
-
38
-
39
-
40
-
41
-
42
-
43
-
44
-
45
-
46
-
47
-
48
-
49
-
50
-
51
-
52
-
53
-
54
-
55
-
56
-
57
-
58
-
59
-
60
-
61
-
62
-
63
-
64
-
65
-
66
-
67
-
68
-
69
-
70
-
71
-
72
-
73
-
74
-
75
-
76
-
77
-
78
-
79
-
80
-
81
-
82
-
83
-
84
-
85
-
86
-
87
-
88
-
89
-
90
-
91
-
92
-
93
-
94
-
95
-
96
-
97
-
98
-
99
-
100
-
101
-
102
-
103
-
104
-
105
-
106
-
107
-
108
-
109
-
110
-
111
-
112
-
113
-
114
-
115
-
116
-
117
-
118
-
119
-
120
-
121
-
122
-
123
-
124
-
125
-
126
-
127
-
128
-
129
-
130
-
131
-
132
 |
 |
Owner’s Manual
Owner’s Manual