Creative 70EM896106000 Owners Manual - Page 45
Test Tone/Signal Generator Insert, To Add a Trim Pot Insert
 |
UPC - 054651126893
View all Creative 70EM896106000 manuals
Add to My Manuals
Save this manual to your list of manuals |
Page 45 highlights
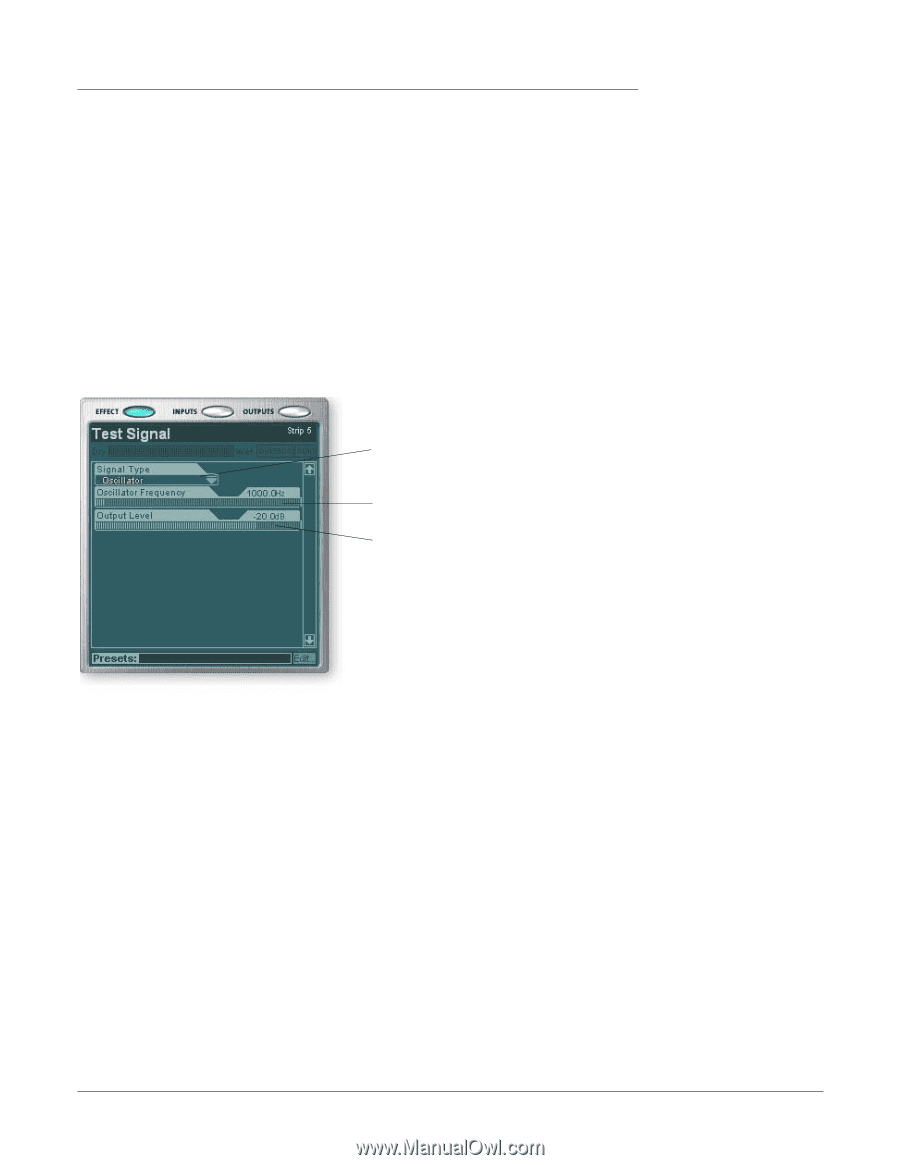
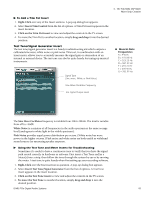
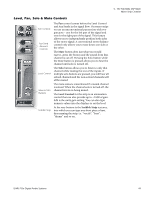
4 - The PatchMix DSP Mixer Mixer Strip Creation To Add a Trim Pot Insert 1. Right-Click over any of the Insert sections. A pop-up dialog box appears. 2. Select Insert Trim Control from the list of options. A Trim Pot insert appears in the insert location. 3. Click on the Trim Pot insert to view and adjust the controls in the TV screen. 4. To move the Trim Pot to another location, simply drag and drop it into the desired position. Test Tone/Signal Generator Insert The test tone/signal generator insert is a handy troubleshooting aid which outputs a calibrated sine wave, white noise or pink noise. This tool, in combination with an insert meter, allows you to accurately measure the signal gain or attenuation of an internal or external device. The test tone can also be quite handy for tuning up musical instruments. Signal Type (Sine wave, White or Pink Noise) Musical Note Frequencies A = 440 Hz B = 493.88 Hz C = 523.25 Hz D = 587.33 Hz E = 659.26 Hz F = 698.46 Hz G = 783.99 Hz Sine Wave Oscillator Frequency Test Signal Output Level The Sine Wave Oscillator frequency is variable from 20Hz-20kHz. The level is variable from off to +30dB. White Noise is a mixture of all frequencies in the audio spectrum at the same average level (analogous to white light in the visible spectrum). Pink Noise provides equal power distribution per octave. (White noise has more power in the higher octaves.) Pink noise and white noise are both useful as wideband sound sources for measuring speaker response. Using the Test Tone and Meter Inserts for Troubleshooting Sometimes it's useful to have a continuous tone to verify that you have the signal path routed correctly in hardware or software. First insert a Test Tone and/or a Meter(s) into a strip, then follow the tone through the system by ear or by moving the meter. A test tone is quite handy when first setting up your recording software. 1. Right-Click over the Insert section in question. A pop-up dialog box appears. 2. Select Insert Test Tone/Signal Generator from the list of options. A Test Tone insert appears in the insert location. 3. Click on the Test Tone insert to view and adjust the controls in the TV screen. 4. To move the Test Tone to another location, simply drag and drop it into the desired position. E-MU PCIe Digital Audio Systems 45
-
 1
1 -
2
-
3
-
4
-
5
-
6
-
7
-
8
-
9
-
10
-
11
-
12
-
13
-
14
-
15
-
16
-
17
-
18
-
19
-
20
-
21
-
22
-
23
-
24
-
25
-
26
-
27
-
28
-
29
-
30
-
31
-
32
-
33
-
34
-
35
-
36
-
37
-
38
-
39
-
 40
40 -
 41
41 -
 42
42 -
 43
43 -
 44
44 -
 45
45 -
 46
46 -
 47
47 -
 48
48 -
 49
49 -
 50
50 -
51
-
52
-
53
-
54
-
55
-
56
-
57
-
58
-
59
-
60
-
61
-
62
-
63
-
64
-
65
-
66
-
67
-
68
-
69
-
70
-
71
-
72
-
73
-
74
-
75
-
76
-
77
-
78
-
79
-
80
-
81
-
82
-
83
-
84
-
85
-
86
-
87
-
88
-
89
-
90
-
91
-
92
-
93
-
94
-
95
-
96
-
97
-
98
-
99
-
100
-
101
-
102
-
103
-
104
-
105
-
106
-
107
-
108
-
109
-
110
-
111
-
112
-
113
-
114
-
115
-
116
-
117
-
118
-
119
-
120
-
121
-
122
-
123
-
124
-
125
-
126
-
127
-
128
-
129
-
130
-
131
-
132
 |
 |