D-Link DFL-260 Product Manual - Page 388
L2TP Roaming Clients with Certificates, Enable Proxy ARP on
 |
UPC - 790069296802
View all D-Link DFL-260 manuals
Add to My Manuals
Save this manual to your list of manuals |
Page 388 highlights
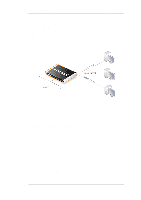
9.2.6. L2TP Roaming Clients with Certificates Chapter 9. VPN • Set Tunnel Protocol to L2TP. • Set Outer Interface Filter to ipsec_tunnel. • Set Outer Server IP to ip_ext. • Select the Microsoft Point-to-Point Encryption allowed. Since IPsec encryption is used this can be set to be None only, otherwise double encryption will degrade throughput. • Set IP Pool to l2tp_pool. • Enable Proxy ARP on the int interface to which the internal network is connected. • Make the interface a member of a specific routing table so that routes are automatically added to that table. Normally the main table is selected. 6. For user authentication: • Define a Local User DB object (let's call this object TrustedUsers). • Add individual users to TrustedUsers. This should consist of at least a username and password combination. The Group string for a user can also be specified. This is explained in the same step in the IPsec Roaming Clients section above. • Define a User Authentication Rule: Agent PPP Auth Source Local Src Network all-nets Interface l2tp_tunnel Client Source IP all-nets (0.0.0.0/0) 7. To allow traffic through the L2TP tunnel the following rules should be defined in the IP rule set: Action Allow NAT Src Interface l2tp_tunnel ipsec_tunnel Src Network l2tp_pool l2tp_pool Dest Interface any ext Dest Network int_net all-nets Service All All The second rule would be included to allow clients to surf the Internet via the ext interface on the NetDefend Firewall. The client will be allocated a private internal IP address which must be NATed if connections are then made out to the public Internet via the NetDefend Firewall. 8. Set up the client. Assuming Windows XP, the Create new connection option in Network Connections should be selected to start the New Connection Wizard. The key information to enter in this wizard is: the resolvable URL of the NetDefend Firewall or alternatively its ip_ext IP address. Then choose Network > Properties. In the dialog that opens choose the L2TP Tunnel and select Properties. In the new dialog that opens select the Networking tab and choose Force to L2TP. Now go back to the L2TP Tunnel properties, select the Security tab and click on the IPsec Settings button. Now enter the pre-shared key. 9.2.6. L2TP Roaming Clients with Certificates If certificates are used with L2TP roaming clients instead of pre-shared keys then the differences in the setup described above are: 388
-
 1
1 -
2
-
3
-
4
-
5
-
6
-
7
-
8
-
9
-
10
-
11
-
12
-
13
-
14
-
15
-
16
-
17
-
18
-
19
-
20
-
21
-
22
-
23
-
24
-
25
-
26
-
27
-
28
-
29
-
30
-
31
-
32
-
33
-
34
-
35
-
36
-
37
-
38
-
39
-
40
-
41
-
42
-
43
-
44
-
45
-
46
-
47
-
48
-
49
-
50
-
51
-
52
-
53
-
54
-
55
-
56
-
57
-
58
-
59
-
60
-
61
-
62
-
63
-
64
-
65
-
66
-
67
-
68
-
69
-
70
-
71
-
72
-
73
-
74
-
75
-
76
-
77
-
78
-
79
-
80
-
81
-
82
-
83
-
84
-
85
-
86
-
87
-
88
-
89
-
90
-
91
-
92
-
93
-
94
-
95
-
96
-
97
-
98
-
99
-
100
-
101
-
102
-
103
-
104
-
105
-
106
-
107
-
108
-
109
-
110
-
111
-
112
-
113
-
114
-
115
-
116
-
117
-
118
-
119
-
120
-
121
-
122
-
123
-
124
-
125
-
126
-
127
-
128
-
129
-
130
-
131
-
132
-
133
-
134
-
135
-
136
-
137
-
138
-
139
-
140
-
141
-
142
-
143
-
144
-
145
-
146
-
147
-
148
-
149
-
150
-
151
-
152
-
153
-
154
-
155
-
156
-
157
-
158
-
159
-
160
-
161
-
162
-
163
-
164
-
165
-
166
-
167
-
168
-
169
-
170
-
171
-
172
-
173
-
174
-
175
-
176
-
177
-
178
-
179
-
180
-
181
-
182
-
183
-
184
-
185
-
186
-
187
-
188
-
189
-
190
-
191
-
192
-
193
-
194
-
195
-
196
-
197
-
198
-
199
-
200
-
201
-
202
-
203
-
204
-
205
-
206
-
207
-
208
-
209
-
210
-
211
-
212
-
213
-
214
-
215
-
216
-
217
-
218
-
219
-
220
-
221
-
222
-
223
-
224
-
225
-
226
-
227
-
228
-
229
-
230
-
231
-
232
-
233
-
234
-
235
-
236
-
237
-
238
-
239
-
240
-
241
-
242
-
243
-
244
-
245
-
246
-
247
-
248
-
249
-
250
-
251
-
252
-
253
-
254
-
255
-
256
-
257
-
258
-
259
-
260
-
261
-
262
-
263
-
264
-
265
-
266
-
267
-
268
-
269
-
270
-
271
-
272
-
273
-
274
-
275
-
276
-
277
-
278
-
279
-
280
-
281
-
282
-
283
-
284
-
285
-
286
-
287
-
288
-
289
-
290
-
291
-
292
-
293
-
294
-
295
-
296
-
297
-
298
-
299
-
300
-
301
-
302
-
303
-
304
-
305
-
306
-
307
-
308
-
309
-
310
-
311
-
312
-
313
-
314
-
315
-
316
-
317
-
318
-
319
-
320
-
321
-
322
-
323
-
324
-
325
-
326
-
327
-
328
-
329
-
330
-
331
-
332
-
333
-
334
-
335
-
336
-
337
-
338
-
339
-
340
-
341
-
342
-
343
-
344
-
345
-
346
-
347
-
348
-
349
-
350
-
351
-
352
-
353
-
354
-
355
-
356
-
357
-
358
-
359
-
360
-
361
-
362
-
363
-
364
-
365
-
366
-
367
-
368
-
369
-
370
-
371
-
372
-
373
-
374
-
375
-
376
-
377
-
378
-
379
-
380
-
381
-
382
-
 383
383 -
 384
384 -
 385
385 -
 386
386 -
 387
387 -
 388
388 -
 389
389 -
 390
390 -
 391
391 -
 392
392 -
 393
393 -
394
-
395
-
396
-
397
-
398
-
399
-
400
-
401
-
402
-
403
-
404
-
405
-
406
-
407
-
408
-
409
-
410
-
411
-
412
-
413
-
414
-
415
-
416
-
417
-
418
-
419
-
420
-
421
-
422
-
423
-
424
-
425
-
426
-
427
-
428
-
429
-
430
-
431
-
432
-
433
-
434
-
435
-
436
-
437
-
438
-
439
-
440
-
441
-
442
-
443
-
444
-
445
-
446
-
447
-
448
-
449
-
450
-
451
-
452
-
453
-
454
-
455
-
456
-
457
-
458
-
459
-
460
-
461
-
462
-
463
-
464
-
465
-
466
-
467
-
468
-
469
-
470
-
471
-
472
-
473
-
474
-
475
-
476
-
477
-
478
-
479
-
480
-
481
-
482
-
483
-
484
-
485
-
486
-
487
-
488
-
489
-
490
-
491
-
492
-
493
-
494
-
495
-
496
-
497
-
498
-
499
-
500
-
501
-
502
-
503
-
504
-
505
-
506
-
507
-
508
-
509
-
510
-
511
-
512
-
513
-
514
-
515
-
516
-
517
-
518
-
519
-
520
-
521
-
522
-
523
-
524
-
525
-
526
-
527
-
528
-
529
-
530
-
531
-
532
-
533
-
534
-
535
-
536
-
537
-
538
-
539
-
540
-
541
-
542
-
543
-
544
-
545
 |
 |