Dell C3765dnf Color Laser View - Page 413

Using the Server Address Book and Server Phone Book

Page 413 highlights

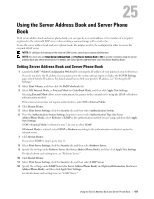
25 Using the Server Address Book and Server Phone Book With server address book and server phone book, you can specify an e-mail address or fax number of a recipient registered in the external LDAP server when sending a scanned image with e-mail or fax. To use the server address book and server phone book, the printer needs to be configured in order to access the external LDAP server. NOTE: To configure the settings of the external LDAP server, consult your system administrator. NOTE: You must also set Email Server Address Book and Fax Server Address Book to On to specify recipients using the server address book and server phone book. For details, see "Email Server Address Book" and "Fax Server Address Book." Setting Server Address Book and Server Phone Book 1 Launch the Dell™ Printer Configuration Web Tool by entering the IP address of your printer in your web browser. If you do not know the IP address of your printer, print the system settings report or display the TCP/IP Settings page, which lists the IP address. For details about how to find your printer's IP address, see "Verifying the IP Settings." 2 Select Print Volume, and then click the Dell ColorTrack tab. 3 Select Off, Internal Mode, or External Mode for ColorTrack Mode, and then click Apply New Settings. Selecting External Mode allows you to authenticate the printer to the external server using the LDAP or Kerberos authentication method. If the external server does not require authentication, select Off or Internal Mode. 4 Click Restart Printer. 5 Select Print Server Settings, click the Security tab, and then select Authentication System. 6 From the Authentication System Settings drop-down menu under Authentication Type (for Server Address/Phone Book), select Kerberos or LDAP as the authentication method you are using, and then click Apply New Settings. If Off or Internal Mode is selected in step 3, be sure to select LDAP. If External Mode is selected, select LDAP or Kerberos according to the authentication method set up for the external server. 7 Click Restart Printer. If you select LDAP in step 6, go to step 11. 8 Select Print Server Settings, click the Security tab, and then select Kerberos Server. 9 Specify the settings under Kerberos Server (for Server Address/Phone Book), and then click Apply New Settings. For details about each setting item, see "Kerberos Server." 10 Click Restart Printer. 11 Select Print Server Settings, click the Security tab, and then select LDAP Server. 12 Specify the settings under LDAP Server (for Server Address/Phone Book) and Optional Information (for Server Address/Phone Book), and then click Apply New Settings. For details about each setting item, see "LDAP Server." Using the Server Address Book and Server Phone Book 411

  • 1
  • 2
  • 3
  • 4
  • 5
  • 6
  • 7
  • 8
  • 9
  • 10
  • 11
  • 12
  • 13
  • 14
  • 15
  • 16
  • 17
  • 18
  • 19
  • 20
  • 21
  • 22
  • 23
  • 24
  • 25
  • 26
  • 27
  • 28
  • 29
  • 30
  • 31
  • 32
  • 33
  • 34
  • 35
  • 36
  • 37
  • 38
  • 39
  • 40
  • 41
  • 42
  • 43
  • 44
  • 45
  • 46
  • 47
  • 48
  • 49
  • 50
  • 51
  • 52
  • 53
  • 54
  • 55
  • 56
  • 57
  • 58
  • 59
  • 60
  • 61
  • 62
  • 63
  • 64
  • 65
  • 66
  • 67
  • 68
  • 69
  • 70
  • 71
  • 72
  • 73
  • 74
  • 75
  • 76
  • 77
  • 78
  • 79
  • 80
  • 81
  • 82
  • 83
  • 84
  • 85
  • 86
  • 87
  • 88
  • 89
  • 90
  • 91
  • 92
  • 93
  • 94
  • 95
  • 96
  • 97
  • 98
  • 99
  • 100
  • 101
  • 102
  • 103
  • 104
  • 105
  • 106
  • 107
  • 108
  • 109
  • 110
  • 111
  • 112
  • 113
  • 114
  • 115
  • 116
  • 117
  • 118
  • 119
  • 120
  • 121
  • 122
  • 123
  • 124
  • 125
  • 126
  • 127
  • 128
  • 129
  • 130
  • 131
  • 132
  • 133
  • 134
  • 135
  • 136
  • 137
  • 138
  • 139
  • 140
  • 141
  • 142
  • 143
  • 144
  • 145
  • 146
  • 147
  • 148
  • 149
  • 150
  • 151
  • 152
  • 153
  • 154
  • 155
  • 156
  • 157
  • 158
  • 159
  • 160
  • 161
  • 162
  • 163
  • 164
  • 165
  • 166
  • 167
  • 168
  • 169
  • 170
  • 171
  • 172
  • 173
  • 174
  • 175
  • 176
  • 177
  • 178
  • 179
  • 180
  • 181
  • 182
  • 183
  • 184
  • 185
  • 186
  • 187
  • 188
  • 189
  • 190
  • 191
  • 192
  • 193
  • 194
  • 195
  • 196
  • 197
  • 198
  • 199
  • 200
  • 201
  • 202
  • 203
  • 204
  • 205
  • 206
  • 207
  • 208
  • 209
  • 210
  • 211
  • 212
  • 213
  • 214
  • 215
  • 216
  • 217
  • 218
  • 219
  • 220
  • 221
  • 222
  • 223
  • 224
  • 225
  • 226
  • 227
  • 228
  • 229
  • 230
  • 231
  • 232
  • 233
  • 234
  • 235
  • 236
  • 237
  • 238
  • 239
  • 240
  • 241
  • 242
  • 243
  • 244
  • 245
  • 246
  • 247
  • 248
  • 249
  • 250
  • 251
  • 252
  • 253
  • 254
  • 255
  • 256
  • 257
  • 258
  • 259
  • 260
  • 261
  • 262
  • 263
  • 264
  • 265
  • 266
  • 267
  • 268
  • 269
  • 270
  • 271
  • 272
  • 273
  • 274
  • 275
  • 276
  • 277
  • 278
  • 279
  • 280
  • 281
  • 282
  • 283
  • 284
  • 285
  • 286
  • 287
  • 288
  • 289
  • 290
  • 291
  • 292
  • 293
  • 294
  • 295
  • 296
  • 297
  • 298
  • 299
  • 300
  • 301
  • 302
  • 303
  • 304
  • 305
  • 306
  • 307
  • 308
  • 309
  • 310
  • 311
  • 312
  • 313
  • 314
  • 315
  • 316
  • 317
  • 318
  • 319
  • 320
  • 321
  • 322
  • 323
  • 324
  • 325
  • 326
  • 327
  • 328
  • 329
  • 330
  • 331
  • 332
  • 333
  • 334
  • 335
  • 336
  • 337
  • 338
  • 339
  • 340
  • 341
  • 342
  • 343
  • 344
  • 345
  • 346
  • 347
  • 348
  • 349
  • 350
  • 351
  • 352
  • 353
  • 354
  • 355
  • 356
  • 357
  • 358
  • 359
  • 360
  • 361
  • 362
  • 363
  • 364
  • 365
  • 366
  • 367
  • 368
  • 369
  • 370
  • 371
  • 372
  • 373
  • 374
  • 375
  • 376
  • 377
  • 378
  • 379
  • 380
  • 381
  • 382
  • 383
  • 384
  • 385
  • 386
  • 387
  • 388
  • 389
  • 390
  • 391
  • 392
  • 393
  • 394
  • 395
  • 396
  • 397
  • 398
  • 399
  • 400
  • 401
  • 402
  • 403
  • 404
  • 405
  • 406
  • 407
  • 408
  • 409
  • 410
  • 411
  • 412
  • 413
  • 414
  • 415
  • 416
  • 417
  • 418
  • 419
  • 420
  • 421
  • 422
  • 423
  • 424
  • 425
  • 426
  • 427
  • 428
  • 429
  • 430
  • 431
  • 432
  • 433
  • 434
  • 435
  • 436
  • 437
  • 438
  • 439
  • 440
  • 441
  • 442
  • 443
  • 444
  • 445
  • 446
  • 447
  • 448
  • 449
  • 450
  • 451
  • 452
  • 453
  • 454
  • 455
  • 456
  • 457
  • 458
  • 459
  • 460
  • 461
  • 462
  • 463
  • 464
  • 465
  • 466
  • 467
  • 468
  • 469
  • 470
  • 471
  • 472
  • 473
  • 474
  • 475
  • 476
  • 477
  • 478
  • 479
  • 480
  • 481
  • 482
  • 483
  • 484
  • 485
  • 486
  • 487
  • 488
  • 489
  • 490
  • 491
  • 492
  • 493
  • 494
  • 495
  • 496
  • 497
  • 498
  • 499
  • 500
  • 501
  • 502
  • 503
  • 504
  • 505
  • 506
  • 507
  • 508
  • 509
  • 510
  • 511
  • 512
  • 513
  • 514
  • 515
  • 516
  • 517
  • 518
  • 519
  • 520
  • 521
  • 522
  • 523
  • 524
  • 525
  • 526
  • 527
  • 528
  • 529
  • 530
  • 531
  • 532
  • 533
  • 534
  • 535
  • 536
  • 537
  • 538
  • 539
  • 540
  • 541
  • 542
  • 543
  • 544
  • 545
  • 546
  • 547
  • 548
  • 549
  • 550
  • 551
  • 552
  • 553
  • 554
  • 555
  • 556
  • 557
  • 558
  • 559
  • 560
  • 561
  • 562
  • 563
  • 564
  • 565
  • 566

Using the Server Address Book and Server Phone Book
411
25
Using the Server Address Book and Server Phone
Book
With server address book and server phone book, you can specify an e-mail address or fax number of a recipient
registered in the external LDAP server when sending a scanned image with e-mail or fax.
To use the server address book and server phone book, the printer needs to be configured in order to access the
external LDAP server.
NOTE:
To configure the settings of the external LDAP server, consult your system administrator.
NOTE:
You must also set
Email Server Address Book
and
Fax Server Address Book
to
On
to specify recipients using the server
address book and server phone book. For details, see "Email Server Address Book" and "Fax Server Address Book."
Setting Server Address Book and Server Phone Book
1
Launch the
Dellâ„¢ Printer Configuration Web Tool
by entering the IP address of your printer in your web browser.
If you do not know the IP address of your printer, print the system settings report or display the
TCP/IP Settings
page, which lists the IP address. For details about how to find your printer's IP address, see "Verifying the IP
Settings."
2
Select
Print Volume
, and then click the
Dell ColorTrack
tab.
3
Select
Off
,
Internal Mode
, or
External Mode
for
ColorTrack Mode
, and then click
Apply New Settings
.
Selecting
External Mode
allows you to authenticate the printer to the external server using the LDAP or Kerberos
authentication method.
If the external server does not require authentication, select
Off
or
Internal Mode
.
4
Click
Restart Printer
.
5
Select
Print Server Settings
, click the
Security
tab, and then select
Authentication System
.
6
From the
Authentication System Settings
drop-down menu under
Authentication Type (for Server
Address/Phone Book)
, select
Kerberos
or
LDAP
as the authentication method you are using, and then click
Apply
New Settings
.
If
Off
or
Internal Mode
is selected in step 3, be sure to select
LDAP
.
If
External Mode
is selected, select
LDAP
or
Kerberos
according to the authentication method set up for the
external server.
7
Click
Restart Printer
.
If you select
LDAP
in step 6, go to step 11.
8
Select
Print Server Settings
, click the
Security
tab, and then select
Kerberos Server
.
9
Specify the settings under
Kerberos Server (for Server Address/Phone Book)
, and then click
Apply New Settings
.
For details about each setting item, see "Kerberos Server."
10
Click
Restart Printer
.
11
Select
Print Server Settings
, click the
Security
tab, and then select
LDAP Server
.
12
Specify the settings under
LDAP Server (for Server Address/Phone Book)
and
Optional Information (for Server
Address/Phone Book)
, and then click
Apply New Settings
.
For details about each setting item, see "LDAP Server."