Dell C3765dnf Color Laser View - Page 99
Performance and Maintenance, Appearance and Themes
 |
View all Dell C3765dnf Color Laser manuals
Add to My Manuals
Save this manual to your list of manuals |
Page 99 highlights
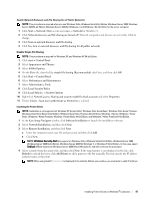
Enable Network Discovery and File Sharing for all Public Networks NOTE: This procedure is required when you use Windows Vista, Windows Vista 64-bit Edition, Windows Server 2008, Windows Server 2008 64-bit Edition, Windows Server 2008 R2, Windows 7, and Windows 7 64-bit Edition for the server computer. 1 Click Start→ Network (Start→ your user name→ Network for Windows 7). 2 Click Network discovery and file sharing are turned off. Network computers and devices are not visible. Click to change. 3 Click Turn on network discovery and file sharing. 4 Click Yes, turn on network discovery and file sharing for all public networks. Disable Simple File Sharing NOTE: This procedure is required for Windows XP, and Windows XP 64-bit Edition. 1 Click start→ Control Panel. 2 Select Appearance and Themes. 3 Select Folder Options. 4 On the View tab, clear the Use simple file sharing (Recommended) check box, and then click OK. 5 Click Start→ Control Panel. 6 Select Performance and Maintenance. 7 Select Administrative Tools. 8 Click Local Security Policy. 9 Click Local Policies→ Security Options. 10 Right-click Network access: Sharing and security model for local accounts and select Properties. 11 Ensure Classic - local users authenticate as themselves is selected. Installing the Printer Driver NOTE: Installation is not supported on Windows XP Home Edition, Windows Vista Home Basic, Windows Vista Home Premium, Windows Vista Home Basic 64-bit Edition, Windows Vista Home Premium 64-bit Edition, Windows 7 Starter, Windows 7 Home Basic, Windows 7 Home Premium, Windows 7 Home Basic 64-bit Edition, and Windows 7 Home Premium 64-bit Edition. 1 In the Easy Setup Navigator window, click Software Installation to launch the installation software. 2 Select Network Installation, and then click Next. 3 Select Remote Installation, and then click Next. a Enter the computer name, user ID, and password, and then click Add. b Click Next. NOTE: Windows Security Alert may appear on Windows Vista, Windows Vista 64-bit Edition, Windows Server 2008, Windows Server 2008 64-bit Edition, Windows Server 2008 R2, Windows 7, or Windows 7 64-bit Edition. In this case, select Unblock (Allow access for Windows Server 2008 R2 and Windows 7), and then continue the procedure. 4 Select a printer from the printer list, and then click Next. If the target printer is not displayed on the list, click Refresh to refresh the list or click Add Printer to add a printer to the list manually. You may specify the IP address and port name at this point. NOTE: When using AutoIP, 0.0.0.0 is displayed in the installer. Before you continue, you must enter a valid IP address. Installing Printer Drivers on Windows® Computers 97
-
 1
1 -
2
-
3
-
4
-
5
-
6
-
7
-
8
-
9
-
10
-
11
-
12
-
13
-
14
-
15
-
16
-
17
-
18
-
19
-
20
-
21
-
22
-
23
-
24
-
25
-
26
-
27
-
28
-
29
-
30
-
31
-
32
-
33
-
34
-
35
-
36
-
37
-
38
-
39
-
40
-
41
-
42
-
43
-
44
-
45
-
46
-
47
-
48
-
49
-
50
-
51
-
52
-
53
-
54
-
55
-
56
-
57
-
58
-
59
-
60
-
61
-
62
-
63
-
64
-
65
-
66
-
67
-
68
-
69
-
70
-
71
-
72
-
73
-
74
-
75
-
76
-
77
-
78
-
79
-
80
-
81
-
82
-
83
-
84
-
85
-
86
-
87
-
88
-
89
-
90
-
91
-
92
-
93
-
 94
94 -
 95
95 -
 96
96 -
 97
97 -
 98
98 -
 99
99 -
 100
100 -
 101
101 -
 102
102 -
 103
103 -
 104
104 -
105
-
106
-
107
-
108
-
109
-
110
-
111
-
112
-
113
-
114
-
115
-
116
-
117
-
118
-
119
-
120
-
121
-
122
-
123
-
124
-
125
-
126
-
127
-
128
-
129
-
130
-
131
-
132
-
133
-
134
-
135
-
136
-
137
-
138
-
139
-
140
-
141
-
142
-
143
-
144
-
145
-
146
-
147
-
148
-
149
-
150
-
151
-
152
-
153
-
154
-
155
-
156
-
157
-
158
-
159
-
160
-
161
-
162
-
163
-
164
-
165
-
166
-
167
-
168
-
169
-
170
-
171
-
172
-
173
-
174
-
175
-
176
-
177
-
178
-
179
-
180
-
181
-
182
-
183
-
184
-
185
-
186
-
187
-
188
-
189
-
190
-
191
-
192
-
193
-
194
-
195
-
196
-
197
-
198
-
199
-
200
-
201
-
202
-
203
-
204
-
205
-
206
-
207
-
208
-
209
-
210
-
211
-
212
-
213
-
214
-
215
-
216
-
217
-
218
-
219
-
220
-
221
-
222
-
223
-
224
-
225
-
226
-
227
-
228
-
229
-
230
-
231
-
232
-
233
-
234
-
235
-
236
-
237
-
238
-
239
-
240
-
241
-
242
-
243
-
244
-
245
-
246
-
247
-
248
-
249
-
250
-
251
-
252
-
253
-
254
-
255
-
256
-
257
-
258
-
259
-
260
-
261
-
262
-
263
-
264
-
265
-
266
-
267
-
268
-
269
-
270
-
271
-
272
-
273
-
274
-
275
-
276
-
277
-
278
-
279
-
280
-
281
-
282
-
283
-
284
-
285
-
286
-
287
-
288
-
289
-
290
-
291
-
292
-
293
-
294
-
295
-
296
-
297
-
298
-
299
-
300
-
301
-
302
-
303
-
304
-
305
-
306
-
307
-
308
-
309
-
310
-
311
-
312
-
313
-
314
-
315
-
316
-
317
-
318
-
319
-
320
-
321
-
322
-
323
-
324
-
325
-
326
-
327
-
328
-
329
-
330
-
331
-
332
-
333
-
334
-
335
-
336
-
337
-
338
-
339
-
340
-
341
-
342
-
343
-
344
-
345
-
346
-
347
-
348
-
349
-
350
-
351
-
352
-
353
-
354
-
355
-
356
-
357
-
358
-
359
-
360
-
361
-
362
-
363
-
364
-
365
-
366
-
367
-
368
-
369
-
370
-
371
-
372
-
373
-
374
-
375
-
376
-
377
-
378
-
379
-
380
-
381
-
382
-
383
-
384
-
385
-
386
-
387
-
388
-
389
-
390
-
391
-
392
-
393
-
394
-
395
-
396
-
397
-
398
-
399
-
400
-
401
-
402
-
403
-
404
-
405
-
406
-
407
-
408
-
409
-
410
-
411
-
412
-
413
-
414
-
415
-
416
-
417
-
418
-
419
-
420
-
421
-
422
-
423
-
424
-
425
-
426
-
427
-
428
-
429
-
430
-
431
-
432
-
433
-
434
-
435
-
436
-
437
-
438
-
439
-
440
-
441
-
442
-
443
-
444
-
445
-
446
-
447
-
448
-
449
-
450
-
451
-
452
-
453
-
454
-
455
-
456
-
457
-
458
-
459
-
460
-
461
-
462
-
463
-
464
-
465
-
466
-
467
-
468
-
469
-
470
-
471
-
472
-
473
-
474
-
475
-
476
-
477
-
478
-
479
-
480
-
481
-
482
-
483
-
484
-
485
-
486
-
487
-
488
-
489
-
490
-
491
-
492
-
493
-
494
-
495
-
496
-
497
-
498
-
499
-
500
-
501
-
502
-
503
-
504
-
505
-
506
-
507
-
508
-
509
-
510
-
511
-
512
-
513
-
514
-
515
-
516
-
517
-
518
-
519
-
520
-
521
-
522
-
523
-
524
-
525
-
526
-
527
-
528
-
529
-
530
-
531
-
532
-
533
-
534
-
535
-
536
-
537
-
538
-
539
-
540
-
541
-
542
-
543
-
544
-
545
-
546
-
547
-
548
-
549
-
550
-
551
-
552
-
553
-
554
-
555
-
556
-
557
-
558
-
559
-
560
-
561
-
562
-
563
-
564
-
565
-
566
 |
 |
