HTC Ozone Download the HTC Ozone ROM Update - Version 2.16.605.15 - Page 54
Setting up a custom domain e-mail, Creating and sending e-mail messages
 |
View all HTC Ozone manuals
Add to My Manuals
Save this manual to your list of manuals |
Page 54 highlights
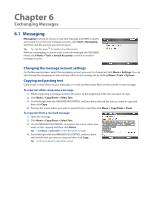
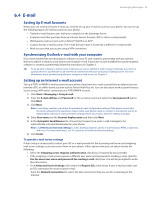
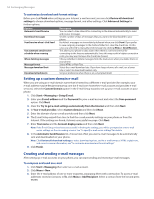
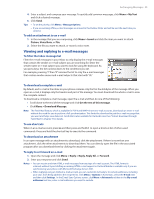
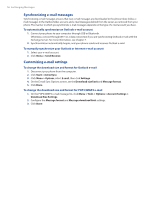
54 Exchanging Messages To customize download and format settings Before you click Finish when setting up your Internet e-mail account, you can click Review all download settings to choose download options, message format, and other settings. Click Advanced Settings for further options. Options Automatic Send/Receive Download messages Send/receive when I click Send Use automatic send/receive schedule when roaming When deleting messages Message format Message download limit Download attachments Description You can select a time interval for connecting to the Internet automatically to send and receive messages. Set the number of days of messages that you want to be downloaded to your phone. By default, messages are immediately delivered when you click Send. If you prefer to save outgoing messages to the Outbox folder first, clear the check box. (In this case, you will need to manually send messages by clicking Menu > Send/Receive). This allows your phone to data roam when there is a set time interval for connecting to the Internet automatically. Since this may result in higher connection costs, you may want to leave the check box cleared. Choose whether to delete messages from the mail server when you delete them on your phone. Select HTML or Plain Text. Select the e-mail download size. If you have large volumes of e-mail, use a lower size or select to download headers only. Set your preference when there is an e-mail attachment Setting up a custom domain e-mail When you are using an e-mail domain name that is hosted by a different e-mail provider (for example, your e-mail address may be [email protected] but E-mail.com hosts the e-mail account and provides e-mail services), select the Custom Domain option in the E-mail Setup wizard to set up your e-mail account on your phone. 1. Click Start > Messaging > Setup E-mail. 2. Enter your E-mail address and the Password for your e-mail account and select the Save password option. Click Next. 3. Clear the Try to get e-mail settings automatically from the Internet and then click Next. 4. In Your e-mail provider, select Custom domain and then click Next. 5. Enter the domain of your e-mail provider and then click Next. 6. The E-mail Setup wizard then tries to find the e-mail provider settings on your phone or from the Internet. If the settings are found, it shows a successful message. Click Next. 7. Enter Your name and the Account display name and then click Next. Note If the E-mail Setup wizard was unsuccessful in finding the settings, you will be prompted to enter e-mail server settings on the succeeding screens. See "To specify e-mail server settings" for details. 8. In the Automatic Send/Receive list, choose how often you want e-mail messages to be automatically sent and downloaded on your phone. Note Click Review all download settings to select download options, set the e-mail format as HTML or plain text, and more. For more information, see "To customize download and format settings." 9. Click Finish. Creating and sending e-mail messages After setting up e-mail accounts on your phone, you can start sending and receiving e-mail messages. To compose and send an e-mail 1. Click Start > Messaging then select an e-mail account. 2. Click Menu > New. 3. Enter the e-mail address of one or more recipients, separating them with a semicolon. To access e-mail addresses stored in Contacts, in To, click Menu > Add Recipient. Select a contact from the list and press ENTER.
-
 1
1 -
2
-
3
-
4
-
5
-
6
-
7
-
8
-
9
-
10
-
11
-
12
-
13
-
14
-
15
-
16
-
17
-
18
-
19
-
20
-
21
-
22
-
23
-
24
-
25
-
26
-
27
-
28
-
29
-
30
-
31
-
32
-
33
-
34
-
35
-
36
-
37
-
38
-
39
-
40
-
41
-
42
-
43
-
44
-
45
-
46
-
47
-
48
-
 49
49 -
 50
50 -
 51
51 -
 52
52 -
 53
53 -
 54
54 -
 55
55 -
 56
56 -
 57
57 -
 58
58 -
 59
59 -
60
-
61
-
62
-
63
-
64
-
65
-
66
-
67
-
68
-
69
-
70
-
71
-
72
-
73
-
74
-
75
-
76
-
77
-
78
-
79
-
80
-
81
-
82
-
83
-
84
-
85
-
86
-
87
-
88
-
89
-
90
-
91
-
92
-
93
-
94
-
95
-
96
-
97
-
98
-
99
-
100
-
101
-
102
 |
 |
