HTC Ozone Download the HTC Ozone ROM Update - Version 2.16.605.15 - Page 83
Customizing Camera Advanced settings
 |
View all HTC Ozone manuals
Add to My Manuals
Save this manual to your list of manuals |
Page 83 highlights
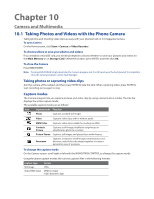
Camera and Multimedia 83 Customizing Camera Advanced settings On the Camera screen, click Options on the Camera screen to open the Camera Advanced settings where you can activate the self-timer, change the ambience, customize capture settings, and more. Use the NAVIGATION CONTROL to go through the available settings. Option Allows you to Mode Select the capture mode to use. Self-timer Select the Self-timer option for capturing images: Off, 2 seconds, or 10 seconds. Selecting 2 seconds or 10 seconds delays the capturing by the specified time after you press ENTER. Brightness Adjust the brightness from -2 to +2 (increments of 0.5). White Balance Specify the white balance setting such as Auto, Daylight, Night, Incandescent, and Fluorescent to suit the lighting environment. Resolution Choose the resolution to use. The resolution options depend upon which camera mode you are using. Capture Format Select whether to use MPEG4, H.263 or 3GPP2. (Video and MMS Video mode only) Recording Limit (Video mode only) Specify the maximum time or file size for recording video clips. Template (Picture Theme mode only) Choose one of the five templates to use for Picture Theme mode. Quality Select the JPEG image quality level for all captured still images. You can choose from Basic, Normal, Fine, and Super Fine. This option is available in all modes except Video and MMS Video. Time Stamp (Photo mode only) Choose whether or not to include the shooting date and time on captured photos. Storage Select where you want to save your files. You can either save the files to the main memory or to a storage card. Direction Choose in what direction images will be stitched in a panorama. (Panorama mode only) Stitch Count Select the desired number of snapshots to be taken and stitched into a panorama. (Panorama mode only) Keep Backlight Choose whether to turn the backlight on or off while using the camera. This overrides your phone backlight settings while you are using the camera. Shutter Sound Choose whether or not you want the camera to make a shutter sound when you take photos or record video clips. Review Duration Set a time length for displaying the captured image or video on the Review screen before automatically saving it and returning to the live Camera screen. Select No Limit to allow the picture to be displayed until you choose to take another action. Select No Review to immediately return to the live Camera screen after capturing. Effect Choose a special effect such as Grayscale, Sepia, or Negative to apply to your photos or video clips. Note: White Balance cannot be applied if an Effect has already been applied. Metering Mode Select a metering mode to allow the camera to measure the amount of light in the center and around the image and calculate the best-fit exposure value before capturing. Choose either Center Area to measure light using the center area of the image or Average to measure light using the area all around the image. Record with Audio Select On to record audio while capturing video clips. This is selected On by default. If you select (Video and MMS Video Off and then capture a video clip, it will have no audio. mode only)
-
 1
1 -
2
-
3
-
4
-
5
-
6
-
7
-
8
-
9
-
10
-
11
-
12
-
13
-
14
-
15
-
16
-
17
-
18
-
19
-
20
-
21
-
22
-
23
-
24
-
25
-
26
-
27
-
28
-
29
-
30
-
31
-
32
-
33
-
34
-
35
-
36
-
37
-
38
-
39
-
40
-
41
-
42
-
43
-
44
-
45
-
46
-
47
-
48
-
49
-
50
-
51
-
52
-
53
-
54
-
55
-
56
-
57
-
58
-
59
-
60
-
61
-
62
-
63
-
64
-
65
-
66
-
67
-
68
-
69
-
70
-
71
-
72
-
73
-
74
-
75
-
76
-
77
-
 78
78 -
 79
79 -
 80
80 -
 81
81 -
 82
82 -
 83
83 -
 84
84 -
 85
85 -
 86
86 -
 87
87 -
 88
88 -
89
-
90
-
91
-
92
-
93
-
94
-
95
-
96
-
97
-
98
-
99
-
100
-
101
-
102
 |
 |